Miss Blossom, Lazy Daze
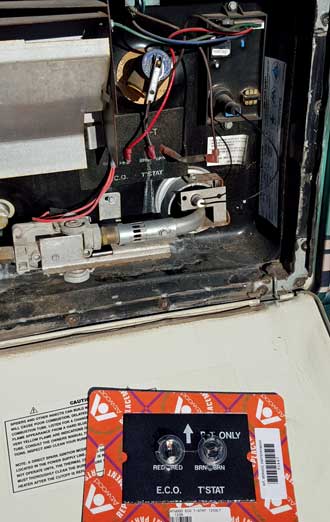 |
Tuesday, December 15, 2015: Just as we are ready to trade the Lazy Daze, the water heater will not turn off. It heats the water until the thermal sensor shuts off the gas completely. Gwen suggested I look for a YouTube video for repair and found this. It looked like an easy enough fix so I first went to Camping World (for me, Camping World is a lot like Wal-Mart, NOT a place I want to shop). I waited 15 minutes for the parts man to finally return to say he didn't have the sensors I needed. While waiting, I looked up the part on Amazon and found it on Prime for $11.50. I knew I could have the part by Thursday. The Camping World guy pointed across the street and said "they sell parts too". Yes, they had the part for $20 (Camping World wanted me to order it for $22) so I purchased it and installed it in about 15 minutes. The video shows what I did, click the photos to see other views. Here are the new sensors installed, I connected the wires last. Yes, the water heater is working properly now. | 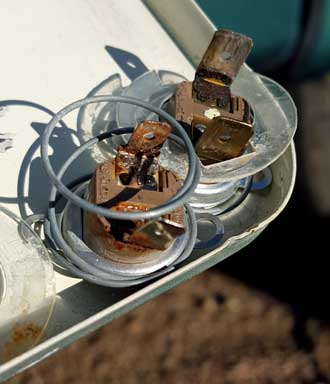 |
Monday, December 14, 2015: This is an update and my advice for buying a used RV. We have been successful in our search so I have more to say about the process. It is not easy but it can be fun. The 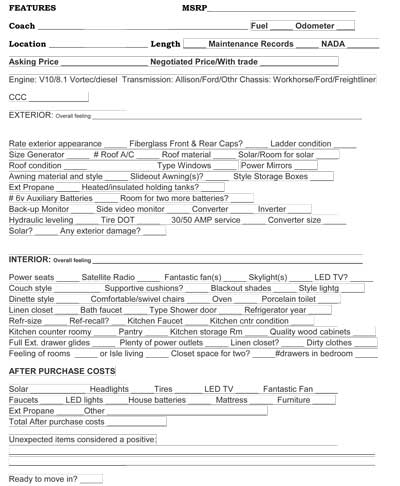 most important thing I did was to call a friend in Roseburg, Oregon who manages a popular diesel repair shop. At the time, I was thinking the only motorhome for me would have a diesel engine so he would be a good person to talk with before making a purchase. To my surprise, the first thing he said was, "Don't buy a diesel!" His reasoning, more expensive, triple the maintenance costs, more difficult to find parts and reputable repair. He then gave me the names of some special friends further south in Oregon. They own a truck and RV repair, in the business for 30 years. These folks helped me with valuable advice. First, they ranked the motorhome brands for quality and reliability. Then we focused on engine, transmission and chassis. His number one choices was the 8.1 liter Vortec engine, Allison 6 speed automatic transmission, with the Workhorse chassis. Next, he DID say, if you find the perfect floor plan, don't let the engine, transmission and chassis stop you because the differences can be small. We continued our conversation where I learned more. Last, we talked about extended warranties which he recommended for RVs because of all that can go wrong. He did not recommend them for trucks or autos. Anyway, after talking to him, I changed what I was searching for. We had already come up with a "quality list" of brand names on our own and fortunately they were on the approved list given to me. Newmar, Allegro, Winnebago, and National RV were on top of the list. Fleetwood, Monaco and Thor were not on the list. Gwen wanted a particular floor plan with a separate bathroom (rather than a "hallway" bathroom), a stand-alone dining table, medium to large kitchen, a feeling of an apartment rather than "isle" living, an oven, room for her sewing hobby, dual pane windows, a generator, and NOT the color blue. My list was shorter, the Vortec engine, Allison transmission, Workhorse chassis, plenty of storage and any parts to a solar system. We looked at thousands of photos found on the Internet sites I listed below. We also visited about a dozen dealers and drove three units before we found the perfect unit for us. I'll be creating a separate page with stories of that unit once we take delivery. I created a "Features Check-Off List" so I could compare one coach to another. You can download the list and open in any word processor to modify it to work for yourself. Here is my explanation of the list. There are four reasons to have a list like this 1) for comparison, 2)to immediately reject (deal breaker like no hydraulic leveling system), 3)just for your own interest, 4)to have an idea of after purchase costs to make it right for you. Starting at the top of the list, MSRP - top right. I wanted to be able to compare coaches by the price they sold for when NEW. I got that information from NADA. It is very quick to get and can be done using a smart phone if you come upon a coach you did not anticipate before visiting a dealer. Next, the brand, year and model number of the coach, Fuel (gas or diesel), Odometer reading, dealer or coach location (so you can find it again), length, whether or not maintenance records are available (when was the oil last changed, brakes replaced, etc. ), the NADA average retail value. This number is really for comparison. I was told more than once, dealers use a subscription service issued every quarter of RV values, NOT the NADA. However, my experience was that the sales price advertised was always within 5% of the NADA value. It also helps to value your trade. Next, Asking Price (sticker price) then Negotiated Price less the trade offer. This was always the number I was looking for. The trade offers we got for our Lazy Daze varied from $15,000 to $30,000 but the "negotiated price" (to get the motorhome) varied from $28,000 to $40,000. The dealer only offering $15,000 for the Lazy Daze wanted $30,000 plus our LD to get the motorhome we were looking at. This was well within the same "cash plus LD" price range of those offering us $30,000 for our LD. So you always must look at the difference. The next line was for me to circle the engine, transmission and chassis of the coach. CCC is "cargo carry capacity", the weight you can carry in the coach before it's overloaded. You must be very carefully with the printed information. Don't get fooled by a coach advertising a 4,500 pound CCC compared to another coach stating a 1,450 pound CCC when in reality, they are both the same, the first coach did not subtract water, propane and passengers. Next: the overall feeling of the exterior (you don't want an ugly coach). Now the exterior specifics, exterior rating, fiberglass caps (the cheaper coaches don't have a fiberglass cap like the Winnebago Vista). ladder condition (I probably should have left this off, it really doesn't matter), size generator (not only gives the size but whether it has one), number or size of the air conditioning units (we found that ONE air conditioner will NOT cool something the size of our Cameo fifth wheel back home), roof material (most had rubber over wood or fiberglass, our LD has seamless aluminum), room for solar (none of the coaches we looked at had solar panels, is there room for the panels on the roof?), roof condition (the warranty on a rubber roof is usually 10 - 12 years, you might be taking a chance if you purchase a unit which is already ten years old), windows are either dual pane or 1/4" glass, Power mirrors (very nice to have on a motorhome since the mirrors are very difficult to adjust if not powered), Awnings are fabric or vinyl, manual or powered (we use our awning a lot, many RVers have never used their awnings). Storage box style (some are located UNDER a slide, difficult to access when the slide is out while others slide out WITH the slide), an external propane connection (really for my own information, I should have eliminated this point since none of the units had one and I removed the one installed on the LD so I could install on the new motorhome), Holding tanks heated (almost impossible to know, should have left this point off), Number of batteries (almost all had two but the unit we bought had four), Backup and side video monitors (I believe all we tested had monitors, about half had side monitors as well), Converter size (ended up on my list twice, this came from owning the Alumascape which had a really small converter), Inverter (most did not have one so we would have to buy and install one for solar, the unit we bought has a 2000 watt inverter already installed), Hydraulic leveling (this should have been up top because without hydraulic leveling we would not even look at the coach), Tire DOT (trailer tires should not be used after six years, motorhome tires can be used longer but should be watched carefully for sidewall failure symptoms), Size electrical service (just for my information), Solar (no one had a coach using solar), Damage (a CarFax costs about $35, I ran one on the LD and my mechanic friend ran one on our new purchase).
Now to Interior. Power seats (it's nice to have them), Satellite Radio (we like it, but I didn't need this on the list, I'm transferring the one from the LD), Fantastic fan (it's nice to have two, our purchase has only one, it will cost about $225 when I install another), Skylights (can be nice but annoying if you are trying to sleep late), LED TV (you want LED if you will be on solar because they draw little power, most had the old tube style TVs including the coach we bought, they were removed and we bought a new smart TV for the front, none for the bedroom), Couch (how does it make into a bed and are the cushions supportive or worn out), Blackout shades are really nice and more expensive than "day/night shades"), Lighting (for my own interest so I would know how difficult it would be to change them to LED lighting), Dinette (important to Gwen), Chairs (comfortable for reading or watching TV), Oven (important to Gwen, the unit we bought has no oven), Toilet (the better ones are porcelain), Linen closet (just so we know if it has one), Bath faucet (they almost always need to be replaced with something better), Shower door (curtain or glass?), Refrigerator year (they will usually fail before ten years depending upon use and they are expensive, size and whether they are on recall is important), Kitchen faucet (replace?), Condition of the counter (and large enough), Pantry (ease of use), Plenty of storage room, Cabinet quality (solid wood?, doors are usually solid, base unit can be a picture of wood grain on particle board), Drawer glides (the better ones are full extension), Power outlets (the LD only has FOUR in the whole coach), Linen closet?, Place for dirty clothes?, Rooms or hallway living (motorhomes, IMHO, really struggle with floor plans to make a "little apartment" rather than "living in an isle way"), Clothes storage in the bedroom.
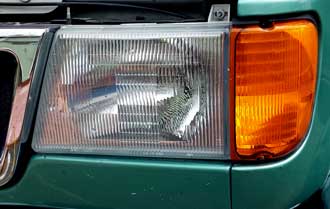
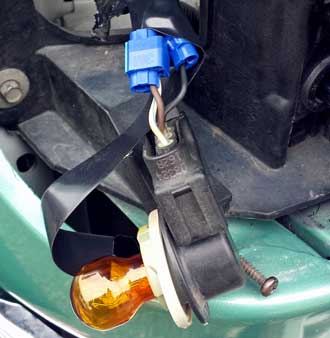
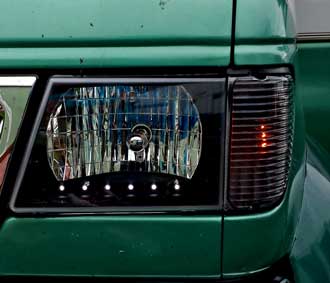
My list for after purchase expenses included: solar charging system, replace old fogged headlights, tires (if the DOT showed they were too old), replacing the TV, adding a fantastic fan, replacing faucets, adding LED lighting, replacing old house batteries, a new mattress if we could exchange for the LD mattress, replacing worn furniture, and other items such as blackout shades.
Some of the coaches came with unexpected items such as a tow bar, tire chains, tire covers, etc.
Ready to move in? (what must be done to the coach before you can actually make the trade? Things like carpet cleaning, cabinet latches, storage door gas shocks. and in our case, a carburetor for the generator.
The MSRP range of the units we looked at ranged from $100,000 - $190,000 and all were listed for sale at $45,000 to $65,000.
Once you've looked at several motorhomes you will have pages to compare one to another and you will quickly learn to focus on what is important to you. I tried to leave off items that could be easily added or would not be "deal-breakers", so decide what is important to you and make your own list. You will also notice that important items (which would be expensive to repair) were left off the list such as engine parts, furnace, hot water heater. All the dealers said they would "check every system" before delivery and some offered short (3,000 miles or 3 month warranty) and I chose to purchase the "extended maintenance agreement" which covered most of the important/expensive items. You can add anything you want to my list.
We "negotiated" with four of the many dealers we saw. (We looked only on dealer lots rather than private sellers because we wanted to trade the LD.) Each dealer treated us differently. Two of the four had buyers "coming tomorrow", which they didn't because they were calling me for days after I walked out. All the dealers treated us with respect and patiently showed us what they had and we wanted to buy from all to "give them a sale" because they must work hard for sales. Most of the salesmen actually listened to what we wanted and pointed us toward the best units to match our list. Only one dealer was "high pressure" and would not accept an offer without running my credit card or a having check for $1,000. That dealer was early in our shopping so I had little experience with dealers. Fortunately (because we changed our minds about that coach later) we could not come to an agreement but I was made to wait 5 - 10 minutes for them to give me back my check. Knowing what I know now, I would refuse the $1000 "to be sure I was serious" money, they either take my offer or not. This was one of the dealers who "had a buyer coming tomorrow" yet the next day the salesman called and offered to pay us $20 in "gas money" to return for an "easier manager". We did review the comments on Yelp of each dealer before we visited which was slightly helpful.
With every dealer, I had already reviewed their inventory online and knew which coaches I wanted to see. I walked into the first dealers with my check-off sheets in hand, would fill them out, then staple the salesman's business card to the sheet. After the first few dealers I learned to fill in my sheet BEFORE the visit with all the information I could find which helped to make my visit more focused on the FEELING of the coach. Then I learned that all sales brochures were available online so I printed off the "features" page of each coach brochure and attached to my checklist. In every case, that made me more knowledgable than the sales person. The Newmar was the coach with the highest MSRP of the coaches we looked at so I was most interested in that unit. Here is the sales brochure for the year and model we looked at. I had a brochure for EVERY coach we looked at. Just do a Google search for the brochure to match the coach you are looking at.
Doing all this, you know (before stepping onto the dealer lot), 1) what the coach sold for new, 2) what NADA says is the average value today, 3) all the features and floor plan of the coach, 4) what the dealer will likely sell your trade for (from the NADA report on your trade), 5) the reputation of the dealer (because you have looked them up on Yelp or other business review sites) and 6) what your negotiating points will likely be (for example, "the tires are ten years old, that will cost me $2,400 to replace them ... I must dispose of those old analog TVs and replace them).
Finally, having said all that ... the coach we bought had been on the dealer lot only hours before I learned of it and we purchased it less than 24 hours after it was on the lot. This was from a consignment dealer located in the Phoenix area with two lots, one on the east side and one on the west side. I learned of this coach from Josh, a salesman on the east lot. I walked onto Josh's lot with my check lists in hand for the coaches I wanted to see. Josh listened to what we were looking for. He immediately telephoned the west lot to inquire about the other units on my list and learned of the new arrival. He gave me the few details he knew and made an appointment for us at the west lot. By the time we arrived the next day, I had my check list partially completed with what it sold for new and what NADA said was the average value. Stapled to my check list was the features page from the sales brochure for that model and year. All we needed to learn were more of the specifics and the FEELING we got when sitting in the coach. It felt like a little apartment!
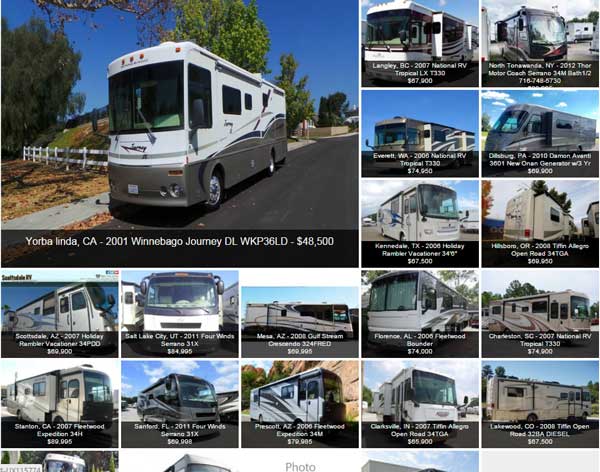
So, while at home in Timber Valley, I'm asked often about buying and selling an RV online, since I've had good success at both. For the answer you need to know a little history first. Our first RV purchased in 2000 was a 21 foot Aerolite. Very lightweight, easily pulled and good quality. We kept it for 4 years, used it occasionally but no trips longer than two weeks. We sold it in 2004 for $1000 less than we paid for it. The reason we sold, we wanted something bigger. So in 2004 we purchased a 2000 King of the Road, 33 foot fifth wheel with two slides. Again, good quality, we made many improvements but traded it in 2007 for a 36' Cameo with three slides. The dealer gave us $4000 more on the trade value than we paid for it. We simply wanted a different floor plan. The Cameo has been the ONLY RV we have purchased new and we still own it. Currently it is permanently parked on our space at an Escapee park in Oregon. In 2012, we decided to downsize to have less to tow around while we traveled. We purchased a 2004 Alumascape travel trailer which had been used very little but was in "rough" condition needing some TLC. It was very comfortable with just the right amount of room for us and only 28 feet long. It was 7,000 lbs lighter than the fifth wheel. I made assumptions when making that purchase: it's lighter, so easier to tow, better fuel mileage, convenient to have Gwen follow in our Prius ... all the assumptions were wrong. So I sold the Alumascape and truck, mid-2015 and purchased the Lazy Daze thinking to "downsize" again. After learning what the Lazy Daze has to teach us, we are ready to "upsize" a bit. Selling and buying an RV use the same processes, just opposites. Both require a great deal of research and hopefully knowing yourself (as you can see, we are still learning about ourselves). The very best time to buy (especially if you live somewhere other than the south), is the month of December and January. Mostly because RV owners are ready to sell and there are few buyers (like trying to sell skis in July). The exception is in the south (like Arizona or Florida). That's because snowbirds (like us) head to warmer climates in the winter and may be looking to upgrade their RV (like us). We had a really good experience trading in a fifth wheel in 2007 and we are hoping for an equally good experience with the Lazy Daze but we have not found any motor home yet to try a trade so we don't really know. We don't have to be in a hurry and someone is really going to want our Lazy Daze so we can wait for that buyer if we need to. The first thing to do is to value the RV (either the one you wish to sell and/or the one you wish to buy). Do this by visiting NADA. NADA acts as a "Blue Book" for RVs and lenders pay attention to the NADA values. I look at NADA positively if it gives me a good value for MY RV and negatively if the value seems too high for the RV I wish to buy. So I use the value as a "starting point". It would be of MORE value to know what dealers really sell for and fortunately there IS a dealer which publishes two years worth of actual sales prices. Again, a starting point. So knowing this amount, I price my RV for slightly MORE than I will expect to sell and assume others have done the same for the RVs I wish to buy. In actuality, I've learned that dealers will generally price the RVs for considerably MORE than their value (according to NADA), I suppose, hoping to catch a novice buyer who is willing to pay more than it's worth. Of course they WILL find that buyer depending upon how long they are willing to have the unit sit on their lot. When buying, I will have a fair amount in mind but offer less knowing their is a game to be played. I'll eventually come around to making a fair offer, if not accepted, walk away, there are PLENTY of used RVs to buy. Buyers are learning to search for RVs online. It's a method to value an RV and also a method of seeing hundreds of floor plans without leaving your home. I found the King of the Road, Alumascape and Lazy Daze online. I sold the Alumascape and Truck online and the Lazy Daze is currently listed online. So where do you look. The easiest looking is a RVTrader. Most serious sellers will list at RVTrader first. Other online sites are RVT and RVUSA. You can list at RVT for 30 days for free. All three of these sites will eventually cost and the fee depends upon your choices when listing. RVUSA promised to show your listing in other related sites. I've been really impressed with RVT because they seem to aggressively market the new listings and follow up with emails to both buyers and sellers. I currently have the Lazy Daze listed in all three with my total expense (so far) of about $130. Click the photo above to see my ad in RVT. The best free location to shop or list an RV is CraigsList. I found the Alumascape on CraigsList and sold the truck on CraigsList. Having said that, CraigsList gets you the MOST scammers but they have always been obvious. If selling on CraigsList, getting cash or going to the bank together to transfer funds from one account to another (I did this when purchasing the Lazy Daze) is the only way. The trick to sales is to have lots of really good photos and stories to go along with the photos. I have struggled a little bit with the interior living space of the Lazy Daze. It came with two "barrel chairs" which we thought awful so gave them away and replaced with two, more comfortable chairs (which are really too big for the space) but we don't intend to give up those chairs with the rig. So I photographed the dining area with folding chairs which work really well for eating meals but NOT comfortable for "reading a book". Buyers will need to have an imagination for that space. If we still own the Lazy Daze next fall, we'll have to replace the "barrel chairs" with something better to make a sale. When exploring an RV dealer lot, you will likely be accompanied by a salesman. Most (not all) only know how to sell, they don't know a thing about RVs but will tell you ANYTHING. That's why you see so many heavy fifth wheels towed by a 3/4 ton truck, "because the dealer said so", when the truck is obviously overloaded. Just to be fair, we purchased our Cameo from Dave Wagers at Wagers Trailer Sales in Salem, Oregon. I consider Dave one of the few honest salesmen, one who will tell it to you straight. AND, Dave owns and travels in a RV so knows something about the product. We have been lucky. Every RV we have purchased has been good quality whether from a dealer or from a private sale. But I have carefully researched before making a purchase. If you are new to RVing, talk to experienced RVers. Some folks will suggest taking an experienced RVer with you when you shop which might be OK ONLY if you want to have an RV exactly like the style they think is best. You will need to look at lots of RVs before you find the one that seems right for you. Pretend to be cooking, sleeping, taking a shower, sit on the pot, eating breakfast, watching TV, or reading a book. (Gwen likes to sew, she looks for someplace to set her sewing machine comfortably.) Can you get comfortable doing all those activities. You will also be looking for something different if you plan to spend only two weeks per year in your RV. We LIVE in our RV 6 - 8 months then move to the OTHER RV for 4 - 5 months. Something else which will make a difference: we prefer to drive a day then stay a couple of weeks (or more) before moving again. If you know you will be moving everyday, you will want a different style RV than what we choose. Getting to know floor plans and prices is so much easier to do online. You can look at hundreds, THEN go to RV shows and RV dealers to get the feel of what you've been seeing online. As a buyer, your best hope is to find the EXACT year, brand and model you wish to buy (after lots of research). If you know the exact RV, search nationwide for the best unit at the best price. If you are looking for a motor home, then find one 2,000 miles away, you can fly to that location and drive it home. Flying is cheap if planned ahead. My round trip tickets from Las Vegas to Portland, Oregon (to get the Lazy Daze title) were only $112. If buying a trailer or fifth wheel, we have drawn a one-day-travel search area around our location. We found the King of the Road ONE day away. We found the Alumascape 2.5 hours away. In both cases we saved MUCH more than it cost to travel the distance. When it comes to receiving offers, I've always had a number in my mind which seemed fair to me. When that number is reached, I accept the offer. Having said that, I know NUMEROUS people who have had their RV parked in the driveway with a "For Sale" sign on it for YEARS. Those folks haven't done their homework with NADA. I know it's tough to sell something for $10,000 when it cost you $100,000 but RVs lose value pretty fast. When it comes to MAKING an offer, again, you've already done the research so you know what's fair. Some dealers I've found advertise a price as much as $20,000 over the NADA value on a $55,000 motor home. I don't know how you justify that nor have I had the experience to have offered such a dealer a "fair" price. So, I don't know what their reaction would be. Maybe they rely on a different kind of customer, if so, move on. If you have the time and want the lowest possible price, find five RVs you consider to be equal in terms of meeting your needs. Make a ridiculous offer on #1. When refused, do the same with #2 through #5. If no one takes your offer, start over with a better offer on each until someone takes your offer. Last, what about borrowing the purchase price of an RV? Yikes! Maybe if you buy used and REALLY know what you want. If you borrow to buy a NEW RV you will be underwater immediately and likely for the next 10 years, maybe more. Good luck! |
|
 |
 |
 Tuesday, October 13, 2015: Making the Lazy Daze more like home by adding a mosaic finish to the walls behind the faucet in the bathroom and the kitchen. This was a heavy, easy-to-cut, sticky-back vinyl material in 1 foot squares for about $8 per square. Click the bathroom photo to see the kitchen wall. We had to order the sheets from Home Depot to get the color we wanted in the kitchen but purchased the bathroom tiles off the shelf in Lowe's. It's important to clean the walls with isopropyl alcohol before the application.
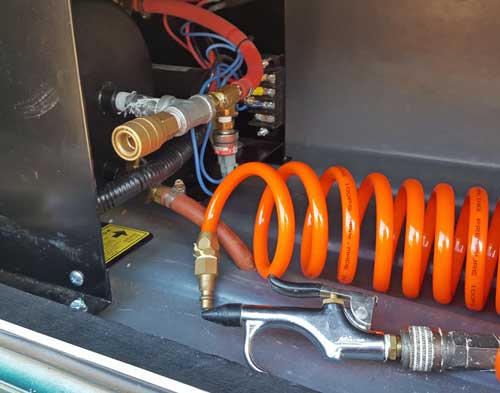
Sunday, September 13, 2015: After the purchase of the Lazy Daze, I noticed part of a hatch contained a small air compressor. It turned on every time I started the engine. I later learned it was installed to power a braking system for the previous owners towed vehicle. I didn't have the parts for the towed vehicle and the Samurai has a different braking system entirely so the air compressor was useless to me. Removing it would be a weight savings but I might need this sometime in the future. I decided to make it useful by adding a female coupler to receive the male end of an air hose. I already had a blower attachment and tire inflation attachment, both might come in handy. I also had enough air hose to reach all the tires from the permanent location of the compressor. Now the compressor IS useful to me.
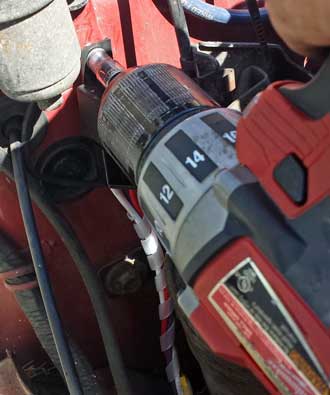
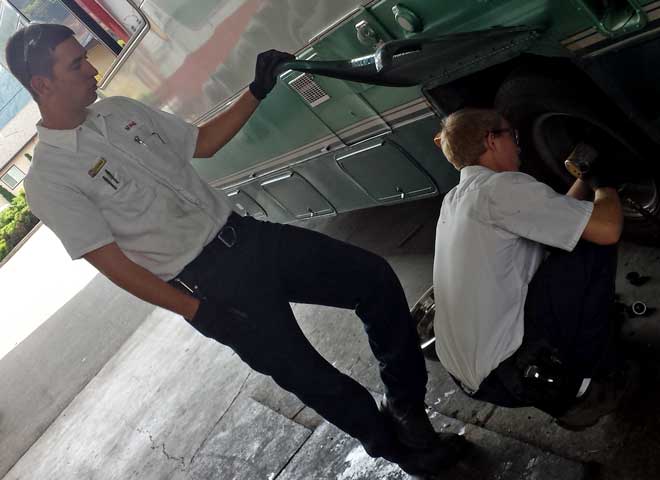
Thursday, September 3, 2015: About once every 30 starts on the Samurai, all we get is a "click" as if the battery is dead. After trying several times, the engine starts. I started doing some research and learned this is a common problem with the Samurai and the "fix" is the "Clicky-Starter" kit. It is very easy to install, just redirect the ignition switch wire, establish a ground wire and a direct connection to the battery and hopefully the problem is fixed. Click the photo for the completed installation. In this photo, I'm securing part of the kit to the firewall.
 |
 |
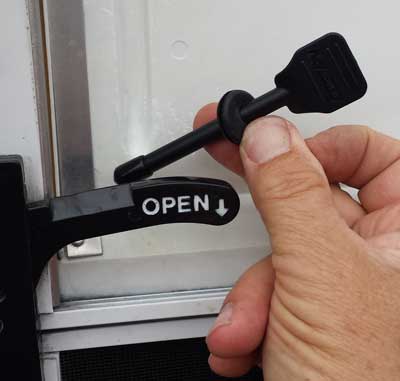
Friday, August 14, 2015: Continuing to make little changes, I saw this in another Lazy Daze during the Lazy Daze rally we attended. The design of the screen door in all the RVs we've owned is the same. To open the screen door, you must first slide the handle access door open. It's an inconvenience, slow and needs a solution. This little handle operates the screen door knob from the inside without sliding the access door. Click the photo to learn how it works.
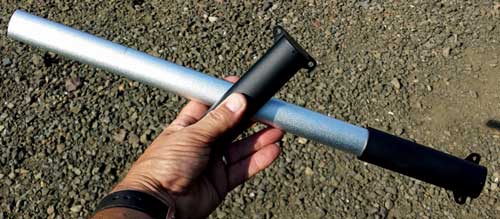 Thursday, August 13, 2015: I worked on multiple, little projects today but will report on one. Another handy item I noticed at the Lazy Daze rally was a cross bar for the screen door. Screen doors in an RV are often difficult to handle because there is nothing to grab hold unless you slide open the handle access door. The cross bar solves that problem. Click the photo to see it installed and you will know what I mean. The screen door on the Lazy Daze is so narrow, the bar had to be trimmed to fit. Other than that, it was easy to install.
  |
 |
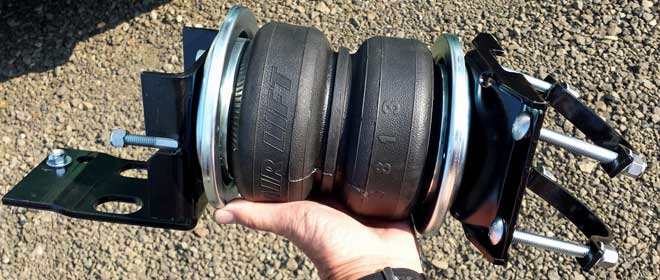 Wednesday, August 5, 2015: This was the day to install the Air Lift 5000 air spring. I expected additional suspension support as well as an easy way to fine tune leveling. I pre-assembled the air springs to save myself some of the installation fee. But it was all for naught. The spring mounting bracket would not clear the exhaust pipe nor the shock absorber. I called the manufacturer who kept repeating, "the springs are made for the vehicle as it came from the factory". Apparently Lazy Daze moved the exhaust pipe (doubtful) and installed shock absorbers where there were none installed by the factory. I took the Lazy Daze to Southern Oregon Diesel for the installation but they reported "no installation was possible without a lot of customization". The air springs were worth the price of the spring and a small installation fee but NOT the fee for "customization". I've returned the spring un-installed. I'm very disappointed. Click the photo for a view of the undercarriage.
 Tuesday, July 28, 2015: This was another rally day with breakfast and potluck dinner plus lots of talk. We have met many new friends, most with the name "Bill".
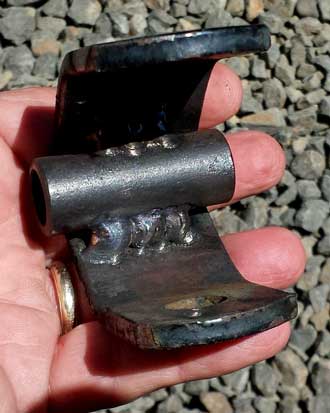
On the drive to Pacific City, we stopped in Lincoln City at Wells Fargo for cash. The Wells Fargo parking lot was just a few feet too small so I could not make the tight turn needed to exit the parking lot, I backed up slowly and only a few feet but that was enough to break a weld on the bracket which connects the toad hitch to the Samurai. So I drove the tiny town of Pacific City looking for a "Welding" sign and didn't find one. I stopped at the hardware store and asked the clerk, "see Shane at the auto shop". I found Shane who dropped everything to make my little welding project. It took him twenty minutes and I appreciate the quickness and the charge was only $10. Shane promised his weld would never break. Click the photo to see the bracket reconnected.
Monday, July 6, 2015: The Lazy Daze has a very small CCC (cargo carry capacity) so almost anything in the storage bins puts us over the maximum weight limit, especially if the holding tanks are full. I discussed this problem earlier when I bought roof top cargo bars. The Lazy Daze can tow as much as 6,000 lbs, we currently tow the Samurai which weighs 2,400 lbs fully loaded. I've been watching CraigsList for months for the right size and price rooftop cargo box. This last weekend I found the exact size I was looking for at a good price in a small town north of Redmond where we were helping Lesa pack furniture. This will add to and organize a few more items I can take with us while we travel. It is large enough to hold three of the containers I already carry plus some other, smaller items. Click the photo for another view. Here is a photo of how it looks on the Samurai.
 |
 |
 |
 |
 |
 |
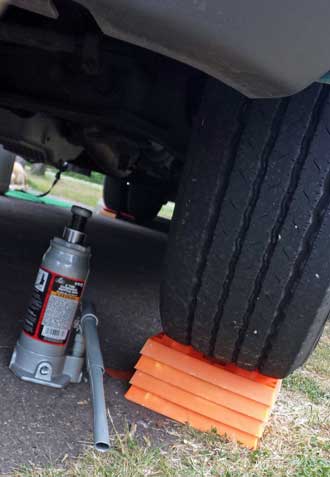
Wednesday, June 17, 2015: We are still trying to work out some bugs with the Lazy Daze. You'd think it would be easy to level but it's very complicated trying to figure how much to put under each wheel, usually only two wheels. But it's not easy. I've begun to level from side to side then use the bottle jack to raise the front wheels to level from front to rear. It certainly gives me practice for changing a front tire.
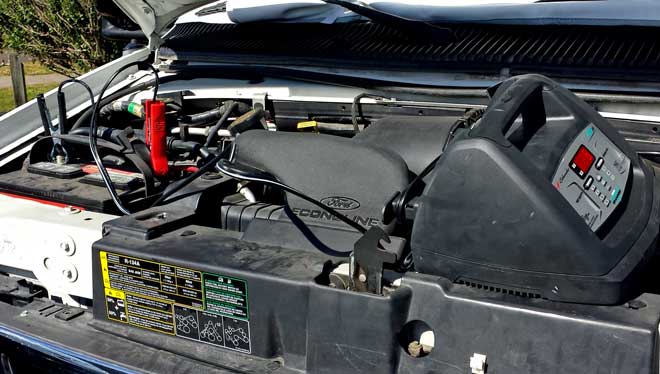
The Lazy Daze has NO AC outlet in the overhead cab where the TV and/or entertainment center is located. In 2004, it came with a DC powered TV so no one thought an AC outlet was needed. The TV has been removed and replaced with our LED TV. It's AC powered so I've installed a small inverter to power the TV from the DC outlet in the overhead. I also need to power the DISH satellite receiver. Each of these units requires little power but enough that I can't plug both into the overhead DC plug without drawing the voltage down too much from this low powered DC plug. So one of the units, in this case, the DISH satellite receiver must be plugged into the dash DC outlet with another small inverter. So this draws power from the chassis battery with no way to charge that battery without starting the engine. It was drawn down so far, I had to start the generator, run an extension cord to the front of the Lazy Daze where I plugged in my battery charger to bring the chassis battery back up in voltage. I'm considering a small solar charger specifically for this battery but need to learn if a small charge will be enough. I'm still experimenting.
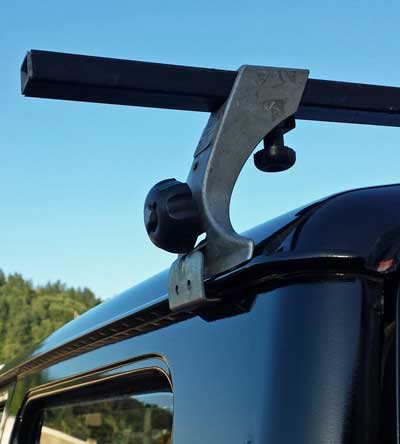 Wednesday, June 10, 2015: This was a day with an unusual mission. To start from the beginning, our Lazy Daze has a very poor CCC (Cargo Carry Capacity). I knew this when I bought it but felt it could be managed. It means we can't carry much in the coach without going overweight. The storage compartments are mostly empty or filled with light weight items and the Lazy Daze is very close to maximum weight, 14,050 lbs. But the Lazy Daze can legally tow enough weight to equal 20,000 lbs. The Samurai weighs only 2000 lbs so items we can't carry in the motor home could be carried in the Samurai. However, the Samurai has precious little storage space but that's why they make roof top cargo boxes. To carry a cargo box you need a bar rack. I've been watching Craig's list for a month for bar racks to fit the Samurai. They are very expensive if purchased new. This set was advertised from a town near Salem but I learned the owner worked in Eugene so we made arrangements to meet the owner today in Eugene to get the rack. I use to own one just like it in a previous life. This one is at least 35 years old but perfect for a 28 year old car. Click the photo to see a view of the bar rack. Now I must continue to watch Craig's List for a cargo box to fit. I just missed the perfect box by 24 hours. To make the trip to Eugene even more worthwhile, Gwen and I got passport photos taken at the Eugene Costco. Our passports will expire fall of 2016 but we will not have a chance to order the renewal passports except for right now.
  |
 |
 |

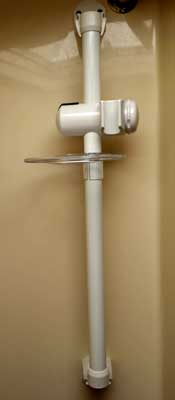
Wednesday, May 13, 2015: Gwen wanted a location to hang the floor mat outside the shower. I knew it would end up used as a grab bar so decided to purchase a grab bar to be used as a towel rack as well as a grab bar. That way, it's safe to use with body weight hanging on the bar. I used a backing board otherwise, the 1/4" door material would not hold the weight. This is a simple improvement but one needed to enter and exit the shower.
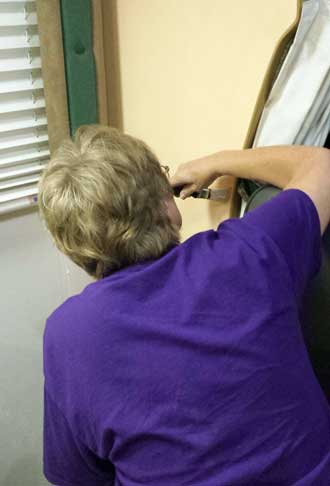
Tuesday, May 5, 2015: We are on the road to Boise, Idaho tomorrow to visit Gwen's son, on the way, we are picking up Gwen's daughter in Redmond so this will be a family reunion. Before leaving, Gwen wants to test some new colors on the egg shell white wall of Miss Blossom. Gwen says, it gives Miss Blossom a "warm" look. It's just another way Miss Blossom is becoming customized for us.
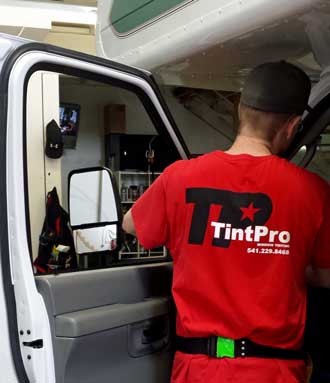 |
Monday, May 4, 2015: Today was an exciting day for Miss Blossom and Sam. I took them both to TintPro in Roseburg for five window tints in Sam and two in Miss Blossom. While the tinting was being done, I walked to several auto supply stores looking for pin stripping thinking I would do it myself. I learned none is stocked so I checked Amazon and learned it would be very difficult to choose the color I was after. When I returned to TintPro, I met my friend Troy and learned he was working for Autoworks located at the same location as TintPro. It was Autoworks who did the pinstripes on our Prius. So I worked out a deal with Troy to do the pinstripes on Sam. Troy has hundreds of colors to choose from. I chose Metallic Sea Foam. It was a perfect match to the lighter green on Miss Blossom. | 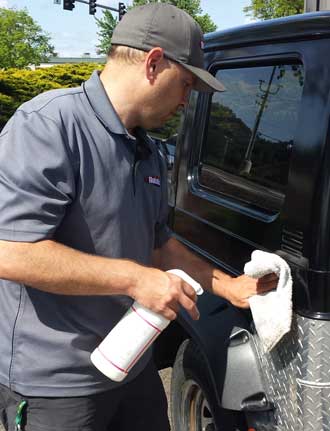 |
 |
 |
 |
 |
 |
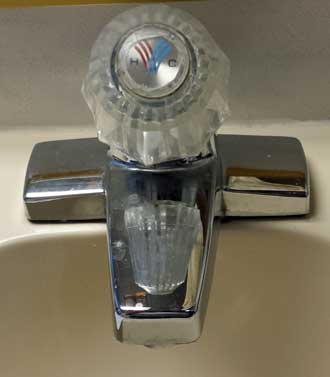 |
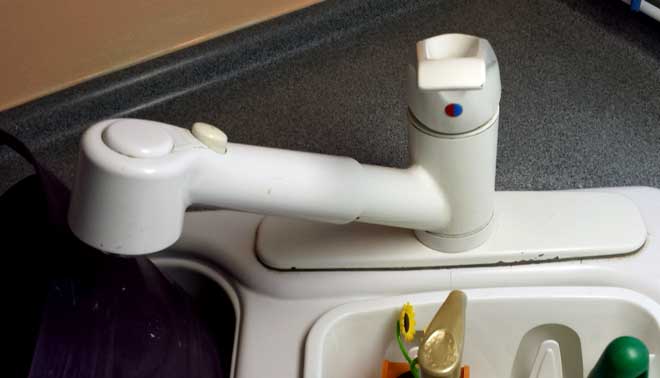
Sunday, April 19, 2015: Continuing with the changes we are making to Miss Blossom. We changed both the kitchen and bath faucets in the Alumascape but only the bath faucet in the Lazy Daze. The original faucet works just fine but it is very difficult to get your hands under the stream because the faucet is low and the bowl is small. We chose a new faucet at Home Depot for less than $60. This is a high profile faucet making it much easier to wash hands or face. We love the new faucet. Click the photo on the left for another view. |  |
 |
 |
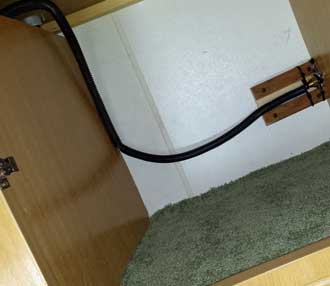 |
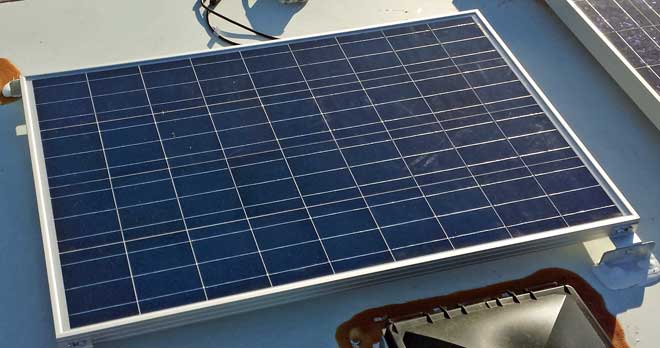
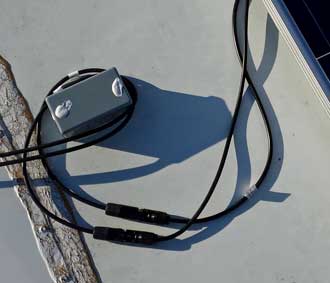
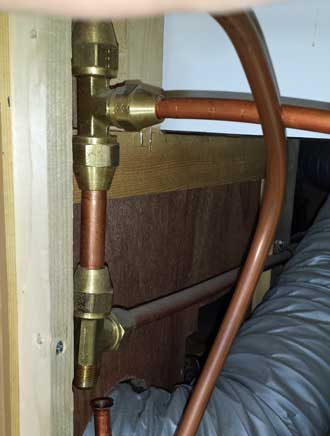
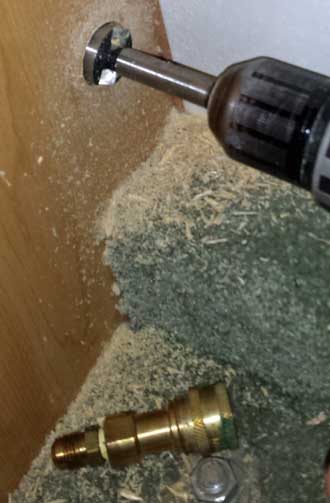
Saturday, April 18, 2015: Gwen and I do a lot of boondocking. Miss Blossom comes with three solar panels so is setup pretty well for power. One thing we have learned to do is to provide for heat without running the furnace. The furnace in an RV uses lots of power so drains the batteries quickly. We've also learned that the Empire propane heater is superior to all others. The Lazy Daze propane tubing is the best I've seen of the three RV's I've added a heater and two I've helped with others. It was very easy to add a "T" and extend another tubing for the quick release to fit the Empire heater. Lazy Daze wrapped many of the exposed tubing with wire loam so I did the same. The Empire heater is 99% efficient compared to 60% efficiency of the furnace. The Empire uses only propane, no power. Click each photo for additional views of the installation.
 Friday, April 17, 2015: On the return from Sparks trip, I stopped in Grants Pass, Oregon where one of my students from a past life lives and works for a music shop. He installed the radio in my Dodge pickup 10 years ago so I'm having him install a radio in Miss Blossom. I was going to have him install a radio with built in XM satellite reception but learned that my external receiver has more features so I had him install my external receiver. It was a difficult installation which took more than two hours but once completed, looked great. This is the only sound system in the Lazy Daze and works without the need of the key in the ignition. One of the features of my external receiver is the ability to "rewind" a program. I'm often listening to public radio programs. I can stop for a lunch break when driving (for example) then return, hit the "rewind" button and pick up the show from where I left off. The radios at the music shop would do the same for and extra fee but they would NOT pair with my Bluetooth headset while by external receiver WILL pair so I can listen without disturbing Gwen. All wires are mounted under the dash so I did not lose any DC plug-ins with this radio installation.
