 |
|
Woodworking Projects - 2013
Page 2
|
|

 |
|
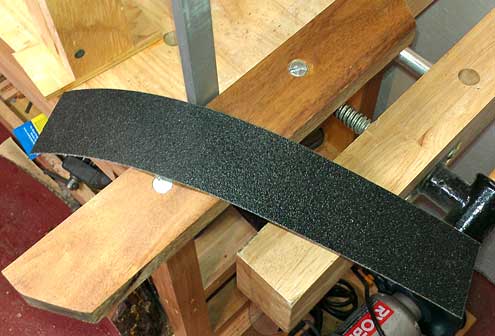
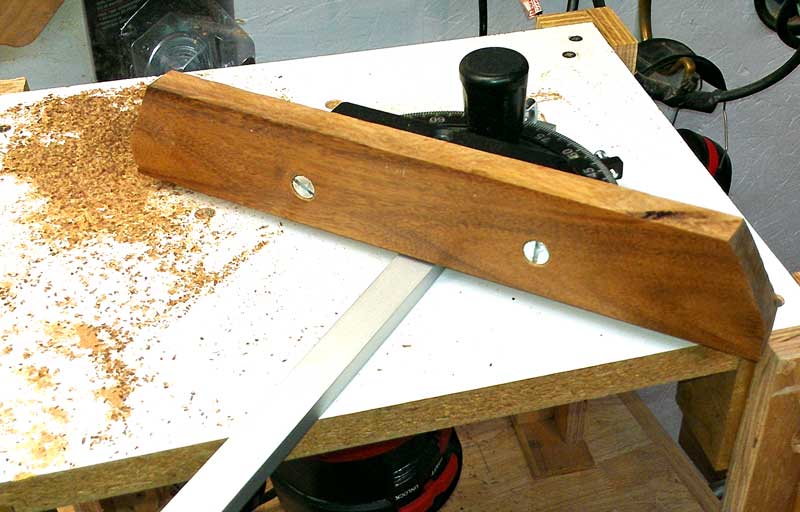
Wednesday: February 6, 2013: I came up with a project today where I really needed the miter guide to be much closer to the table saw blade. My friend John has given me some hardwood flooring, I don't know what wood it is but it is super hard and perfectly straight, just what I need for this project. The table saw instruction manual actually has instructions of how to extend the miter guide. The table saw I owned 20 years ago had a miter guide extension, this one will be similar but not quite as long. Click the above photo for an additional view. |
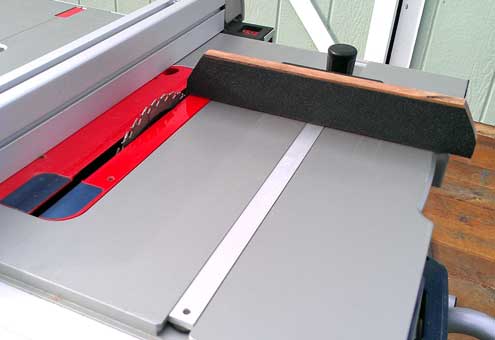
I want the wood to stay in place when I'm making a crosscut. The last thing I want is for the miter guide to be slick and this hardwood has a finish which is super smooth. I purchased a 3M stair step strip which has a very strong peel and stick adhesive on the back. I peeled and this rough surface is permanently stuck to the guide. The guide clears the blade by only 1/16", perfect. I used my square to made sure the miter guide is exactly 90° from the blade. This will work perfectly. |
|
|
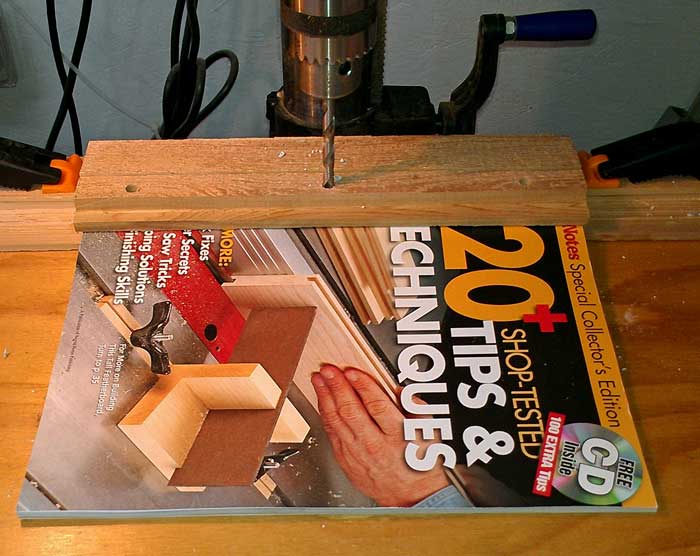
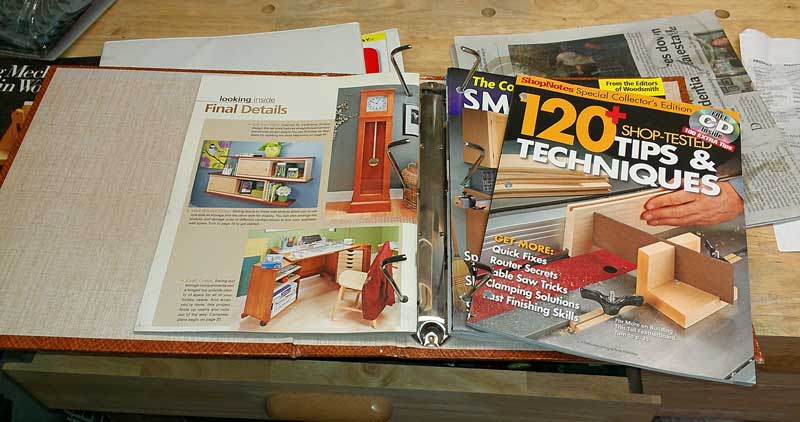
| Saturday, February 9, 2013: Since I now have a semi-permanent residence, I also have a location to have magazine subscriptions sent. I've ordered two magazines, Wood mostly so I can see the advertising and Woodsmith which has NO advertising but lots of good projects and shop tips. Of course I want to keep both magazines for future reference and Woodsmith anticipates that by publishing the magazine with three holes punched for safe keeping in a binder. Wood apparently doesn't care. So I need a three hole punch. Any three hole punch strong enough to punch a magazine is very expensive so I created a jig for my drill press. The bottom of the jig is a cradle for the base of the magazine with helpful centering marks. This fits my drill press table top exactly and is clamped down with spring clamps. The other guide goes over the top of the magazine to hold it in place for the first hole, the center "punch". Click the left photo to see this in action. I then place a 1/4" fluted dowel pin into the center hole and move the magazine to the next hole, the right photo. The fluted pin holds the magazine in place so the other two holes are drilled at the correct distance. This only takes a few seconds and the magazine is "punched". Click the right photo to see the fit into the binder. I picked up my binders cheaply at St. Vincent de Paul, only one mile from our trailer. My intention is to make a list of the projects of interest plus the page and magazine where they are found. This list will go in the front of each binder. That way, when I'm standing in my shop wondering what to do next (as if that will ever happen), I can look in the front of the binders for my project list. |
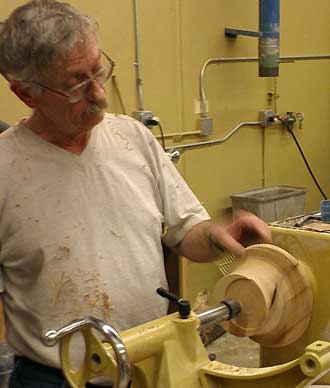
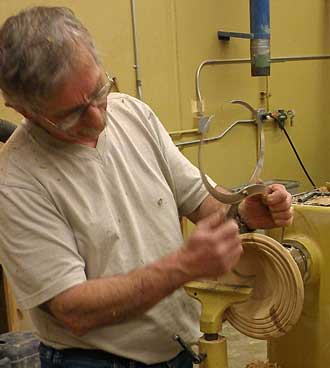
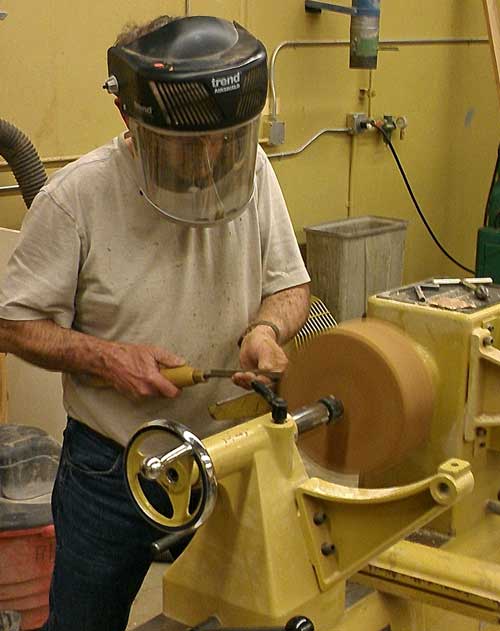
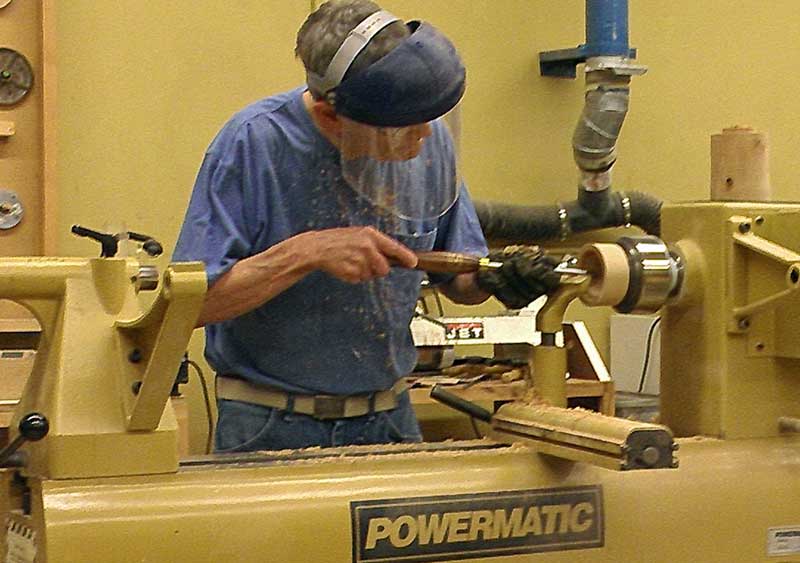
Sunday, February 10, 2013: I purchased the Jet mini lathe model 1014 a month ago but have delayed showing it until today because there is a story behind the lathe which was not resolved until yesterday. A month ago, I was desperate for a lathe to finish the toy trains I was building for the grand kids. I found this one used but when I went to pick it up, it turned out to be the model 1014 rather than model 1220 which is what I had researched and thought I was buying. The model numbers are significant, 1014 means the 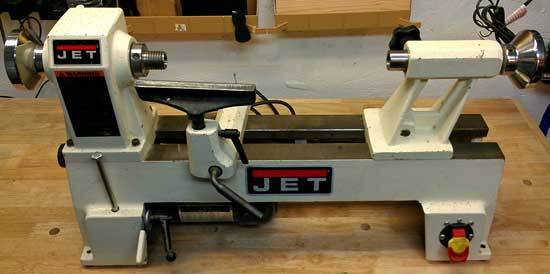 lathe will turn a bowl with a maximum 10" diameter and a spindle maximum of 14" in length. So model 1220 means a 12" bowl and 20" spindle. I am VERY likely to want to turn something longer than 14" in length, face plate turning (making bowls) is not currently in my interest and the difference between 10 and 12" is not significant. Other than that, the model 1014 is very nice and a popular lathe because there is so much interest in turning pens so I could likely resell it easily. Since I had done no research on the model 1014 I didn't know the price and ended up paying too much for the lathe ($300). The model 1014 is no longer manufactured but the replacement with exactly the same dimensions and capacity sells for $387 (when on sale at the time I purchased the lathe, it's $10 more now) and has an indexing head plus lamp. Additionally, my used lathe did not come with a drive spur which cost me $27.50. So NOW I've paid $327.50 to get a used lathe which I could have purchased new for $387 plus gotten more features. After considering my situation I decided to do something I've never done before, try to negotiate a better deal after the deal has already been completed. I finally got to sit down with the seller yesterday for the negotiation. I didn't want a refund or partial refund. The seller also had a "bed extension" for the lathe which would make this lathe perfect for my little shop. 80% of the time I will need only a bed with a maximum spindle turning length of 14" and with a bed extension, longer spindle turning was possible the other 20% of the time. So that made this lathe easy to store when not in use, critical for my little shop. I had already talked with the seller about the bed extension but he had refused to include it with the initial sale. I took my evidence with me, a catalog showing the current price of the lathe and explained my situation. I had paid too much for this used lathe but if he were to let me have the extension, the deal would again be fair. He thought about it for a second, looked at my evidence, then agreed. Now I feel good about the purchase again and have the perfect lathe for my little shop. Click the photo to see what a difference the bed extension makes for this little lathe. lathe will turn a bowl with a maximum 10" diameter and a spindle maximum of 14" in length. So model 1220 means a 12" bowl and 20" spindle. I am VERY likely to want to turn something longer than 14" in length, face plate turning (making bowls) is not currently in my interest and the difference between 10 and 12" is not significant. Other than that, the model 1014 is very nice and a popular lathe because there is so much interest in turning pens so I could likely resell it easily. Since I had done no research on the model 1014 I didn't know the price and ended up paying too much for the lathe ($300). The model 1014 is no longer manufactured but the replacement with exactly the same dimensions and capacity sells for $387 (when on sale at the time I purchased the lathe, it's $10 more now) and has an indexing head plus lamp. Additionally, my used lathe did not come with a drive spur which cost me $27.50. So NOW I've paid $327.50 to get a used lathe which I could have purchased new for $387 plus gotten more features. After considering my situation I decided to do something I've never done before, try to negotiate a better deal after the deal has already been completed. I finally got to sit down with the seller yesterday for the negotiation. I didn't want a refund or partial refund. The seller also had a "bed extension" for the lathe which would make this lathe perfect for my little shop. 80% of the time I will need only a bed with a maximum spindle turning length of 14" and with a bed extension, longer spindle turning was possible the other 20% of the time. So that made this lathe easy to store when not in use, critical for my little shop. I had already talked with the seller about the bed extension but he had refused to include it with the initial sale. I took my evidence with me, a catalog showing the current price of the lathe and explained my situation. I had paid too much for this used lathe but if he were to let me have the extension, the deal would again be fair. He thought about it for a second, looked at my evidence, then agreed. Now I feel good about the purchase again and have the perfect lathe for my little shop. Click the photo to see what a difference the bed extension makes for this little lathe. |
|
|
|
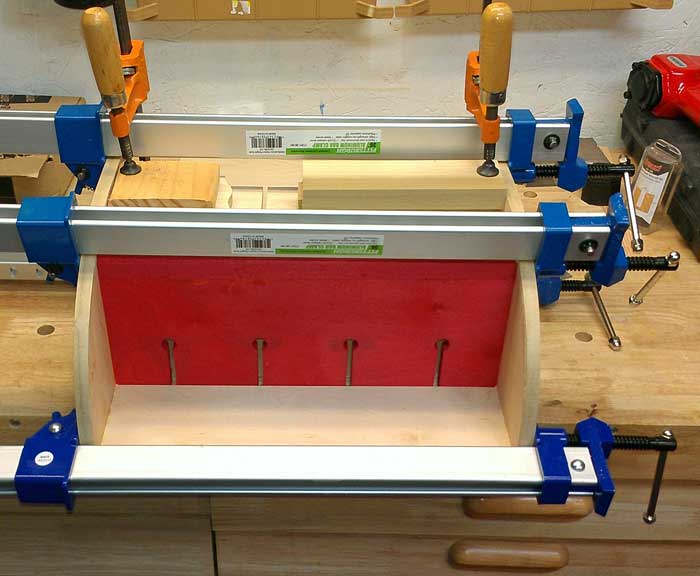
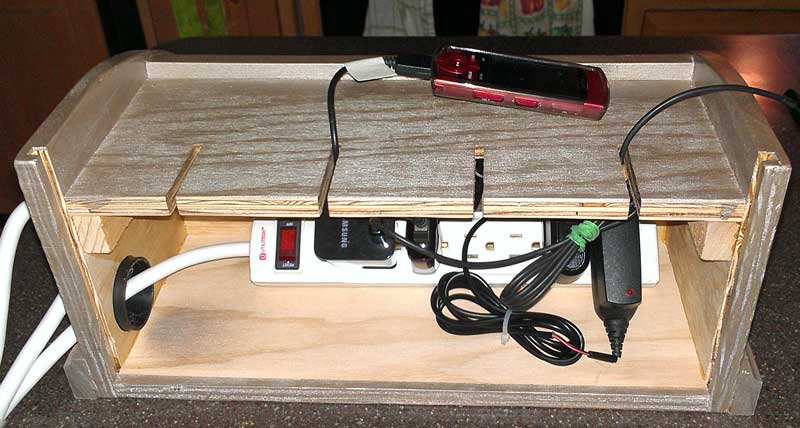
| Friday, February 15, 2013: While visiting son Ben in Reno a few weeks ago I asked if he would like to have this gadget charging station for his birthday. I had just seen the Steve Ramsey video of how to build it. I subscribe to Steve's email project service which send an email each week with a new project. The service is called Woodworking for Mere Mortals. The last issue of Wood magazine even mentioned the service. I followed Steve's plan pretty close but changed the shelf support and added a plastic cord plug for the wire coming out of the box. I wanted one for myself so I built mine first to work out the bugs then built Ben's of better plywood. I learned that even though I purchase birch plywood for Ben's unit, the veneer is only 1/32" thick so next to impossible to cut without it splintering. I suppose I could try running tape on the underside of the cut. I was using a carbide tipped blade which should have been the best but still, splinters. I stained the front panel of Ben's unit red using red food coloring. I will add the frame around the base then seal with polyurethane. I painted mine tan but did not realize the "tan" can I used was a "metallic tan" so it has a silver look to it. I assembled mine using glue and a pneumatic brad nailer. I used only glue on Ben's so there would be no holes. The one exception, I used the brad nailer to attach the shelf support to the inside of the box. I made sure 5/8" brads were in the nailer but DARN if ONE 1-1/4" brad wasn't hiding in the chamber and it came out first puncturing the good side of the box. So I found some "wood filler" at Bi-Mart on sale to repair the hole after I removed the brad. It was my first time to use wood filler and it will be invisible once the polyurethane is applied. Click the photos to see additional views. Now, all the chargers are in one place which also means all the gadgets are in one place so we know where to find them. Ben's unit will be ready to mail on Tuesday (day after President's Day). By-the-way, Steve wanted us to use iron-on edge trip of the boxes. I had never used it before either so checked it out at Lowes. It was $7 for a roll and they only stocked "red oak". I cut thin strips of Poplar instead and glued to the plywood edge. Poplar matched the Birch perfectly. |
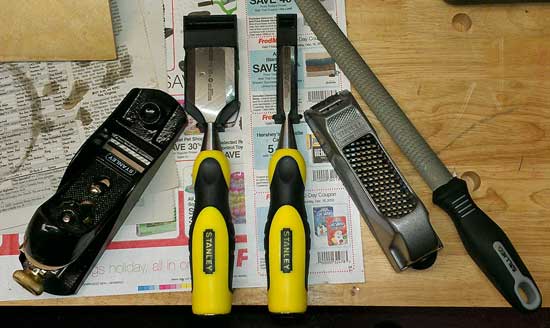
Monday, February 18, 2013: Since today was President's Day, Fred Meyer had a sale from 7am to 1pm for all early shoppers. For me they had shirts at 70% off the lowest marked price so I got two for around $6 each. They also had the best sale on hand tools I've seen since watching the Fred Meyer ads. Hand tools were marked at 50% discount. I've seen two for one coupons around Christmas time but 50% discount is actually better than a two for one coupon. So I finished my "cheap" chisels collection plus a Stanley hand plane and Surform planer. I also purchased a wood rasp thinking I might need it some day. They were all cheaper than Amazon and I didn't have to wait for them to arrive in the mail. Soon, retail purchasing, where you walk out of the store with the item in your hand, will be the "new" and exciting experience. |
|
|
|
|
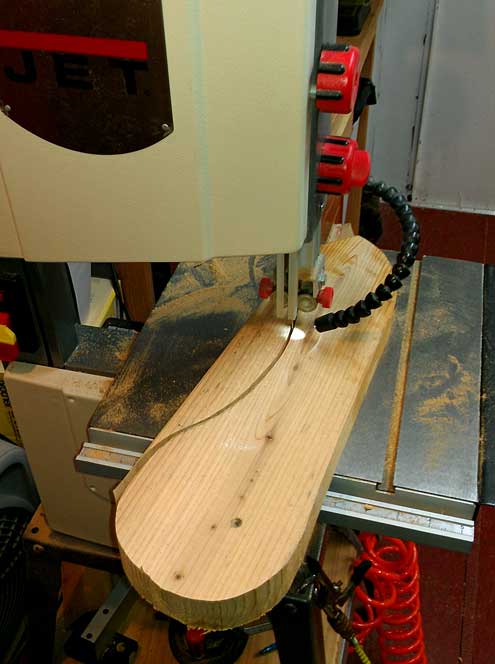
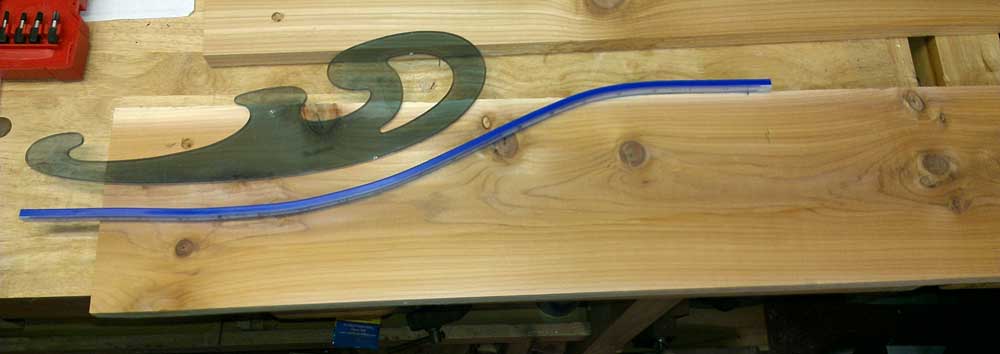
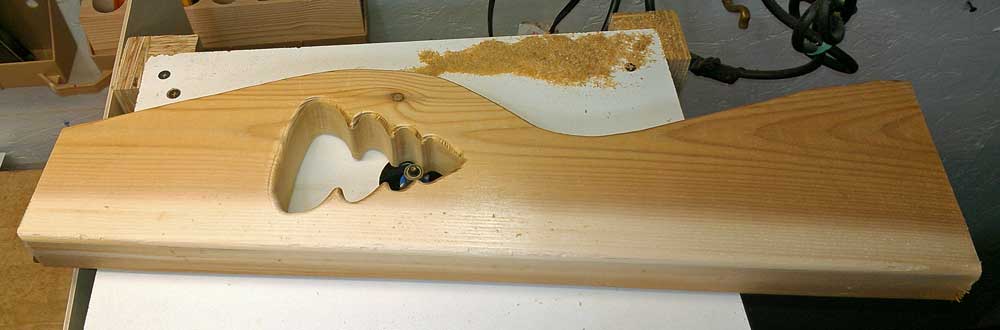
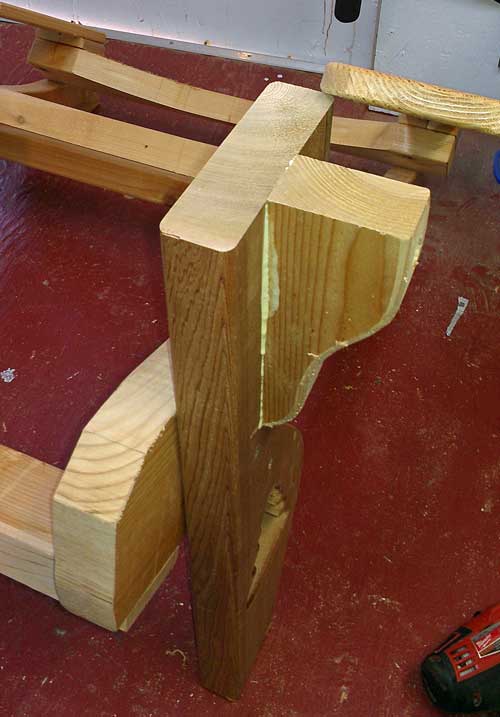
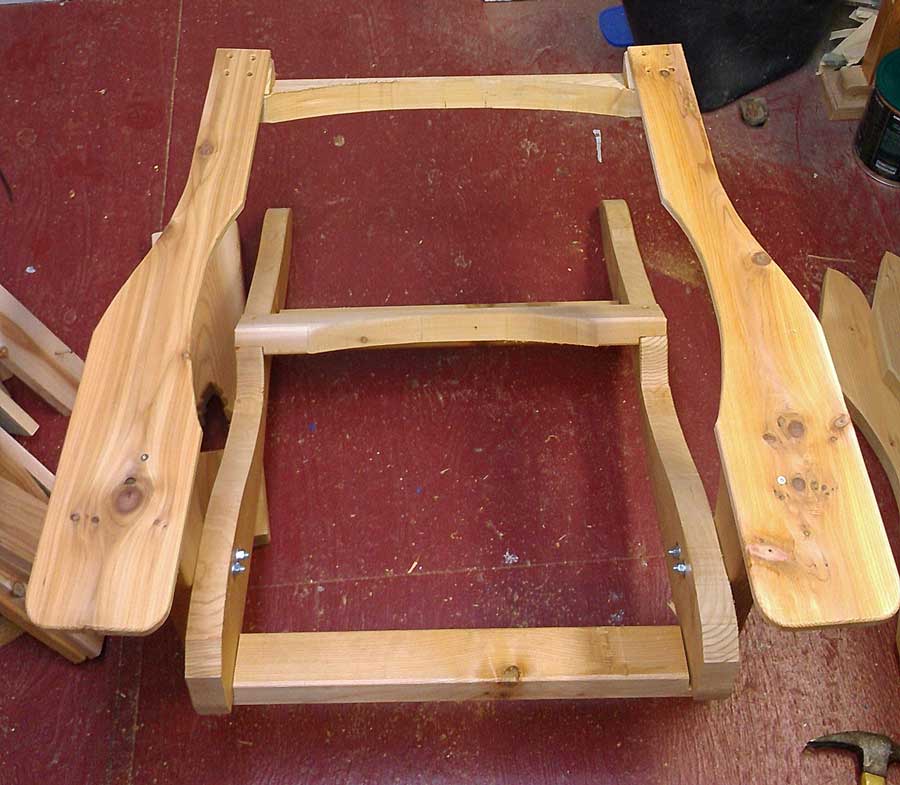
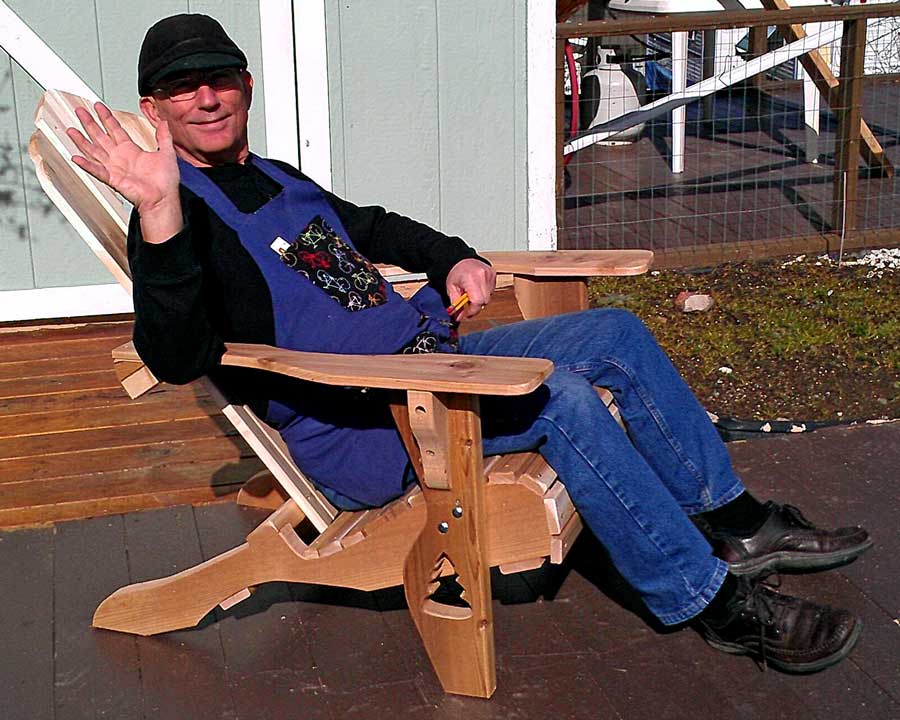
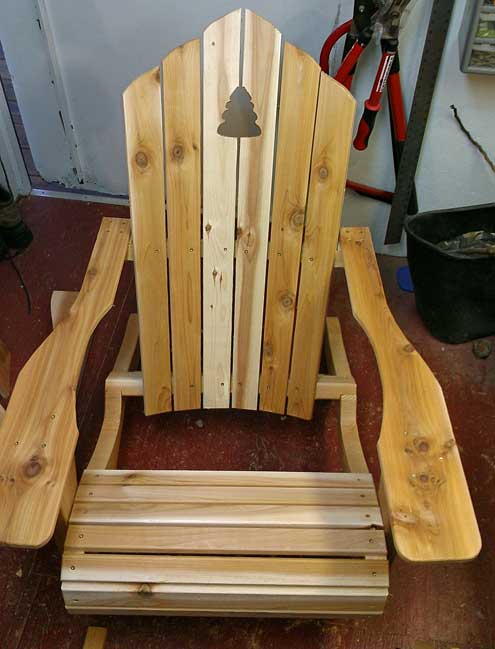 Friday: February 22, 2013: I've been working on the Adirondack chair project for four days. This last day was entirely inside my little shop due to the rain. That meant running the table saw inside my tiny shop when I usually do all table saw work outside. I figured it out. I have enough cedar for two chairs but decided to get one chair assembled entirely so I would know if I want to make any changes to the second chair. I chose cedar for more weather resistance which also made the chairs more expensive. I expect to have $70 invested in two chairs by the time they are finished. I used photographs of other chairs for the basic idea but still had to test the plan to get the right seat height and angle of the back. I prefer my chair to be reclined more than Gwen likes hers so the second chair will have less angle on the back. I plan to stain the chairs once the weather warms. Click each photo for additional views. I'll be finishing Gwen's chair then working on footstool and a little table. I plan to enjoy our patio this spring and summer. Oh, and I still have another set of screws for the back boards in case you noticed that there is only one screw in each back board. The last adirondack chairs we owned were made by a guy in Grants Pass who charged $40 each, made of pine so Gwen painted them. Pine would have been considerably cheaper but I didn't want pine. Here's another photo of me with the chair after the sun came out on February 24. Friday: February 22, 2013: I've been working on the Adirondack chair project for four days. This last day was entirely inside my little shop due to the rain. That meant running the table saw inside my tiny shop when I usually do all table saw work outside. I figured it out. I have enough cedar for two chairs but decided to get one chair assembled entirely so I would know if I want to make any changes to the second chair. I chose cedar for more weather resistance which also made the chairs more expensive. I expect to have $70 invested in two chairs by the time they are finished. I used photographs of other chairs for the basic idea but still had to test the plan to get the right seat height and angle of the back. I prefer my chair to be reclined more than Gwen likes hers so the second chair will have less angle on the back. I plan to stain the chairs once the weather warms. Click each photo for additional views. I'll be finishing Gwen's chair then working on footstool and a little table. I plan to enjoy our patio this spring and summer. Oh, and I still have another set of screws for the back boards in case you noticed that there is only one screw in each back board. The last adirondack chairs we owned were made by a guy in Grants Pass who charged $40 each, made of pine so Gwen painted them. Pine would have been considerably cheaper but I didn't want pine. Here's another photo of me with the chair after the sun came out on February 24. |
 |
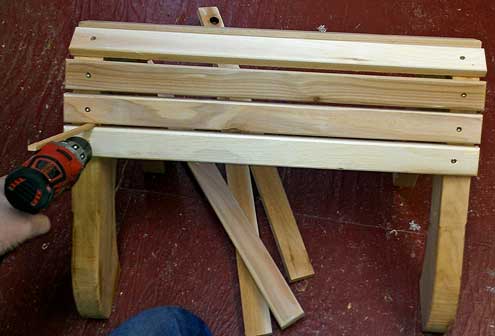 Monday, February 24, 2014: I used this day to build the Adirondack stools for the chairs. This was a guick build except that I was one board short so must finish the project tomorrow or after getting the needed board. So the completion of this project ended up with two chairs and two stools. I was going to build a small table to complete the set but I believe I'll wait to learn if we really have a need for it. I'm imagining setting my drink on the arm of the chair rather than a table. Click these two photos to see additional views. Monday, February 24, 2014: I used this day to build the Adirondack stools for the chairs. This was a guick build except that I was one board short so must finish the project tomorrow or after getting the needed board. So the completion of this project ended up with two chairs and two stools. I was going to build a small table to complete the set but I believe I'll wait to learn if we really have a need for it. I'm imagining setting my drink on the arm of the chair rather than a table. Click these two photos to see additional views. |
|
| Tuesday, February 26, 2013: Today I was searching for wood-turning supplies and came across LumberJocks, a location on the Internet to communicate with other woodworkers. So far I've posted only one projectwhich must be approved by LumberJock administratorsthen I can post more. I've glaced through the many projects posted by other woodworkers and seen many impressive woodworking activities. It gave me some nice ideas for some projects of my own. I've already added some "favorites" to my profile and will take a second look when the time comes to make more gifts. I'm looking forward to spending more time at LumberJocks and participating in forums. |
|
|
 |
 |
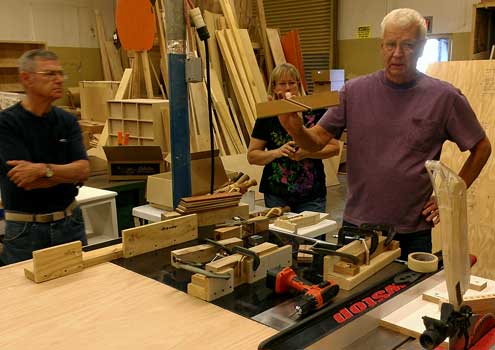
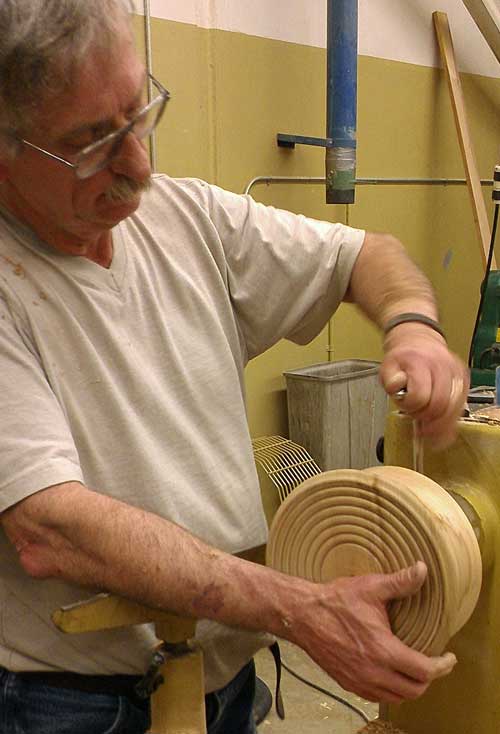
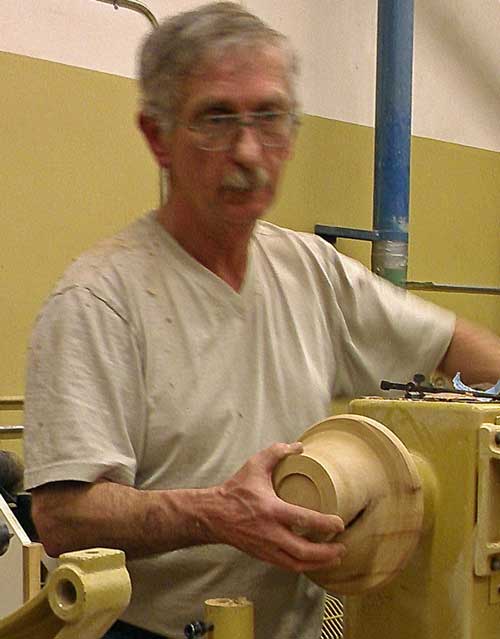
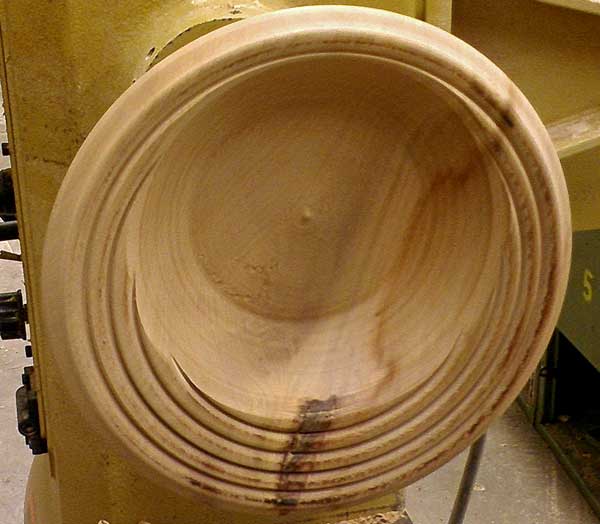
Monday, March 4, 2013: This is the first Monday of the month so time for the Roseburg Wood turner's meeting. Tonight's lesson, demonstration from Mike is off center turning. But before Mike arrived, we had our usual raffle where my buddy (and tonight's driver) Gene, won a nice piece of Madrone. I wonder what he will turn from this nice piece of wood. Be sure to click on each photo for additional views. Gene and I were amazed at how Mike quickly turned a chunk of wood into a beautiful, "winged" bowl using off center turning techniques. This is far beyond my ability but I already have some new projects to try which are something new for me anyway. |
|
|
|
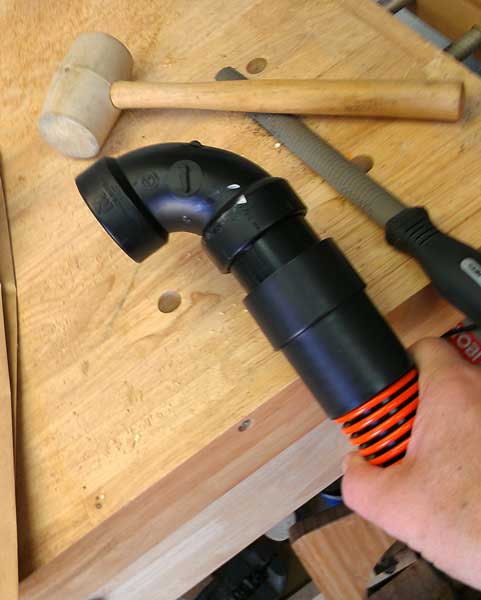
| Monday, March 11, 2013: I finish a shop project. Perhaps you have seen "dust separators" for shop vacuums advertised in your favorite woodworking catalogs. The one I wanted was $89 and did not include the extra hose needed to make the system work. A dust separator connects between the vacuumed and final hose in the shop. It's job is to keep most of the vacuumed particles out of the shop vac chamber so the vac filter does not have to be cleaned so often. It also makes it easier to empty the dust collector (no disconnecting the motor assembly and removing the filter). I decided to make my own since I could do it much cheaper. My won't have the "cyclone" feature of the $89 model but I believe it will work well without it. Once I received the extra hose needed (it was on sale plus free shipping), I found a method to make the connection to 1-1/2" ABS pipe. A month ago I purchased a rasp at Harbor Freight with no "need" in mind. Today, I found that need, changing the ABS pipe to fit the new vacuumed hose. I reinforced the lid by putting plywood on both sides then drilled for bolts (to sandwich the plywood with the lid) and larger holes for the ABS fittings. I sealed the fittings with silicon caulk. It works great however, the Lowes bucket partially collapses from the vacuumed pressure. My first thought is to buy another bucket, cut off the top 2 inches and push inside to double the side strength. I'll try that when I get the chance. Anyway, I vacuumed the whole shop and found lots of dust inside my new bucket. Click the photos for additional views. |
|
|
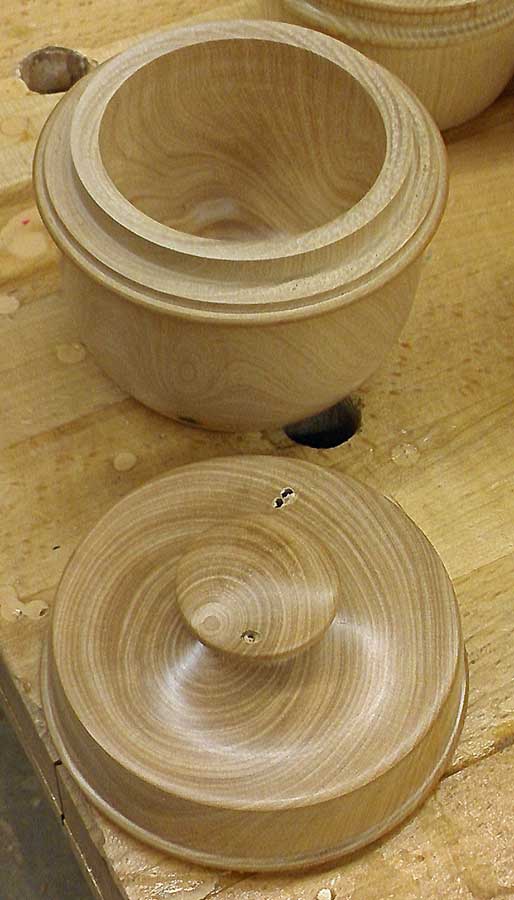
| Monday, April 1, 2013: It's the first Monday of the month so that mean the Roseburg Woodturner's Club meeting tonight. This time it was Jim demonstrating the making of a bowl with matching lid. This technique is well beyond anything I'm ready to try but it was fun to watch Jim show how to do it. We always have a raffle with prizes and I've always won something because there are so many prizes. The prizes are pieces of wood of various kinds and sizes. Tonight I bought one ticket and won a nice piece of Hazelnut. I'll have to come up with some special project for this piece of wood. Click the photos for additional views. |

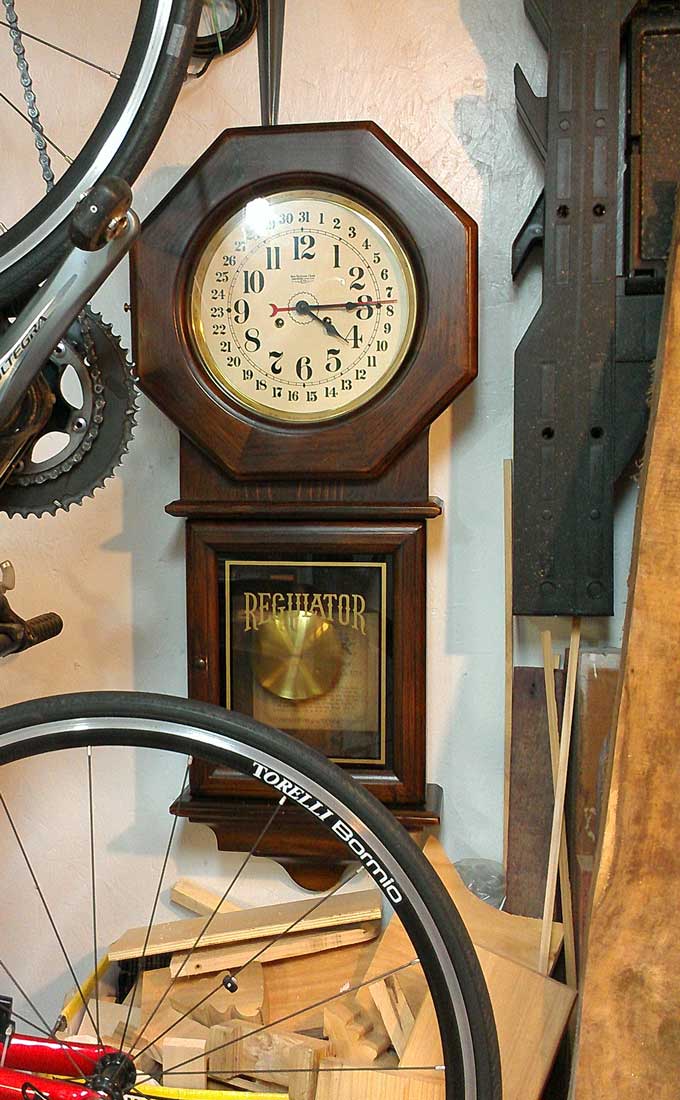
Sunday, April 7, 2013: While visiting Ralph and Janet I had the chance to shop their garage sale and found this lovely Regulator Clock they purchased in 1975. It has a mechanical movement (rather than electronic). I've been wanting a clock with a mechanical movement but planned to build myself one. Janet priced this clock so well it was a 1/4 the cost of the mechanical movement I had planned to buy so I couldn't pass it up. I thought I might just remove the movement and build another clock but I'm liking this clock so much I believe I'll let it hang (and chime) in my woodshop for a while. I'll consider what I want to do with it. Note that it's not only a clock but a calendar as well. Click the photo for a close-up view. On a clock with an electronic movement, like all the clocks I've ever made, the pendulum is only for show. Since this is a mechanical movement, the pendulum in this clock has a purpose. The pendulum regulates the accuracy of the movement. The thumb screw at the bottom of the clock must be moved to increase or decrease the speed the clock clicks through a 24 hour period. In this case, the movement is spring driven. The movement I'm interesting in buying to build a clock is weight driven. |
|
|
|
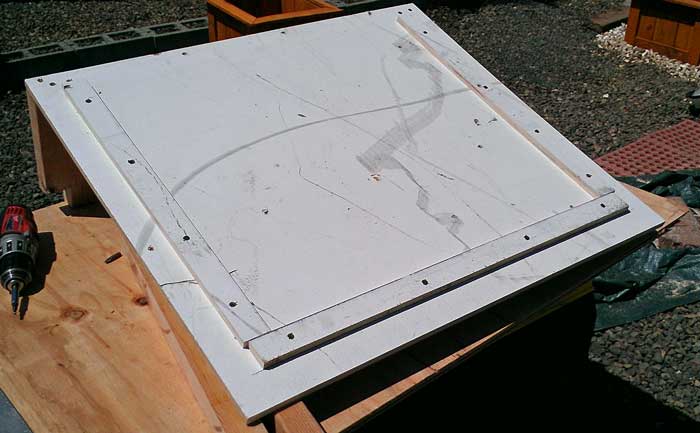
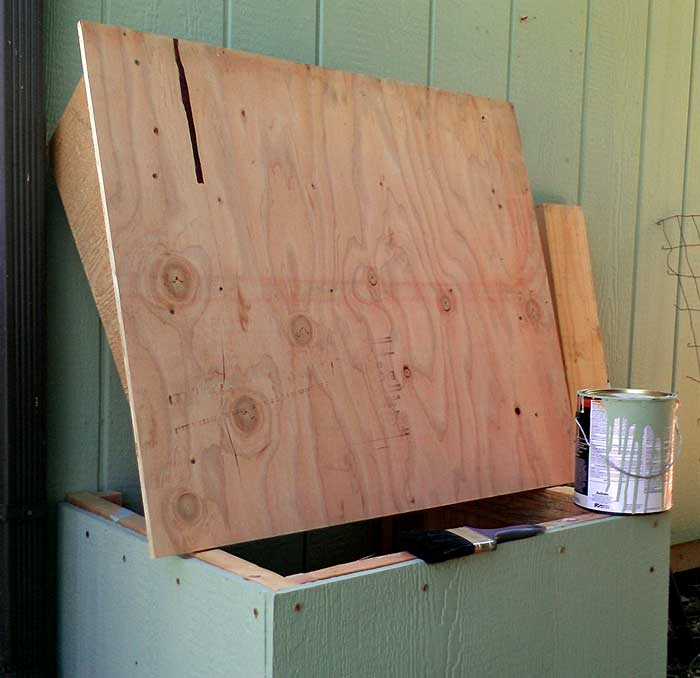
| Wednesday, May 8, 2013: I need a small storage hut behind my shed. I was able to pick up most of the materials at the used lumber store or for free at the garage sales I visited last weekend. I think this little house would have cost as much as $100 or more if I had purchase new, but my total investment was about $20. The roof is removable for access. The paint color is the same color as the shed. Click the photos for additional views. |
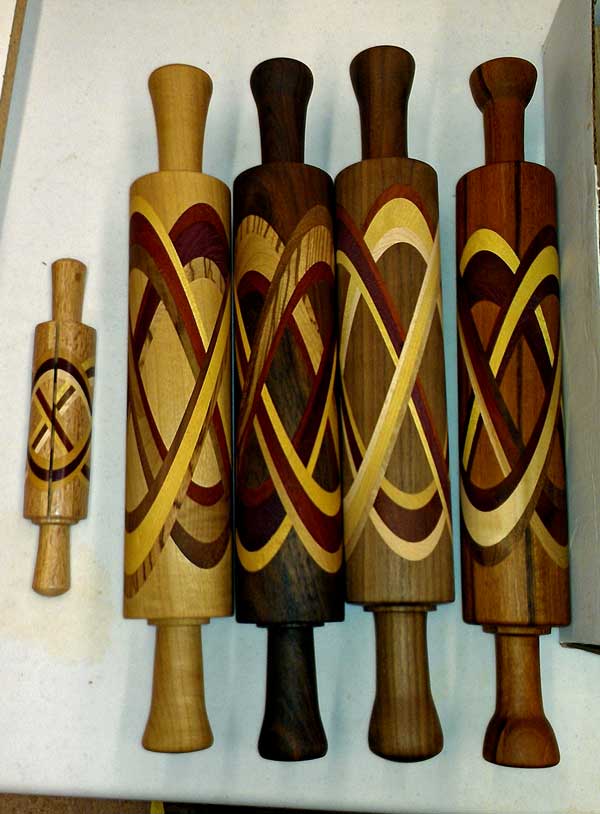
Monday, June 3, 2013: Since this is the first Monday of the month, I went to the Roseburg Woodturner's Club with my friend Gene. Tonight's demonstration is by Dick. Dick is showing how to make the blanks for rolling pins then how to turn the blanks into unique works of art but practical use rolling pins. Dick has made many jigs to help make blanks easier. This is extremely time consuming and NOT the usual kind of woodworking I'm interested in doing. Far too complicated and time consuming for each project. Dick spends the winters in Tucson, Arizona where we sells these rolling pins for $150. That's still TOO CHEAP for the amount of labor in making one of these (in my opinion). Click the photo to see the finished product. |
|
|
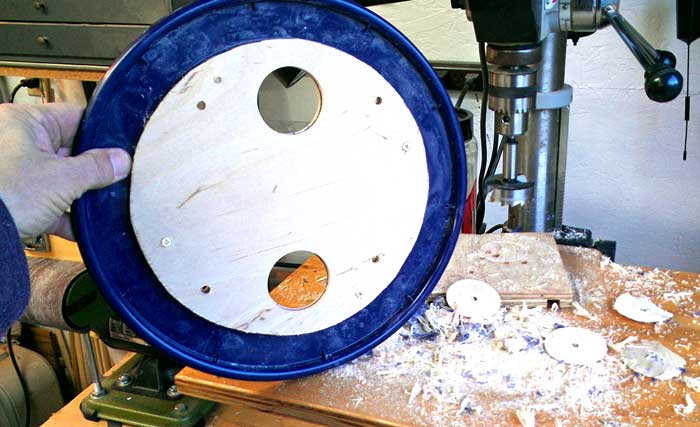
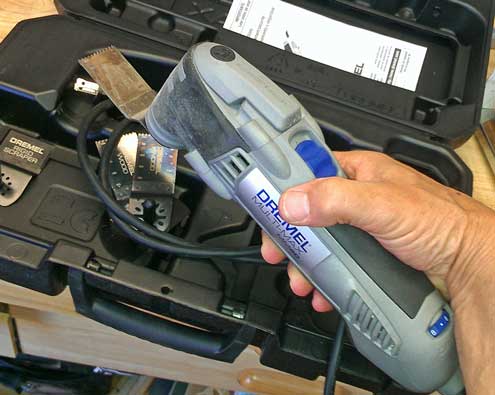
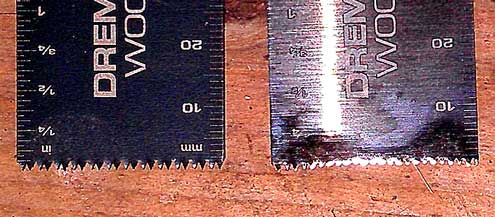
| Friday, July 12, 2013: I recently began using the Dremel multitool to cut wood, fiberglass and metal. At first I thought I'd find little use for this tool but I've learned to use it on almost every project since getting this tool. I used it to cut off bolts, make square trim cuts, cut aluminum molding, cut plastic tubing in tight quarters, and finish a cut started with a circle saw. The disappointment has been the short life of the saw blades. In the right photo, the blade on the left is unused and the one on the right has cut out a 4" circle in 1/8" plywood then another two 4" circles in 1/4" fiberglass. The blade is used up with those few cuts. These wood blades are $6 each. I switched to a carbide blade advertised to cut "hardened metal" but it dulled in only a few cuts of steel bolts and those blades are about $20 each depending upon the retailer and brand blade. I'll admit, there are situations where this is the only tool that will solve some problem situations so you must pay the blade price to make the cut. |
| |
|
|
 lathe will turn a bowl with a maximum 10" diameter and a spindle maximum of 14" in length. So model 1220 means a 12" bowl and 20" spindle. I am VERY likely to want to turn something longer than 14" in length, face plate turning (making bowls) is not currently in my interest and the difference between 10 and 12" is not significant. Other than that, the model 1014 is very nice and a popular lathe because there is so much interest in turning pens so I could likely resell it easily. Since I had done no research on the model 1014 I didn't know the price and ended up paying too much for the lathe ($300). The model 1014 is no longer manufactured but the replacement with exactly the same dimensions and capacity sells for $387 (when on sale at the time I purchased the lathe, it's $10 more now) and has an indexing head plus lamp. Additionally, my used lathe did not come with a drive spur which cost me $27.50. So NOW I've paid $327.50 to get a used lathe which I could have purchased new for $387 plus gotten more features. After considering my situation I decided to do something I've never done before, try to negotiate a better deal after the deal has already been completed. I finally got to sit down with the seller yesterday for the negotiation. I didn't want a refund or partial refund. The seller also had a "bed extension" for the lathe which would make this lathe perfect for my little shop. 80% of the time I will need only a bed with a maximum spindle turning length of 14" and with a bed extension, longer spindle turning was possible the other 20% of the time. So that made this lathe easy to store when not in use, critical for my little shop. I had already talked with the seller about the bed extension but he had refused to include it with the initial sale. I took my evidence with me, a catalog showing the current price of the lathe and explained my situation. I had paid too much for this used lathe but if he were to let me have the extension, the deal would again be fair. He thought about it for a second, looked at my evidence, then agreed. Now I feel good about the purchase again and have the perfect lathe for my little shop. Click the photo to see what a difference the bed extension makes for this little lathe.
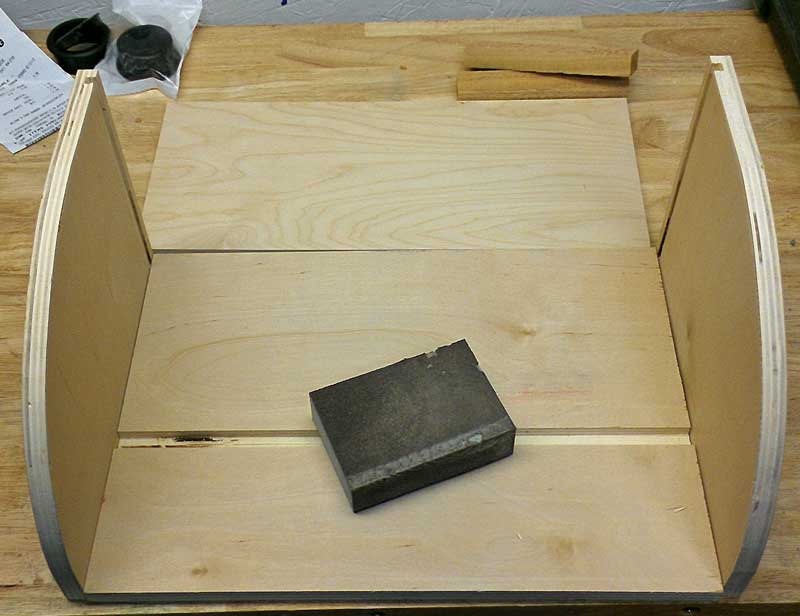


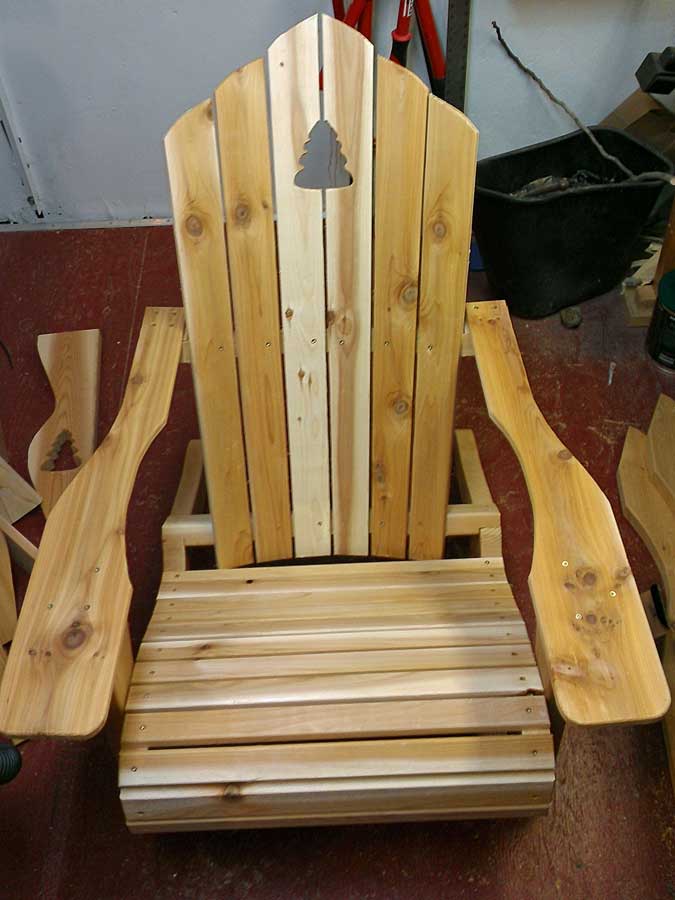 Friday: February 22, 2013: I've been working on the Adirondack chair project for four days. This last day was entirely inside my little shop due to the rain. That meant running the table saw inside my tiny shop when I usually do all table saw work outside. I figured it out. I have enough cedar for two chairs but decided to get one chair assembled entirely so I would know if I want to make any changes to the second chair. I chose cedar for more weather resistance which also made the chairs more expensive. I expect to have $70 invested in two chairs by the time they are finished. I used photographs of other chairs for the basic idea but still had to test the plan to get the right seat height and angle of the back. I prefer my chair to be reclined more than Gwen likes hers so the second chair will have less angle on the back. I plan to stain the chairs once the weather warms. Click each photo for additional views. I'll be finishing Gwen's chair then working on footstool and a little table. I plan to enjoy our patio this spring and summer. Oh, and I still have another set of screws for the back boards in case you noticed that there is only one screw in each back board. The last adirondack chairs we owned were made by a guy in Grants Pass who charged $40 each, made of pine so Gwen painted them. Pine would have been considerably cheaper but I didn't want pine. Here's another photo of me with the chair after the sun came out on February 24.
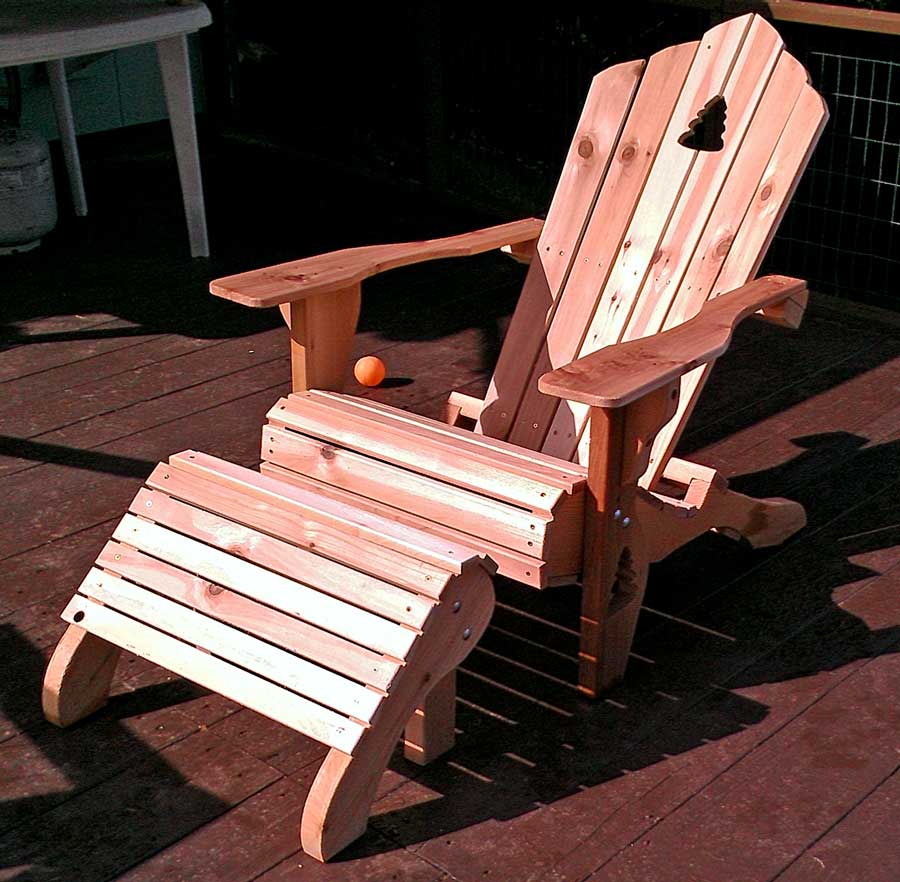 Monday, February 24, 2014: I used this day to build the Adirondack stools for the chairs. This was a guick build except that I was one board short so must finish the project tomorrow or after getting the needed board. So the completion of this project ended up with two chairs and two stools. I was going to build a small table to complete the set but I believe I'll wait to learn if we really have a need for it. I'm imagining setting my drink on the arm of the chair rather than a table. Click these two photos to see additional views.
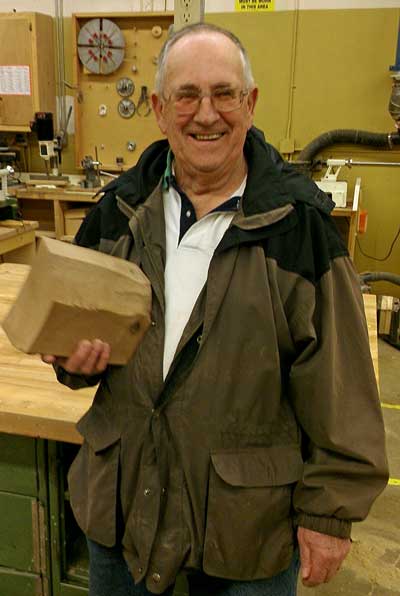


