 |
|
Warranty Repairs on Cameo F35SB3
For purchase details: Click Here
For delivery details: Click Here
For changes made after purchase: Click Here |

|
|
| June 5, 2007: I'm going to use this page to detail the repairs that are made to the Cameo which I consider to be "Warranty Repairs". The Cameo has a two "everything" warranty with a 5 year chassis warranty. I truly hope that I never have to actually deliver the Cameo for repairs but it may happen. Most of the repairs, I plan to do myself but most RV owners would probably return their RV to the shop for repairs under warranty. This first repair seems silly but I consider it something an owner would return to the shop. At the bottom of the shower door is a drip tray and vinyl squeegee to keep water in the shower pan rather than dripping onto the bathroom floor. It was attached with some sort of contact cement. We took delivery of the Cameo on April 18, and exactly one month later, the tray fell onto the bathroom floor. Keep in mind that we are full time RV people, so at least two showers per day in this bathroom. |
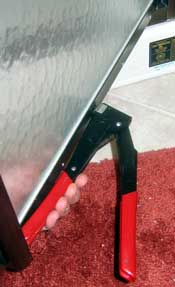
| At first, I reinstalled the drip tray using double-backed tape. But that lasted only one day before it fell onto the floor again. I own a pop-rivet pliers, so I bought 1/8 inch aluminum (so they won't rust) rivets, drilled (5)1/8" holes through the shower door and tray. I then installed the rivets which held the tray nicely to the door. The tray won't be falling off now. I also sealed the top of the tray where it meets the door to be sure no water seeps between the tray and door. I think it looks professional. I hope all the needed repairs are this easy. |
 |
|
 |
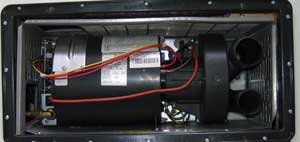 |
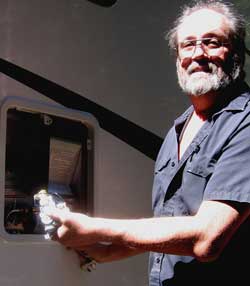
July 6, 2007: On June 6, Gwen sent me an email at work to let me know the furnace had stopped working. The furnace fan would come on for 20 seconds then turn off ... no heat. I called Suburban to get some help and advice of how to use their warranty. The lady I talked with was very rude and basically |
|
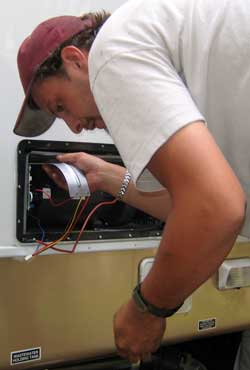
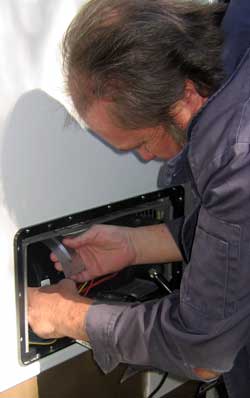
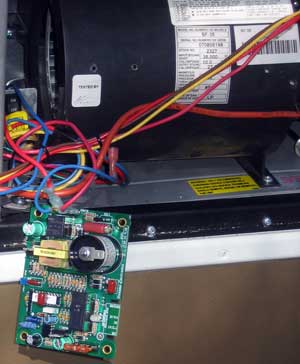
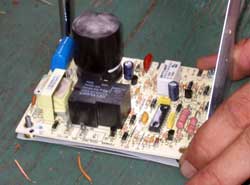
| did not want to talk to me. She referred me to their Website for authorized repair stations. I called the nearest one and was told they were so busy they were NOT accepting new customers. They gave me a referral of a mobile RV repair. When I called him, he moaned and groaned about having to travel to Howard Prairie Resort. In the mean time, I found A2Z mobile repair working on a motor home just 100 yards from me. He said he would fix the furnace and order a replacement circuit board. I didn't hear from him in three weeks so called him twice. He didn't return my calls so I went on a search again. I found Berry's Mobile R.V. Repair. Travis Berry is the owner and repair person (541-621-0759-check my July 27 entry below before calling this guy! ). Travis already had a replacement part and said he would fix it today. He arrived and began work immediately to remove the circuit board. It actually came out easily. |
 |
|
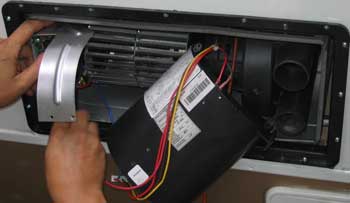 |
Travis showed me how all the manufacturers order low quality circuit boards hoping they will last for the 1 year warranty period, then after they fail, it's MY problem not theirs. He installed a board from Dinosaur Electronics which are far better quality. I had already heard of them for replacement circuit boards of other RV equipment such as the refrigerator. |
|
|
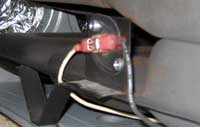 |
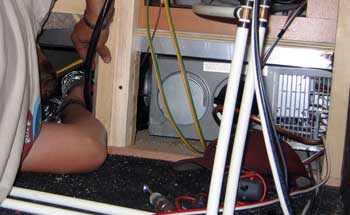
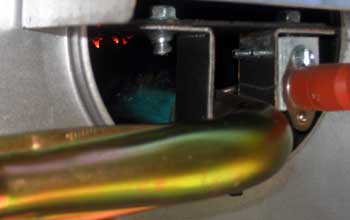
After the installation, the furnace was still not working so the problem was likely the high limit sensor located in the rear of the furnace. The high limit sensor will shut off the furnace if it gets too hot. Travis had to crawl into a pretty tight spot to get behind the furnace. He took the photo to the left of the sensor. As it turns out, a wire was loose on the sensor. Once it was tightened, the furnace worked. |
|
| This whole process took about 2 hours. Travis was going to put the old circuit board back into the furnace but I decided to keep the Dinosaur Electronics board to be sure the furnace did not fail when we really needed it. The total bill went like this: $100 for travel time to the resort and back, 1.5 hours of labor at $70 per hour so, $105, finally, $146 for the Dinosaur Electronics circuit board for a total of $351. Here's how I feel about paying $351 to find a loose wire. Yes, had I known it was a loose wire and where to look for the loose wire, I could have fixed it. But there is no way I could have discovered this on my own. I can however, do this sometime in the future if it is ever needed again now that I've seen it done the first time. As for the $100 travel fee, Travis lives in White City, about 55 miles and 4,000 feet below the resort. I think I got a bargain, since $100 is much less than $70 per hour for travel. Had I connected to the trailer and pulled it to him, it would have taken all day and I would have burned more than $100 in diesel to bring him the furnace. I think keeping the Dinosaur Electronics board was the right thing to do. I did learn that Travis charged about $25 more for the board than what I could have ordered from some of the retail location links found at the Dinosaur Electronics site. I did get $25 worth of information from Travis concerning preventative maintenance. I plan to send the bill to Josh, the warranty person at Wager's Trailer Sales to learn if Carriage will help with any portion of the bill. Finally, yes, I would call Travis back for another repair if needed. He knows what he is doing. (See my re-evaluation of Travis below after his repair failed) |
|
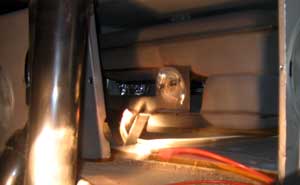
| July 27, 2007: About two weeks ago, we used our furnace during a cold spell. It lasted only two hours before quitting. I called Travis but he has not returned my calls. So much for my recommendation of Berry's Mobile RV Repair. Anyway, I decided that the likely problem was the high limit sensor, so I climbed in a routed a wire around the sensor. |
 |
|
Unfortunately, the lights did not return to the circuit board. Of course, I checked the fuse before doing anything.
This week the Suburban water heater has stopped heating with gas. Only the electric part of the water heater works. I checked the jet which was not clogged. I also checked that propane was reaching the control valve. Apparently the control valve or the controller board has a problem. I've called another mobile repair guy to check both the furnace and the water heater. I am confident that my dealer would fix both these problems without charge however, the travel time to Salem would be one day each way and the diesel would be $200. |
 |
August 10, 2007: Russ Hammer from Hammer's On Site RV Repair Service (541-779-7165) showed up exactly at 10 am, the time we had scheduled. If you check above, you'll see the first repair on the furnace lasted only 2 hours before the furnace quit. In the previous repair, I had a new Dinosaur Electronic control board installed to insure I would have no further problems. As it turns out, that board only lasted 2 hours. It didn't take Russ long to learn that the control board was the problem. He installed a new control board and the furnace was repaired. Of course Dinosaur Electronics has a three year warranty so there was no charge for the new board and Russ only charged $25 labor plus a $75 trip charge which we had agreed on before |
|
he made the trip to the resort. As for Travis, the first repairman, I don't think he can be blamed for the defective first board so we can only blame him for not returning my call after the furnace stopped working after his repair.
Next came the water heater. The hot water heater is not working on gas, it works only on electricity. I had already confirmed gas to the control value but no gas coming out of the value. I had already decided, it must be a defective valve or defective controller board which tells the valve to open. |
 |
|
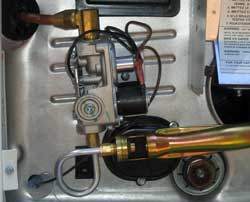 |
Russ confirmed power from the controller board instructing the valve to open. So it is a defective valve. Russ did not have one. Here is where we were instructed to call Carriage Warranty department which we did but could only leave a voicemail. This was discouraging because we made sure we were making the call before closing time back east. So the clock is ticking. We have an Escapees rally planned for mid-September where we will have no power and must heat water using gas. |
|
| September 6, 2007: I have finally received the final word from Carriage on the repair from Barry's RV Repair above. Carriage will not give anything toward that repair. Since no part failed and it was only a loose wire, they will not pay anything toward the labor charge. I have learned that one must follow Carriage protocol for any chance to get support with their warranty. Their protocol is to have the serviceman call them first for repair approval after diagnosis. I'm not sure this protocol would have worked in this case since the diagnosis would have been a loose wire on the over-heat sensor. By the time he called Carriage, the repair would have been complete. Again, I would have expected no-charge from a Carriage dealer, but it was an expensive repair from an independent mobile repair service. As for Barry's RV repair, I would absolutely NOT call him for a repair. Not because he misdiagnosed the problem but because I believe he over-charged for the repair to begin with and would NOT return my calls when the control board he installed failed after two hours of use. Russ from Hammer's RV repair will be returning tomorrow to replace the failed water heater part, we'll see how Carriage has supported that repair. |
|
|
| September 7, 2007: Russ, from Hammer's RV repair has returned to replace the defective control valve on the water heater. Carriage has supported this repair and Russ from day one. They referred Russ to Suburban, the water heater manufacturer. Suburban immediately shipped a replacement valve to Russ and paid him the labor charge to make the replacement. My warranty repairs are a partial success. As long as a part is defective, I can expect Carriage to pay for the part and labor for the repair but not the travel time for the mobile repairman. I would also expect a Carriage dealer to make any repair without charge as long as I take my Cameo to their service department but I don't have that experience yet. I would highly recommend Russ. He communicated with me many times during the repair process to let me know what progress was made. I would call him first for any repair. |
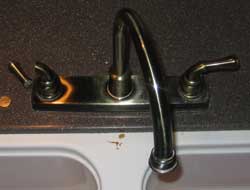
| October 14, 2007: The left handle of the kitchen faucet has been causing problems for quite some time. The handle is threaded into the base, and continuously comes loose and must be tightened. It was finally stripped and would not thread into the base. I used epoxy to secure the handle, which held for two days then it broke again. |
 |
|
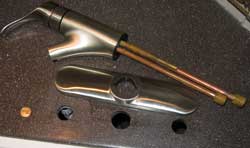 |
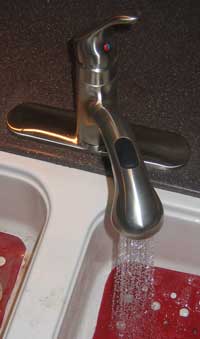
Since the Carriage has a two year bumper to bumper warranty, I'm sure Carriage would have replaced the faucet, however, we wanted something nicer that what was original equipment. This week I have been corresponding with Gary about his pending purchase and discussed the medium |
|
| to low quality of the faucets and other "surface" parts of the Cameo. The Cameo is in the $55,000 to $70,000 price range (at least in 2007) with Carri-lite the next step up at $85,000 to $100,000 and Carriage above that at about $125,000 plus. I know the Carri-lite comes with a nice single handle faucet and spray. We paid $154 for this Moen at Lowes and are very happy with it's operation. Much nicer than the original equipment. I just hope the lower quality items are only surface deep and as we replace them, we have a solid foundation to build on. I don't believe any other brand offers better equipment in this same price range. We are still very happy with the floor plan which was the main reason for the Cameo F35SB3 purchase. |
 |
|
| November 7, 2007: To summarize our warranty problems so far, we had a loose wire on the furnace which ended up costing us more than $400 in the long run because I upgraded the circuit board and Suburban would not pay anything to fix a loose wire. Suburban did, however, pay to replace the gas valve on the waterheater but would not pay the travel charge from the repair man so that was $75. I upgraded the broken kitchen faucet rather than have Carriage send us a replacement so that was $154. Currently, our Norcold model N1095 refrigerator is freezing everything in the refrigerator compartment. Norcold has given us an authorization number for repair but says we much have an authorized service center make the repair. There are two in southern Oregon. One is mobile and wants $125 just to come to the trailer and won't schedule us for three weeks. The other is an RV dealer and has given us a day in about three weeks. I have made the appointment to visit the RV dealer. I have also been working with Russ from Hammer's RV to get him "authorized", if that happens, we will invite Russ to make the repair and expect to pay his $75 service call. I'm not understanding why we are having so much trouble with the appliances, but hope the refrigerator repair is simple. |
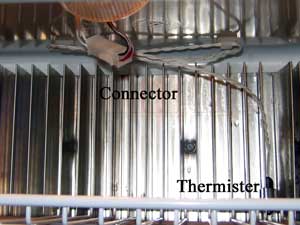 |
November 29, 2007: Weeks ago, our Norcold refrigerator began freezing items in the refrigerator compartment. Norcold immediately suggested it was the "thermister" but insisted that the refrigerator had to be seen by an authorized service center. Russ has not be authorized so I towed the trailer 30 minutes to the nearest service center rather than pay $125 to a mobile service man. In the last weeks I've received emails from readers suggesting the thermister is a $20 part and could be easily replaced. My thought was, "what if it turns out |
|
to NOT be the thermister, then I must deal with the problem during our month long trip to New Mexico". The trailer sat at the service center the entire day. It seems everyone except the service man recognized the problem was the thermister. Apparently Norcold insists on a protocol of tests before they will provide this $20 part. Finally, at the end of the day, the service man announces that we need a new thermister but they have none in stock. They can have one by Friday. If you look at the photo, the thermister is attached to the wires leading to the connector. It is a simple matter to connect then install this part. I made arrangements to pick up the thermister on Saturday morning and install myself rather than return the trailer.
Norcold customer service STINKS! Proper customer service would have said during my first phone call, "I'm so sorry your model N1095 is freezing your vegetables. Tell me your location and I'll have a service representative there to make the repair within 24 hours with as little disruption of your day as possible." Does this sound unreal? I would have gotten this sort of customer service from Les Schwab Tire Co., Costco, even WalMart has better customer service and we are NOT discussing a 99 cent trinket. What would it have cost Norcold to take a WILD chance and send me the $20 thermister with installation instructions eight weeks ago? Norcold obvious sets profit before customer satisfaction. Let's hope their insistence on a day long evaluation of the thermister actually fixes the problem. |
December 3, 2007: The thermister has arrived ... a weekend after it was promised. It simply plugs in .. easy installation. Now, we'll be watching it to learn if this fixes the problem.
Note: It did fix the problem but failed again two years later and had to be replaced a second time. It's a cheap and easy fix to do it yourself. |
 |
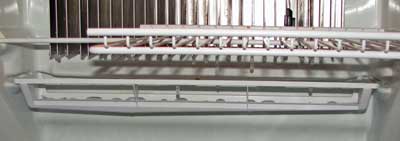 |
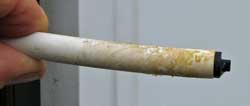
February 27, 2009: Our refrigerator auto defrosts in the lower compartment. The frost on the fins melts and drips into the tray you see below the fins. But the tray is to drain to a smaller tray in the back of the refrigerator. The water |
|
| in this small tray evaporates to the outside. However the inside tray was overflowing and not draining. I discovered a plastic tip in the tube which was clogged. I'm not sure of the purpose of the plastic tip but I cleaned and replaced it. The defrost tray drains well now. |
 |
|
| |
|
|
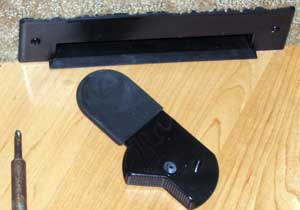
| December 2, 2007: Today we found the switch to the dust-pan accessory to our central vacuum cleaner broken leaving the hose open. This accessory is situated along the floor. When brooming spills, no need to find a dust-pan, just flip the switch and vacuum the crumbs. Without closing this opening, the hose will not have enough suction for vacuuming. I've stuffed a rag into the opening to block the open. Without closing this opening, the hose will not have enough |
 |
|
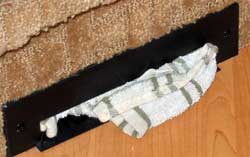 |
suction for vacuuming. I've stuffed a rag into the opening to block the open hole and allow the rest of the central vacuum system to work.
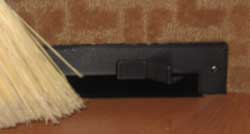
March 13, 2008: The VacPan has been replaced. Wagers Trailer Sales (our dealer) and Carriage have stood behind the two year warranty and replaced it at no charge. The removal and installation was fairly easy if you have to do it yourself. If you own one of these, I |
| HIGHLY recommend you cycle the switch by hand rather than by foot. The design of the switch pivot point is very weak and can easily be broken. If you follow the link, you'll see it will normally cost $39 plus shipping to replace the VacPan. |
 |
|
|
 |
February 8, 2008: We continue to struggle to get the central vacuum system to work for us. This was about a $400 option including a dealer discount. Carriage factory installed the Dirt Devil Model CV950 central vacuum. It seems to have good suction but the bags are very expensive, about $3 each, although we have learned to buy the Dirt Devil "C" bags and shorten them to fit. These bags are only $1 each. The sound the motor makes is a |
|
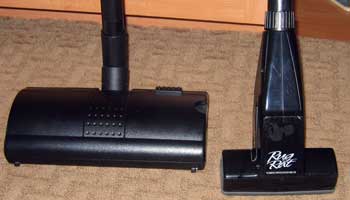
| very loud, high pitch, whine. As reported above, the dust pan accessory switch broke and I have still not removed this attachment to send to the dealer to learn if they will replace it. The continuous problem we have had with this system from DAY ONE is with the ability of the system to pick up pet hair. The system came with the "Rug Rat" pictured to the right in the photo above. The Rug Rat has a brush rug beater which is driven by the the suction of the vacuum. The first Rug Rat lasted two weeks and was replaced by Dirt Devil. This second Rug Rat worked OK for about two weeks but is continually getting clogged and must be taken apart at least once each time we use it. I have doubts that it would work well even without pets. We finally decided to spend another $150 for the cordless, rechargeable, motorized power head pictured to the left of the Rug Rat above. We found it for $150 while InterVac (the manufacturer) wants $169. This means we have spent about $550 for this vacuum system hoping to get it to work as well as the $60 Bissell we gave up for this central system. If you are shopping for an RV central vacuum system, I think you should expect to have to spend the extra $150 for the battery powered head to get it to work, with or without pet hair. Also, I would choose the InterVac brand over the Dirt Devil just to reduce the noise, the InterVac is MUCH more quiet running with the same suction. Also, now you know, you are paying a huge premium to get a central vacuum system over the standard upright and the upright works better. |
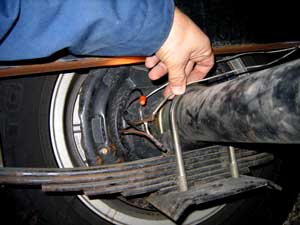
| February 26, 2008: After returning from our trip to California a couple of weeks ago, I discovered the two wires leading to the brakes on the rear axle of the trailer to be severed. That means I was working with only 1/2 my trailer brakes during the trip. I must record this in my memory because I felt the brakes were not working as well as I had remembered but chalked it up to not having towed the trailer in a while and I was just not use to the tow experience. What I need to put into my memory is, if is seems different, check the brake wires. If the brake wires are OK, have the brake |
 |
|
| drums removed and checked. It was an easy repair with wire nuts and lots of duck tape. I plan to add more wire hangers too, to be sure the wires stay out of the way. These wires were pinched in half as if caught between the axle and frame. I would guess, between the ubolts and frame. I'll make sure the wires are routed around any pinch points. Hopefully the shocks I'm adding will help too. Click the photo to see a closeup of the wire break. |
| March 5, 2008: I got a surprise call today from Carriage, the manufacturer of the Cameo. It was the customer service department checking on some of the repairs we have made to the Cameo. It was a very cordial call which ended up with Carriage customer service asking for copies of my repair receipts and an agreement that the vacuum pan would be replaced at no charge. We talked about the furnace repair and the replacement of kitchen faucet. They wanted to make sure the refrigerator was repaired correctly on warranty. And the hot water heater was working properly which was also repaired on warranty. This was the kind of customer service I was expecting from Carriage and until today hadn't experienced. I was very pleased and hope sending copies of receipts for the faucet and furnace repair will result in some of these repairs being covered by warranty. |
| April 8, 2008: Today we received a surprise check from Carriage as a warranty refund for the replacement of the kitchen faucet and partial refund for the problem with the furnace. Although Carriage had supported us with the water heater problem and refrigerator problem, we previously had no support for the faucet or furnace. The check was for the amount of $251, very welcome and very supportive. This arrived after a follow up telephone conversation reported above on March 5. |
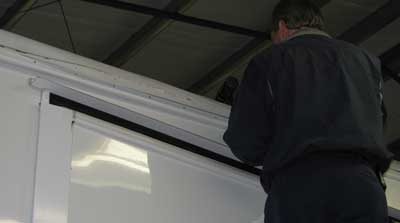 |
November 10, 2008: Bobby is removing the roof trim to prepare to take all the wrinkles out of the roof rubber. We have delivered the trailer to Wager Trailer Sales today to take care of a number of warranty items. The Cameo as a bumper to bumper two year warranty which will end next April. Beside the roof wrinkles, we've asked for the kitchen table to be exchanged due to the failing finish, the shower fixture to be exchanged due to |
|
| peeling finish, the bedroom slide motor is to be replaced because the slide inches away from the trailer as we travel down the road, the toilet is no longer holding water so it is to be repaired, and finally, the slides are to be fine tuned to match the coach when retracted. All work was covered by the Cameo warranty. Wagers did a good job of correcting and double checking all the items we requested and more. |
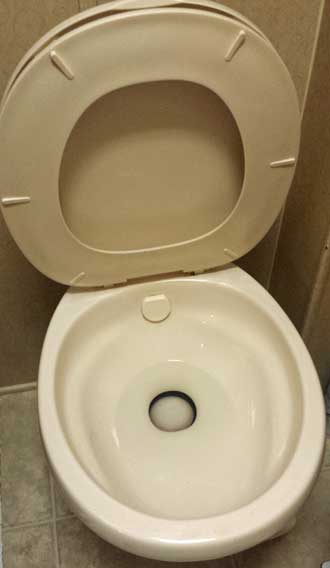
November 14, 2008: One of the repairs was to a toilet which would not hold water without pushing the control arm back in place. The Wagers service tech lubricated the seals and it seemed to be working fine a couple of days ago when we left Salem, however, the toilet has already resumed the original symptoms. I plan to dig into it myself and lubricate with Vaseline.
February 9, 2009: Bringing this up to date ... I've tried the Vaseline and it works. You must put it under the rubber ring which surrounds the valve at the bottom of the bowl. One application seems to last about 45 days, then you must reapply. RV stores have an "official lubricant" for about $9. I've not tried it. I just can't bring myself to pay for it. |
March 13, 2009: Our Magic Chef stove has four points where the grill top fits to the metal top. The grill is often removed for cleaning of the stove top. It's easy because there are four rubber grommets to give the grill a secure fit to the top. The grill just lifts off. We've owned the trailer for nearly two years and have notice some significant wear on the rubber grommets. Today I went shopping for replacements and found them at the local RV store for $3.69/four. I highly recommend that you change these about once each year. There has been some minor damage to our stove top because we waited a bit too long. They are easy to replace. They just snap in place.
|
 |
|
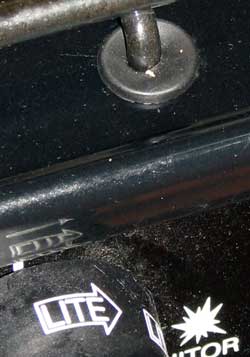
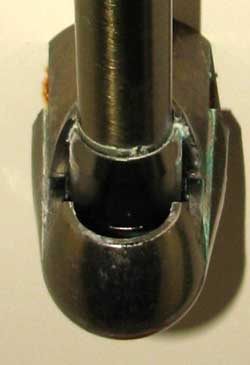
| March 21, 2009: This is the shower unit in the bathroom. This unit has been used everyday for nearly two years. It is showing wear for sure. The shower head sits in a cradle which slide on the rod. We have noticed that the back side of the rod is cracking and will need to be replaced. You are able to access the rod by pulling the bottom bracket toward you. It slides away from the wall and off. You can then unscrew the bottom bracket from the wall. The rod slips out of the bracket. If the whole unit needs to be removed, slide the top half of the upper bracket away from the wall and remove both brackets. |
 |
 |
 |
|
 |
April 8, 2009: Carriage has replaced the entire shower rod assembly, not just the rod. This was an easy install. Carriage sent the replacement, no questions asked. |
After Warranty Repair |
|
Wednesday, September 16, 2009:
Today, we paid for a "non-warranty" repai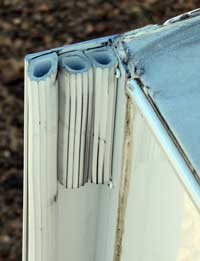 r to the kitchen slide. We returned the Cameo to the point of purchase, Wager's Trailer Sales for the repair. I was somewhat disappointed in the "repair" completed by Wager's Trailer Sales. The kitchen slide did not match the trailer very well and was bending and damaging trim at the top of the slide while barely touching the bottom of the slide to the trailer. We've had two other repair locations look at it and both felt it needed some sophisticated rail adjustments which they couldn't do. Wager's didn't make any sophisticated adjustments. According to the Carriage protocol, they added two additional six inch rubber gaskets to the top of the slide which helped to stop the bending and aided in bringing the bottom of the slide toward the trailer body. So Wager's replaced the rubber gaskets and part of the trim on both sides of the trailer, checked the slide gear teeth, and that's all. The cost was $271. This was something I could easily have done for a fraction of the cost. One of the servicemen referred to the repair as a "bandaid". I believe the Carriage engineers need to redesign the slide mechanics, and this "bandaid" is to keep a bad design working a little while longer. The slide mechanics is one of the weakest parts of the Carriage design. It may be unique to the Cameo but I wouldn't know that without talking with some Carri-lite or Carriage owners. I can't complain about Wager's work, they were following Carrige protocols, just a warning to current and future Cameo owners, you better keep an eye on the slide mechanics. r to the kitchen slide. We returned the Cameo to the point of purchase, Wager's Trailer Sales for the repair. I was somewhat disappointed in the "repair" completed by Wager's Trailer Sales. The kitchen slide did not match the trailer very well and was bending and damaging trim at the top of the slide while barely touching the bottom of the slide to the trailer. We've had two other repair locations look at it and both felt it needed some sophisticated rail adjustments which they couldn't do. Wager's didn't make any sophisticated adjustments. According to the Carriage protocol, they added two additional six inch rubber gaskets to the top of the slide which helped to stop the bending and aided in bringing the bottom of the slide toward the trailer body. So Wager's replaced the rubber gaskets and part of the trim on both sides of the trailer, checked the slide gear teeth, and that's all. The cost was $271. This was something I could easily have done for a fraction of the cost. One of the servicemen referred to the repair as a "bandaid". I believe the Carriage engineers need to redesign the slide mechanics, and this "bandaid" is to keep a bad design working a little while longer. The slide mechanics is one of the weakest parts of the Carriage design. It may be unique to the Cameo but I wouldn't know that without talking with some Carri-lite or Carriage owners. I can't complain about Wager's work, they were following Carrige protocols, just a warning to current and future Cameo owners, you better keep an eye on the slide mechanics.
Monday, January 18, 2010: I added the photo (above... scroll up) today at the request of one of my readers. I suppose it's a great illustration of a simple repair to what was thought to be a complex problem. Again, I don't want to fault the service department at Wagers. There is no doubt that the "Carriage protocols" the wagers service department referred to called for checking the slide tracks and gearing and probably motor mounts. They charge $95 per hour so if you follow the protocols, the time can add up. What can we learn from this? 1) Look for simple solutions first. 2)Get as much information as possible to complete the repair myself.
You'll see below that the opposite slide stopped working (moving) about 6 weeks after the kitchen slide problem. What seemed like a worn gear problem needing gear replacement turned out to be loose motor mount bolts. It took only ten minutes to find and tighten the bolts to fix the problem. |
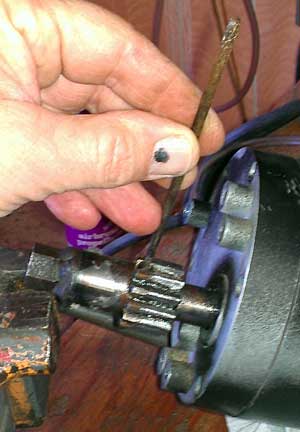
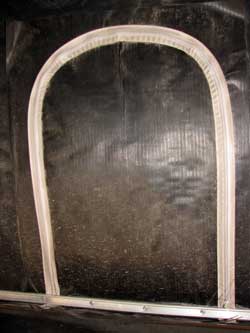
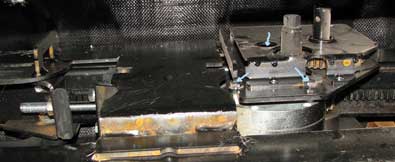
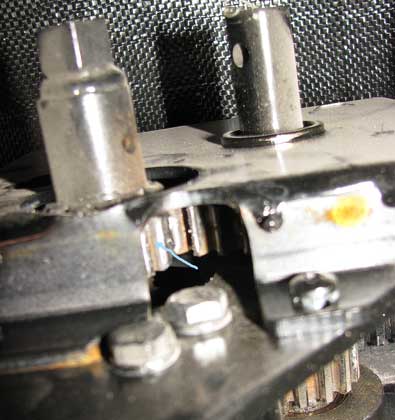
| Saturday, October 31, 2009: YIKES! The door side slide will not come in. (I've had to make this repair MORE than once so please see the 2012 update below.) We'd been hearing an occasional noise from the slide as if a gear was slipping but yesterday, the slide would not move. I got under the trailer, unzipped the motor and gear access door at right and watched what was happening. Indeed, the small gear attached to the motor was slipping against the larger gear. I'm pointing to the slipping gear in the last photo below on the left. I called Wagers, our dealer, and Pete was kind enough to tell me how to remove the motor and the gear, then replace the motor. In the mean time, I posted to the Carriage Owners Forum to learn if anyone on the forum had experience with this replacement. Almost immediately I got an answer from a forum member that his trailer had the same symptoms but it turned out to be loose motor mount bolts and the gear did not need to be changed. I switched off the current to the motor at the control panel, then checked the motor this morning. |
 |
|
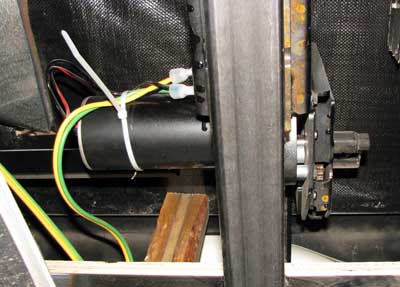 |
It felt solid but when I put a socket wrench on the bolts, they were loose. It looks like there are three motor mount bolts although a fourth might be above the bottom right bolt. You can enlarge these photos by clicking on them. I tightened all of them, then tested the slide. It worked normally. I've already ordered the replacement gear from Wagers and I think I will keep it on hand. I see metal shavings, probably from the slipping gear, but it would be nice to have this part on hand since this gear is known to wear out. My warranty was up in April so Wagers would have |
|
charged thirty minutes for this repair ($50).
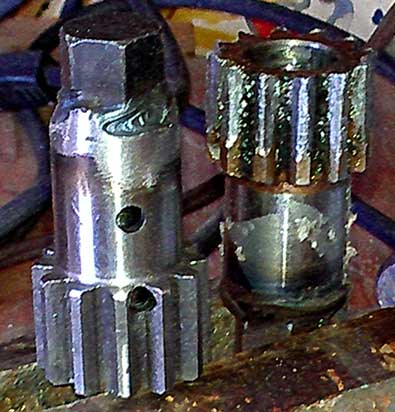
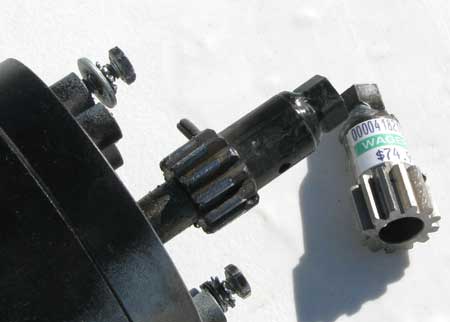
The slipping gear was the small one to the left below. To replace the gear, I would have needed to cut the motor wires because those are crimp-on wire connectors rather than screw on. So I'd need two wire connectors and the replacement gear. |
 |
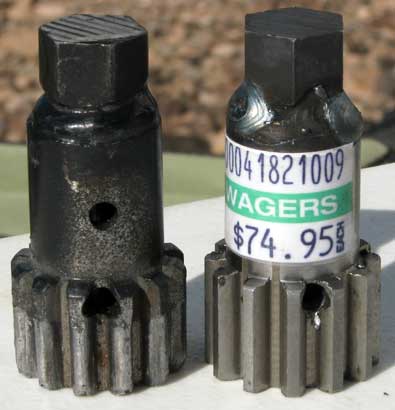
| After removing the three (or four) mounting bolts, cutting the wires, the motor with the gear attached should pull out. Pete mentioned rocking the gear with a wrench if it has pressure on it. Once out, punch out the pin holding the gear, replace the gear and the pin, then fit the motor back in place meshing with the larger gear. Sounds easy, huh? I'm glad all I had to do was tighten the motor mount bolts, but I'll be ready if the gear actually fails. Oh, the gear is $74.95 at Wagers. |
|
|
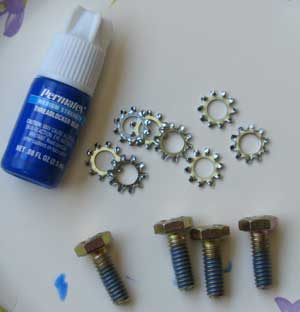
| Sunday, May 16, 2010: The slipping gear has returned. I'm a member of a Carriage owners Yahoo group (I've put a link below where you can subscribe) so I posted a notice to the group to learn if other owners had found a solution to this problem. I got help from several owners. One could NOT solve the problem and sold out, others just told stories about their slide problems but no solutions. I combined a couple of suggestions. The first suggestion was to get better #8 bolts which I did but learned the bolts were too long. I also learned the original bolts were too long by threading them into the hole without a washer. The bolts bottomed out with about 1/16" of space between the bolt head and frame. The washer is about 1/16" (maybe) but I'm doubling the washers to be sure. |
 |
|
|
The second change was to switch to star washers rather than split washers. Third is the blue Loctite. I used the original bolts because the #8 size I could find were a bit short. I stacked two star washers with a flat washer between them and forced the motor against the gear while moving the gear to be sure it was seated at it's lowest position. When I tightened the bolts, they seemed more secure than before. The slide has been run twice and seems to be working normally. I think it helps to keep my finger's crossed. |
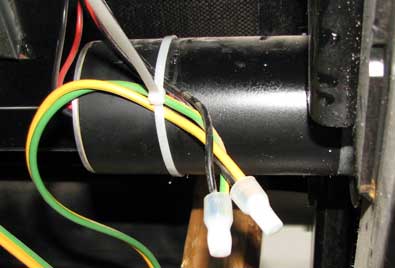
| Saturday, January 29, 2011: Problems with the door side slide began AGAIN as we left Bouse. This time I decided to remove the motor because the last repair, I over tightened one mounting bolt and striped the thread on the motor. I felt it might be possible to tap that thread to 5/16 and add a larger bolt to that hole. To remove the motor the two motor wires must be cut along with the zip tie holding the wire (see the photo above). Be sure to cut close to wire nuts to leave enough to reconnect. The motor has five bolts, one is behind the protective plate and very difficult to access. |
 |
|
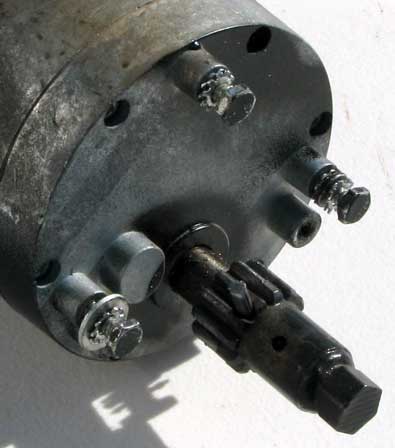 |
Once all five bolts were removed and the wires cut, the motor was easy to remove. I found the pin holding the gear holding by a "thread". It was nearly out of the hole and took only a slight tap to remove. Of course the slide would have gone no-where had the pin dropped out. Since I already had the new gear, I decided to change the gear hoping it would help the problem. The old gear teeth were worn and rounded so I'm hoping the new teeth would give a better bite on the larger gear. The motor metal is probably solid aluminum, so a soft metal. The Carriage forum suggestion to change to a stainless steel bolt is wrong, you simply can not tighten the bolts without striping the motor bolt threads because of the soft metal. The holes are barely the length of the bolt so it's possible to bottom out the bolts BEFORE they tighten, hence the multiple washers. I also blew out the holes with an air compressor thinking there might be debris in the holes. |
|
I was able to tap the striped hole with a 5/16" tap, then used a 5/16" bolt. I used Loctite on all bolts and holes and had to purchase a special wrench to tighten the fifth motor mount bolt behind the plate. I did NOT have to re-drill the one plate hole for the 5/16" bolt, the hole was already 5/16". Once all five bolts were in place and tightened then wire reconnected, I tested the slide which seemed to work like new again.
My advice, don't over tighten these bolts, keep a gear on hand for replacement, use extra star washers to space the bolts so they don't bottom out before tightening.
The biggest engineering design problem here is the use of 1/4" bolts for this motor mount. Larger bolts are needed with so much pressure put on this motor. |
 |
|
|
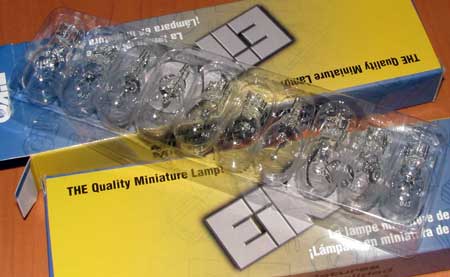
| Thursday, September 30, 2010: I've solved an annoying problem of finding the right 12 volt bulbs for our fifth wheel. There is one size bulb which we always seem to be in need and the price can vary a lot at RV dealers when I can find them. I found this online source at only 24¢ per bulb so I bought 20 of them to have them on hand. You can click the photo to see a close up of the bulbs. Our problem is the three bulb fixture in the bathroom. For some reason it goes through lots of bulbs. |
 |
|
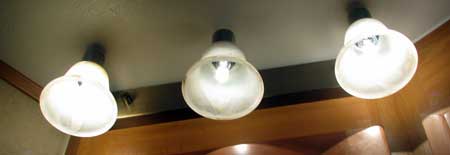 |
This bulb also fits two fixtures in the living area. The shipping charge is free if you order $50 worth, since I didn't want that many bulbs I checked the shipping cost which was more than the cost of the bulbs. I added some 12 volt flood bulbs to the order to fit our many |
| spotlight type fixtures in the living area. That actually brought the cost of the freight down a little so I was happy to pay the shipping cost to get two bulb sizes. These folks have 1,000s of bulbs so I'm sure they will have yours. |
|
February 17, 2012: This repair was done on Septembe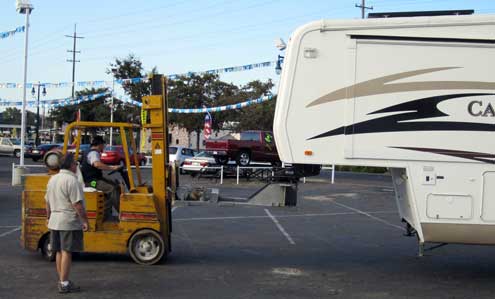 r 12, 2011 but I'm just now reporting on it. After a tire blow-out in July, it became apparent that the heavy duty shackle kit was needed. This was after a 5 day visit to Fox RV in Middlebury, Indiana. An RV repair location recommended by MANY Cameo owners. They were asked to check the shackles and make a permanent repair to the door-side slide motor mount. They FAILED with BOTH requests reporting the "shackles are fine" and they failed a month later and the slide problem returned after only a few uses. I'll report more about the slide problem below. Click the photos below for additional views. r 12, 2011 but I'm just now reporting on it. After a tire blow-out in July, it became apparent that the heavy duty shackle kit was needed. This was after a 5 day visit to Fox RV in Middlebury, Indiana. An RV repair location recommended by MANY Cameo owners. They were asked to check the shackles and make a permanent repair to the door-side slide motor mount. They FAILED with BOTH requests reporting the "shackles are fine" and they failed a month later and the slide problem returned after only a few uses. I'll report more about the slide problem below. Click the photos below for additional views.
|
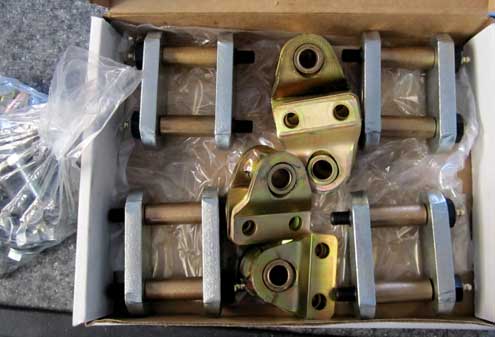
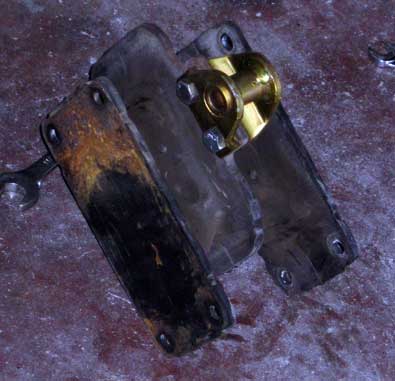
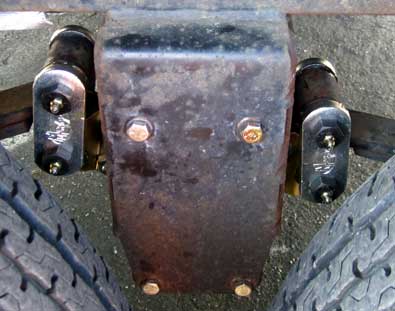
The Mor/Ryde heavy duty shackle replacement kit is relatively cheap, $160 and includes greasable shackle pivots. The shackles are twice the thickness of the originals. Just being able to grease these joints makes this kit worthwhile. Our trailer only has about 20,000 miles on it so I highly recommend the upgrade long before that. The labor to install was $500. You might be able to do this yourself but it would require a lot of jacks and jackstands to do it. Mor/Ryde would be happy to provide you with detailed instructions of how to do it. |
 |
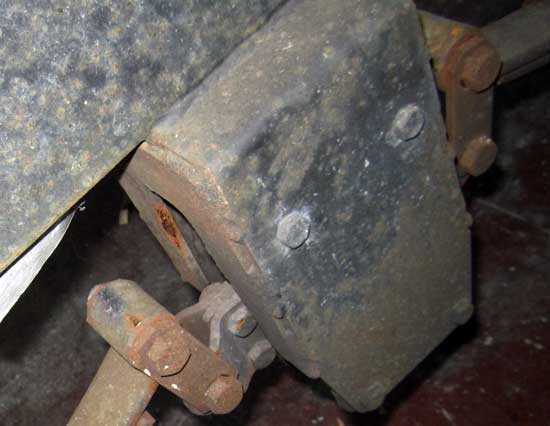
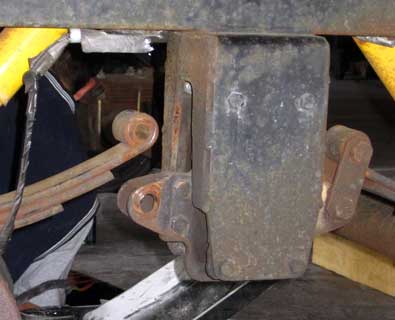
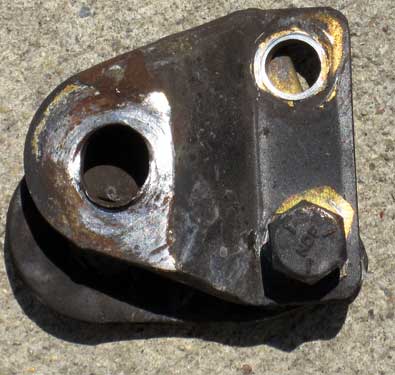
These are views of the shackles and suspension parts before the new kit was installed. Every shackle and attached bolts were worn. The kit includes all new bolts and shackles and now they can be greased which will reduce or eliminate the wear. The broken shackle below was from the axle with the blow-out in July. |
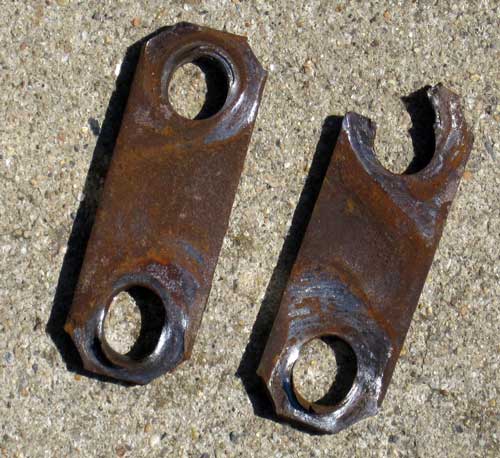
All shackles were worn, these were the worst, from the side of the blow-out. The supporting bolts are just as bad. Click the photo to see them. |
|
| |
| Note the grease nipples of the new kit. I'm feeling much more comfortable now with the new kit installed. I highly recommend the kit change before 20,000 miles. |
|
|
| Tuesday, March 6, 2012: First, I'll say this problem began in October, 2009 and you can see how I repaired it then. Since then I have dealt with it about every 3 - 9 months. I finally gave up on the repair myself and had highly recommended Fox RV in Middlebury, Indiana make what I hoped would be a permanent repair. You can view the Fox work order and invoice here. Fox treated us well allowing us to park over the weekend in their parking lot for a Monday repair. However the repair lasted at most, eight openings of the slide before it began slipping again. Additionally, you will see on the work order a line to check "All Axle Mounts" (shackles). Eighteen days after this check, one shackle failed and when others were checked, they ALL needed to be replaced. That story is here. This was a frustration at best. I suppose the lesson is to go to an RV repair location which stands behind their work and one which you can easily return to since Fox RV is 2000 miles from us. Anyway, I must tackle this problem AGAIN myself and hope I have come up with a solution so that the repair is permanent. Carriage has zippered openings to make access to the slide motor and gear assembly easy but the door-side zippered opening has been used so much the zipper has finally failed so I decided to remove the entire bottom covering (photos above). The spare tire must be lowered to do this. I cut the covering to just remove the part of the cover over the slide motors. |

The portion of the cover I removed is pictured here along with the new fabric I will use to replace the portion I removed. I was going to attempt to have a "tent maker" install zippered doors as the original but that was to cost more than $100 but no-zippers was only $20. The tent fabric I purchased was also superior quality although I've not had any problems with the original fabric (yet, knock on wood). When I reinstalled the fabric, I did so in such a way as to allow the front half of the fabric to hang without removing the tire allowing access to both slide motors. I'll say now that we began having slipping problems with the off-door slide during our last trip. I found the motor mount to be loose and the bearing cover screws to be loose allowing the shaft to shift slightly. I used blue Locktite on all screws and bolts and secured the motor which seems to have solved the problem (again...knock on wood). |
|
| The photo above shows the door-side slide motor gears with the cover plate removed. With the trailer bottom cover removed, the access is easy. The zippered openings did not allow this view nor easy access to the cover plate for removal. This slide system is an engineering NIGHTMARE for multiple reasons which I will explain as you read this. This motor and the gear attached to it must LIFT the door-side slide 6 inches before moving it in. The motor seems to have enough power to do it and you better hope it doesn't fail because replacement is $400 for the motor alone. The main problem I'm having is the motor mount design. You can see five motor mount bolts (made of steel, of course), passing through a steel motor mount plate and threading into the motor housing (aluminum). So you must NOT torque too much on the mounting bolts or you will strip the aluminum threaded holes. That is stupidity number ONE. These bolts need to be as tight as possible to keep the motor in place. These five bolts are 1/4" x 5/8", stupidity number TWO. They need to be larger and longer to bite more threads in the motor housing. I learned this by stripping the bolt on the lower left with my repair in 2009. Note it is now 5/16" because I tapped it for a larger bolt after stripping it. I was careful on the other four, however, I learned with this repair that Fox RV had stripped another bolt on the bottom right. They didn't take the time to tap it for a larger bolt so that helped the problem to begin again so soon after their repair. |
|
| The motor is removed so you can see the five mounting holes in the motor housing. You can also see the (6)screws (5 visible) of the motor housing holding the shaft bearing cover. These are the screws I referred to above which were loose on the off-door-side motor. The pin holding the motor gear in place is difficult to remove and replace. You must do some serious pounding. I wasn't sure that the gear was worn enough to replace but it is so much work to get to this point I decided to do it. You'll see above that I've done this before and paid $75 for the gear plus shipping. I found a source, listed below, where I got the gear for less than half that price. |
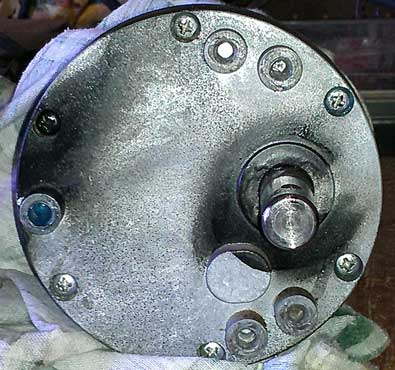
A front view of the motor with the gear removed. You can see I've begun to coat the threads with blue Locktite. I've also cleaned the 1/4" threads with a tap and I have tapped two more of the threads to 5/16". The 5/16" tap was to the one hole Fox stripped and to one of the 1/4" holes at the top of the motor even though it was not stripped. I'm hoping the larger bolts will keep the motor in-place permanently. |
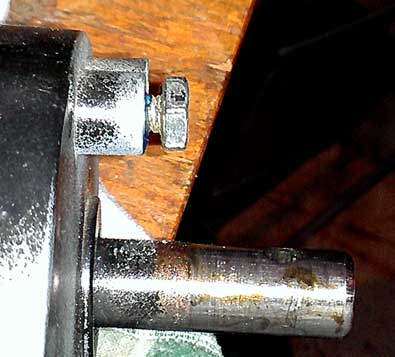
The photo at left shows one of the original 1/4" mounting bolts threaded to the bottom of the motor housing hole. Note it has bottomed out in the hole but still has a considerable gap. The mounting plate is 1/8" thick so without the proper thickness of washers the bolt will bottom out BEFORE tightening to the mounting plate. This is stupidity number THREE. I discovered this back in 2009 when trying to tighten the motor mount the first time.
Compare the new gear below with the worn gear replaced only one year ago in 2011. I'm hoping the gear does not wear this badly if the 5/16" bolts hold the gear in place more securely. While visiting California RV Specialists (CRS) in Lodi looking for a gear replacement, they gave me their source for the gear which turned out to be less than half the price I paid in 2011. I ordered two to have an extra on hand. CRS is the same shop who completed my shackle replacement and they will also be attending the Escapees WARE Rally in April, 2012 as vendors. I find them to be very helpful and knowledgeable and recommend them. Cutting the price in half on this gear is certainly helpful. |
|
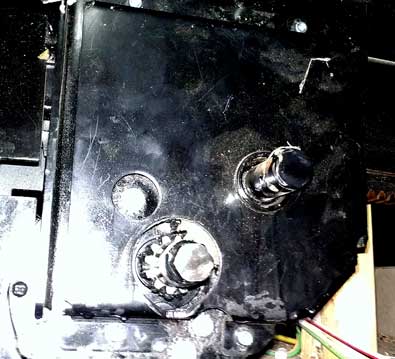
The motor with the new gear is ready for installation. Note the three 5/16" bolts with the two original 1/4" bolts. All have blue Locktite which I hope will help. I'm also using star washers and in some cases more than one due to the mounting bolt bottom-out problem I described above.
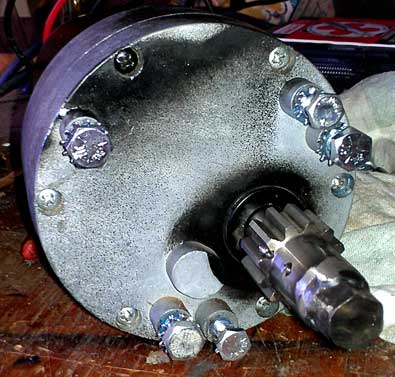
The motor is mounted in the photo to the right. The camera flash flooded out the photo but you can see two mounting bolts to the bottom right and one mounting bolt to the bottom left. Above and to the left of the gear you can see ONE of the two mounting bolts at the top of the motor. So you can access only ONE of the two upper bolts through the access hole of the cover plate without removing the plate. That's stupidity number FOUR.
To replace the insulation, I strung wires at about 1 foot intervals across the opening, suspending the insulation above the wires while I installed the new cover material. It was relatively easy. The metal rails securing the fabric were cut in such a way that I can let the front half of the cover down without disturbing the back half. This gives me access without having to remove the tire or the back half of the cover. Of course, I hope to never have to access these motors again but I'm not really that optimistic. On the other hand, the off-door-side slide motor did not begin slipping until last month. That's nearly five years from when we took delivery. If I don't have to do this again for five years, that's OKay with me. One final note: I posted this for March 6 but I've been working on this project for about three weeks. Yes, you could do it in one day but you would need to have a replacement gear on hand and I had to order mine. |
|
|
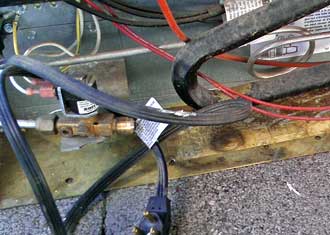
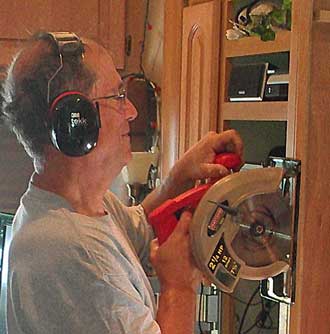
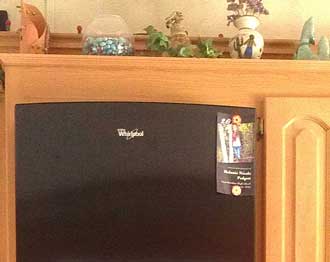
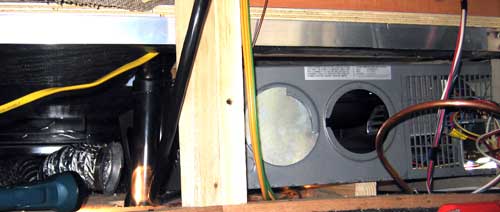
| Thursday, July 11, 2013: After 6.5 years of continuous use, our Norcold 10 cubic foot refrigerator which we paid EXTRA in 2007 ... has died. It quit working three days ago so we ordered a thermistor which was the problem twice before (a $15 part). It arrived yesterday but did not start the refrigerator so we called the repair man. He took one look at the rear of the unit and declared it "dead". He showed me the yellow stain (left photo) and said that was the coolant. The entire refrigeration unit would need to be replaced. "It would be better to replace the unit" he stated. Fortunately, we don't have to replace with an RV refrigerator since we plan to leave the Cameo stationery at the park and travel in our Alumascape. An RV refrigerator would have cost 5 times as much as the Whirlpool we purchased at Sears to replace the Norcold. The Norcold was held in place by only six screws, then with a little effort, it slipped out. The Whirlpool is 3/8" wider than the opening and 1-1/4" taller so I used the circle saw and multisaw to widen the opening. The frame at the top unscrewed so I was able to run the top frame through the table saw to add 1-1/4" to the opening. I capped reconfigured the propane connections behind the refrigerator since the Whirlpool will NOT need propane and saved space. I sealed the vent openings, the Whirlpool does not need fresh air and capped the DC power which had connected to the Norcold. Now, the Whirlpool can be pushed in place and started. Click all photos for more views. This refrigerator feels 25% larger than the Norcold but would still be very small compared to the normal home refrigerator. |
|
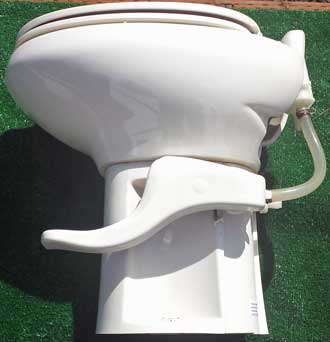
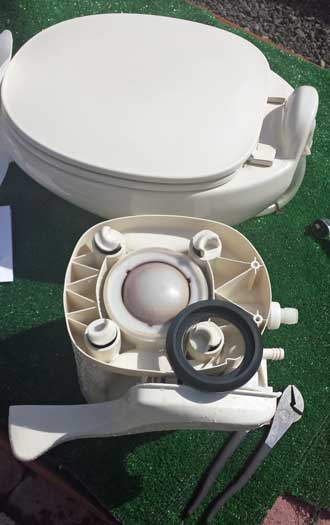
| Thursday, April 2, 2015: The waist ball seal for the Thetford Ceramic toilet has been leaking for a few years and I've been keeping it going by using Vaseline. I'm not sure that was a good idea but it worked for 3 - 4 months at a time before needed another coat. However, it finally stopped working and the waist ball seal needed replacement. It turned out to be an easy job and had I known how easy it was, I would have changed the seal rather than apply vaseline. The parts were $13. Click each photo for additional views. Under the last photo are the instructions. This process took be a couple of hours but the second time would likely be only an hour.. |
| |
| |
|
|
|






 r to the kitchen slide. We returned the Cameo to the point of purchase, Wager's Trailer Sales for the repair. I was somewhat disappointed in the "repair" completed by Wager's Trailer Sales. The kitchen slide did not match the trailer very well and was bending and damaging trim at the top of the slide while barely touching the bottom of the slide to the trailer. We've had two other repair locations look at it and both felt it needed some sophisticated rail adjustments which they couldn't do. Wager's didn't make any sophisticated adjustments. According to the Carriage protocol, they added two additional six inch rubber gaskets to the top of the slide which helped to stop the bending and aided in bringing the bottom of the slide toward the trailer body. So Wager's replaced the rubber gaskets and part of the trim on both sides of the trailer, checked the slide gear teeth, and that's all. The cost was $271. This was something I could easily have done for a fraction of the cost. One of the servicemen referred to the repair as a "bandaid". I believe the Carriage engineers need to redesign the slide mechanics, and this "bandaid" is to keep a bad design working a little while longer. The slide mechanics is one of the weakest parts of the Carriage design. It may be unique to the Cameo but I wouldn't know that without talking with some Carri-lite or Carriage owners. I can't complain about Wager's work, they were following Carrige protocols, just a warning to current and future Cameo owners, you better keep an eye on the slide mechanics.


 r 12, 2011 but I'm just now reporting on it. After a tire blow-out in July, it became apparent that the heavy duty shackle kit was needed. This was after a 5 day visit to Fox RV in Middlebury, Indiana. An RV repair location recommended by MANY Cameo owners. They were asked to check the shackles and make a permanent repair to the door-side slide motor mount. They FAILED with BOTH requests reporting the "shackles are fine" and they failed a month later and the slide problem returned after only a few uses. I'll report more about the slide problem below. Click the photos below for additional views.

