|
Building an RV Deck |
 |
 |
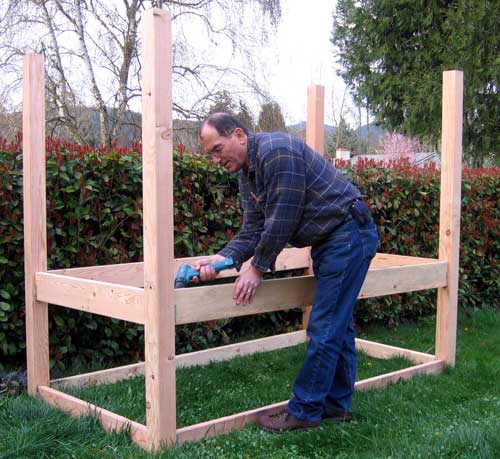
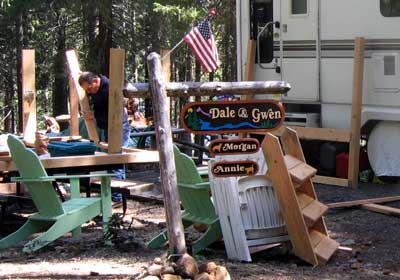
March 31, 2006: One of the lessons we learned last year during our seven month stay in our RV at Howard Prairie Lake Resort was that we wanted some sort of deck off the trailer so we did not have to use the narrow, drop down stairs attached to the trailer. This deck will be just under the door to the trailer so when the door is opened, we walk onto a nice size deck with storage underneath. Today, I began that project. |
 |
|
|
|
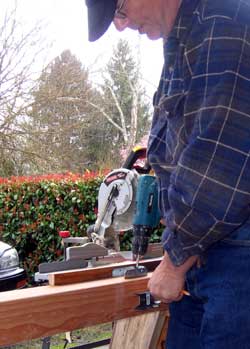
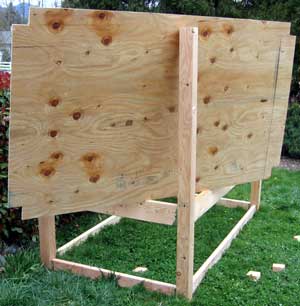
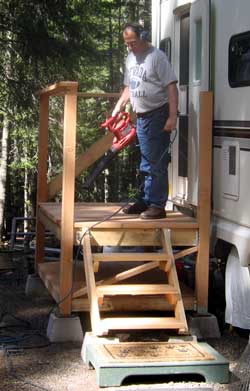
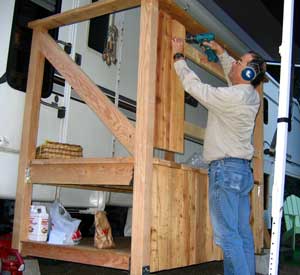
| The four support posts will sit on concrete blocks so I've cut them to a height that will put the deck under the door when sitting on the blocks. Metal hangers are attached in photo number 2 to support the 2 x 6" joists and the 2 x 4" joists for the storage area. I want to be able to transport the deck in pieces to the lake so I'm only assembling with one screw into each board for now. |
 |
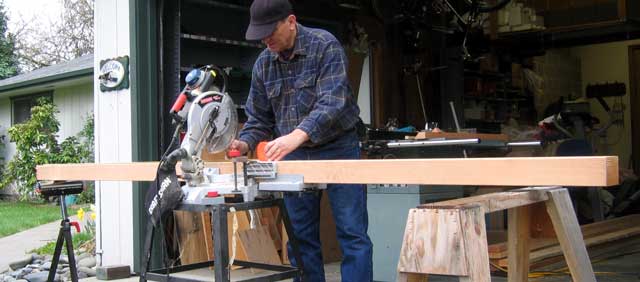
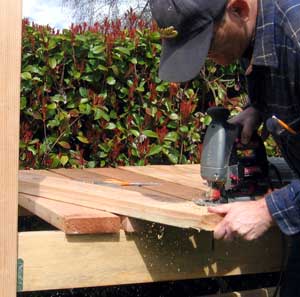
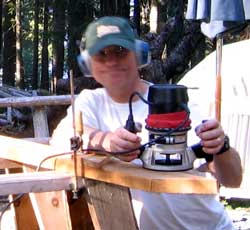
April 1, 2006: I like to router the edge of the deck boards to give them a really finished look. |
|
| |
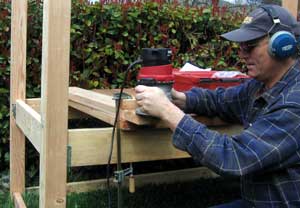
| Each end deck board must be notched to fit against the 4x4. I routered around the notch too. I have used Western Red Cedar for the deck material. |
 |
|
| |
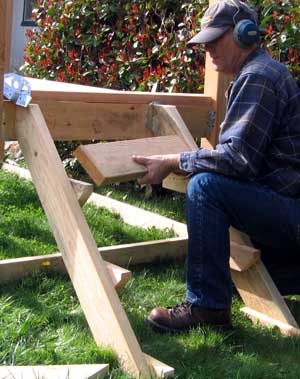 |
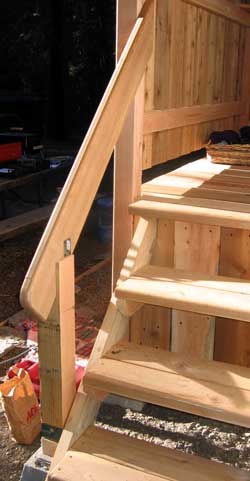
With the deck boards finished and the frame done, the stairs are next. I decided on a simple design made with fir side rails and Western Red Cedar for the stairs. The frame and the stairs are sitting on the ground as I built them but both the frame and stairs will be sitting on concrete building blocks. |
|
 |
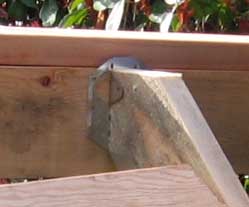
I found a great stair hanger to attach the stair to the deck. When I assemble this at the lake, the top of the hanger will be bent over and the end deck board placed over the top of the hanger. |
 |
 |
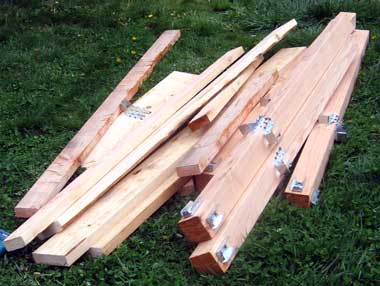
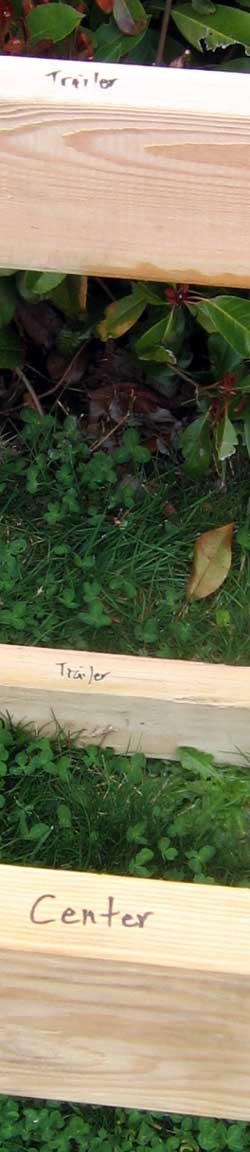
April 2, 2006: Today was a short production day. The plywood floor had to be shortened and notched for the storage area under the deck. I then marked the frame boards for reassembly at the lake resort. I will will transporting to the lake, disassembled. I have not yet purchased the boards for the handrail for the stairway nor for the fence around the deck. I figure I'll do that at the lake. |
|
All the frame pieces are stacked, ready for transport to the lake. I've marked most of the frame pieces at the right for reassembly. I figure I will reassemble this deck toward the end of April. I'm not expecting to get into space 50 when we return to the lake a week from today due to the amount of snow at the lake. We will temporarily park in another, dry site. Two weeks after returning to the lake (Sunday, April 23) we are headed to Chico for an Escapade for a week. This deck will probably be assembled the last weekend in April, assuming we will be able to return to space 50
|
 |
|
 |
 |
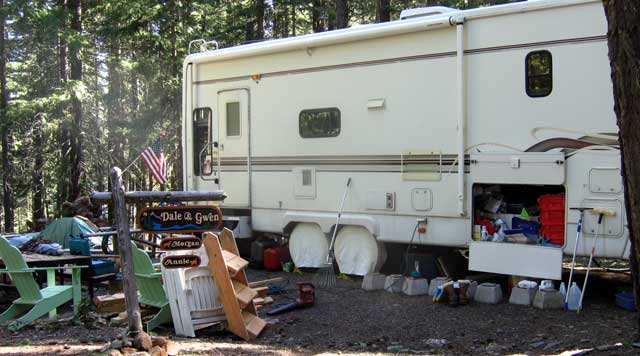
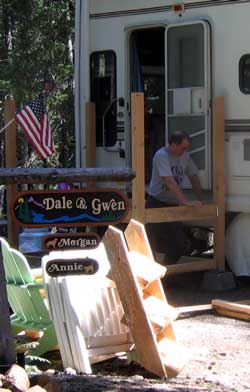
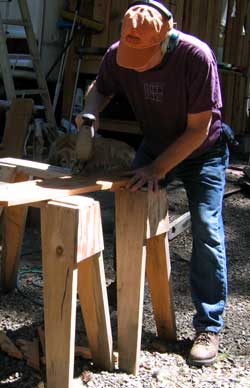
April 30, 2006: The deck assembly takes most of the day. All the lumber and concrete piers are stacked near the door where the deck is to be installed. I begin the assembly with the deck on the picnic table and on its side. |
|
| It is moved to the concrete piers next to the trailer. I was careful to keep the deck far enough from the trailer to be able to pull the trailer out of the site without having to move the deck. Just the bare supports are assemble first. |
 |
|
 |
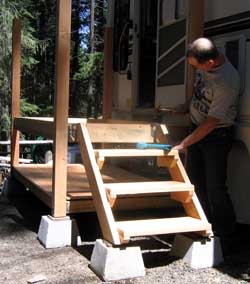
The cross pieces to support the storage plywood floor come next. Everything is assembled using screws so it will come apart easily if the need arises. |
|
| The plywood deck is installed. Next comes the stairs with the special brackets (above). It was about this time that Annie came home with a chipmunk in her mouth. The hatch is open so she jumps into the trailer basement before I could stop her. I immediately ran into the trailer leaving the screen door open. She appearing in our cat door entrance to the basement still with the chipmunk "Don't drop that chipmunk", I thought. She stepped far enough into the kitchen area so I ran her out the door with a broom. |
 |
|
 |
She ran under the car where she let the chipmunk get away. It ran into the engine compartment and stayed there for about two hours making a final run for freedom when the cat's attention was elsewhere. That was a close call, all I need is a chipmunk loose in the trailer.
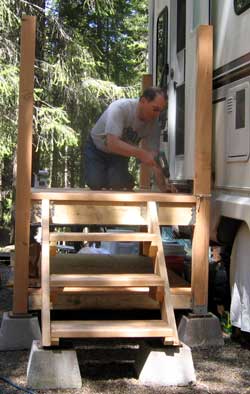
All the cedar deck boards are screwed to the supporting 2 x 6 fir. |
|
| I routered the top rail. Note the diagonal supports under the stairs and on the back side of the upper deck. These two support took all wobble out of the deck. I used the leaf blower to blow all sawdust away from the trailer door. I'm still not finished with this project. I will be buying fence boards for railing around the upper deck and to hide the storage area. This has made the entrance to the trailer far easier and safer. |
 |
|
 |
May 7, 2006: I chose rough cedar fence boards for the deck railing. Of course I screwed them to the supporting 2 x 4 inch fir boards. There are no nails used anywhere in this deck, only screws. I set the fence boards about 1/4" apart (that's pretty close together) because I know they will shrink a bit as they dry. |
|
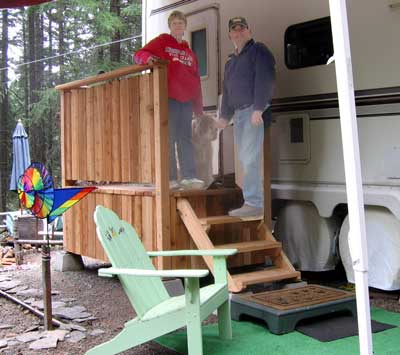
| Morgan and Annie are already using the new stairway and deck. Annie likes to sit on the rail just outside the door. She can see inside the trailer and has a high point of advantage to see what's near the trailer. Most of the deck is covered by the trailer awning. Just the far edge will get wet. |
 |
|
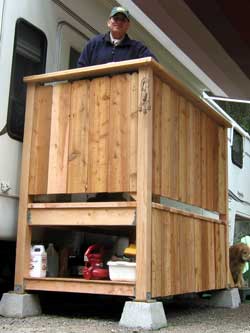 |
I've left the backside of the storage area open to make it easier to store items. You can see why Annie would sit on the top rail next to the window. This is a place she feels safe and she can watch whoever is in the trailer then ask to be let in when she's ready. |
|
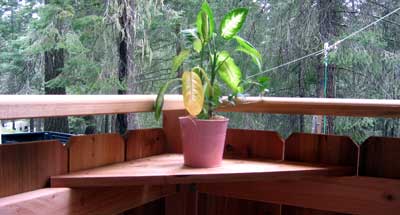
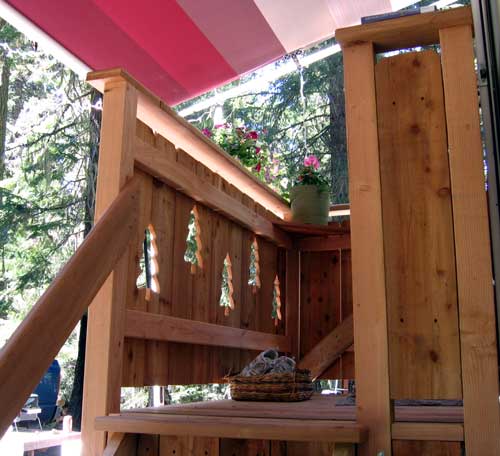
| The inside corner of the rear deck has a nice plant shelf. We don't really have a plant yet, this happens to be one from the inside. |
 |
|
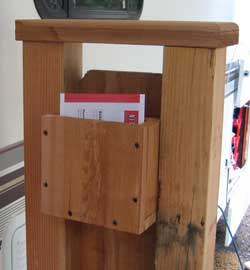 |
The opposite corner has an outgoing mailbox. Since I travel to Medford each day, I must deliver the mail. It was thrown in front of the door but now there will be an official box for all outgoing mail and we don't run the risk of stepping on it. |
|
| May 15, 2006: I couldn't leave this project alone. Gwen felt we did not need a handrail with the stairs because she felt I had already spent too much on this deck ... no more purchases. However, Gwen was also the person requesting the grab bar for the two steps in the trailer. |
 |
|
 |
I decided we needed a handrail because these steps can't be seen in the dark and because I do enough tripping in my old age, I'd like to have the extra safety.
I found enough lumber without making more lumber purchases, however, I did have to buy a couple of brackets and bolts.
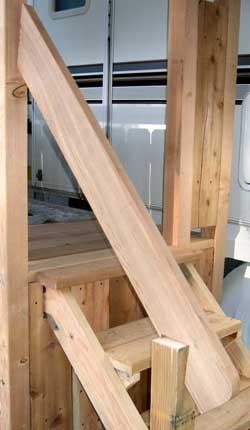
I rounded the end of the rail with my sabre saw. |
|
| Next step was to round the edges of the handrail with my router. Hopefully the router did not disturb Security Bob who lives next door and usually sleeps during the day because he has night duty. |
 |
|
 |
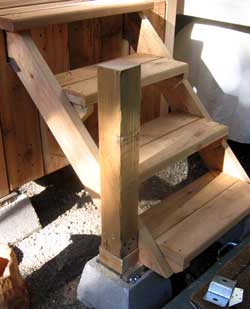
The 4x4 is bolted and screwed to the stairs for a very solid feel. I used two special brackets to connect the 2x6 cedar handrail to the 4x4, then five 3 inch screws to connect the handrail to the upper 4x4 support. This gives the handrail a very solid, sturdy feel, one that can be trusted. |
|
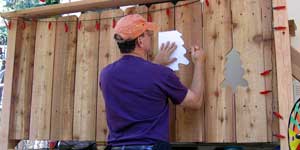
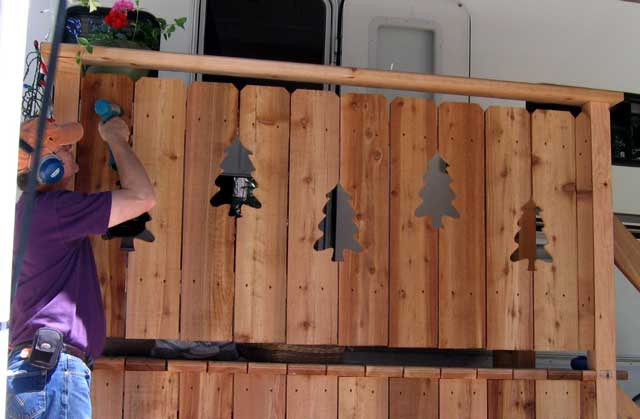
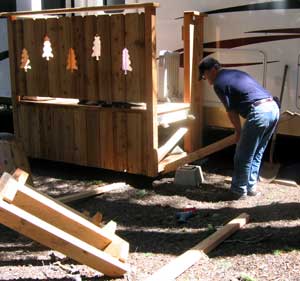
| May 22, 2006: I'm not finished with this deck yet! We are at a resort so it needs to look special to blend with our surrounding. What better than to cut out the outline of trees into the deck boards. |
 |
|
 |
I used a sabre saw to cut out the design. I probably could have done this without removing the board but with only four screws holding each board, it was too easy to remove them for cutting.
Five trees make in perfect for Howard Prairie Resort. If you look closely below you can see the new pot of flowers on the corner shelf and the large hanging basket of flowers above the corner of the deck. The basket on the deck is for shoes, we need some place to throw our shoes before walking into the trailer. |
|
 |
 |
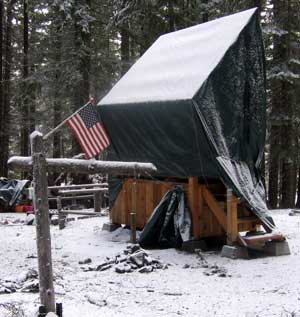
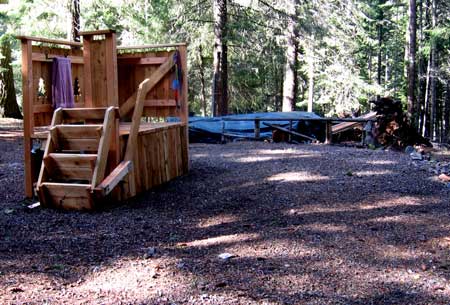
| April 15, 2007: Last fall I prepared our deck for the anticipated 3 feet plus of snow. I built a steep roof frame then covered with a tarp. This must be removed and stored so we can use the deck again this season. |
 |
|
 |
It did not take long to remove the tarp and framework. Everything was installed with screws, so removing all the screws with a cordless drill was quick and easy. |
|
| The deck was built to match the King of the Road fifth wheel but we will be trading the KOTR for the new Carriage Cameo in three days. The deck position and height will not match the new Cameo. Currently the deck sits where the third slide will be on the Cameo so the deck must be move forward. The plan is to move it forward enough to clear the third slide, then match the deck height and position with the Cameo in place. |
 |
|
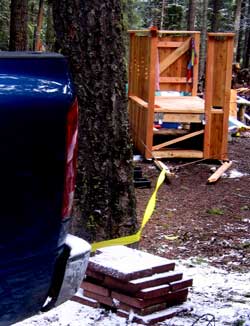 |
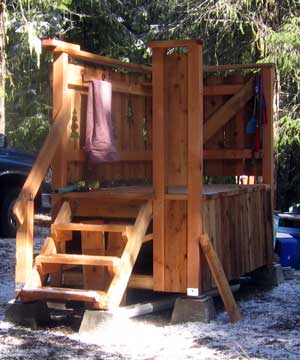
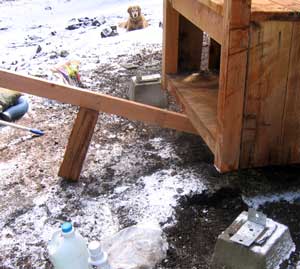
I must first take the deck off the concrete pier blocks, it certainly won't move while attached to these blocks. I raised the deck with a 2 x 4, then removed the blocks from the corner posts. I wrapped a rope around the deck, attached to my tow strap and pulled the deck about 10 feet forward. Hopefully, that's enough. I raked the space to remove all the downed limbs and debris. The space is now ready to receive the new Cameo. We won't be arriving back to Howard Prairie until Friday, April 28. |
|
 |
| April 30, 2007: After fixing the TOP priority of moving the cat utilities to the basement , the second priority is to fix the deck to match the Cameo. It had to be moved about a foot forward which I accomplished using the truck and tow rope as illustrated above. Next, the height must be adjusted by digging the concrete pier blocks under each of the four corners to the right height to match the door and keep the deck level at the same time. I used a pry bar to raise the deck onto the pier blocks and move the deck |
 |
|
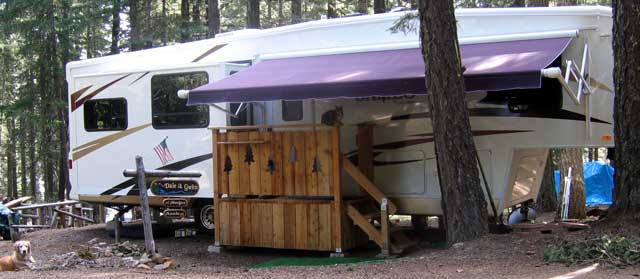
| slightly from side to side. The deck also must be exactly right to not interfere with the operation of the new electric awning. With all the positioning done, I reattached the stairs and hand rail. One disappointment was the interference of the deck with the storage door. Fortunately, this storage compartment can be accessed from the opposite side of the trailer. Morgan and Annie have made themselves at home. Click on the photo below to enlarge. |
 |
| |
 |