 |
August 14, 2007: Today was one of those days where I needed to make another "life decision". Perhaps this is throwing good money after bad. At first we thought we would sell the kayaks but had no good offers. After cleaning and polishing, they looked SO good, we thought we should keep them anyway. |
|
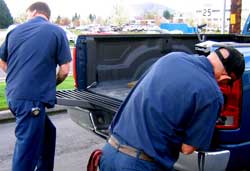
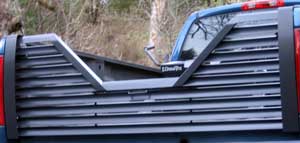
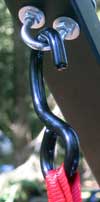
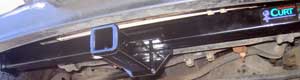
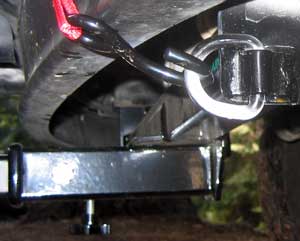
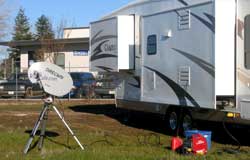
| We still enjoy them but we needed to find a method to transport them while towing the fifth wheel. My kayak is the longest at just over 18 feet. It would require a front mounted 2" receiver to the tow vehicle. So I've gone back to Grants Pass for the front hitch. These are the same folks who installed the fifth wheel hitch, side running boards, and the louvered tailgate above. Mike installed the front hitch, it took him about 1 hour. Mike says it will hold 9,000 lbs but, of course, I don't need that much. He told me this when I asked about front tow loops. He said I no longer need them, use the receiver. You can click the lower photo to see an enlarged view of the front receiver. |
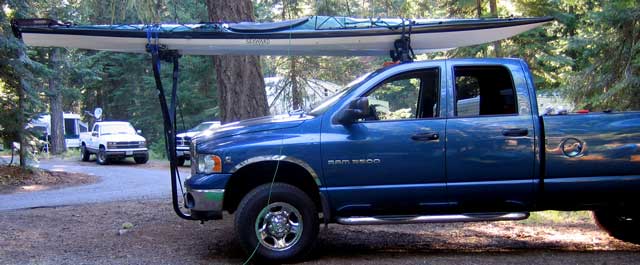 |
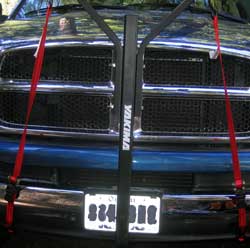
| August 25, 2007: Today was the first day to assemble all the parts to the Yakima Dry Dock Rack. I'm only driving around in the resort to learn of the problems with the rack system and if this will be the answer to transporting the kayaks when towing the fifth wheel. I had hoped to not use the stabilizing straps but soon learned, they are needed to minimize the side to side movement. I've also learned that 48" bars are a few inches too short and I'll need to replace them with longer bars. Once all these problems are fixed, I think this system will work. Since I am a firm believer in Murphy's Law, I'm afraid it will be only a matter of time before I clip a tree or tall truck with the kayaks and break one or both into two pieces. But we'll give it a try. |
 |
|
 |
 |
September 4, 2007: I'm still experimenting with getting the kayak rack correct. I took the kayaks with me to Klamath Falls while delivering the grandkids back to their Mother. The system seems stable enough but not perfect yet. The two stabilizer straps supplied with the front upright are pretty funky and may be OK when installing the rack on |
|
| a rear receiver but I'm not trusting them for a front mount. I'm going to replace them with something else. Also, an emergency stop would put a lot of forward pressure on the front rack with nothing but the boats holding it back. Since the boats taper, I'm afraid the boats will slip out of the rear tie-down and do some damage to the boats, rack and more. I plan to connect the two cross-bars with a strap between the boats. Once all that is done, I believe the kayak rack system will be ready to tow the trailer while hauling the kayaks. The view is looking south from Keno Access road, a single lane paved road between Howard Prairie Lake and Keno, Oregon. Mt. Shasta is in the distance. |
|
|
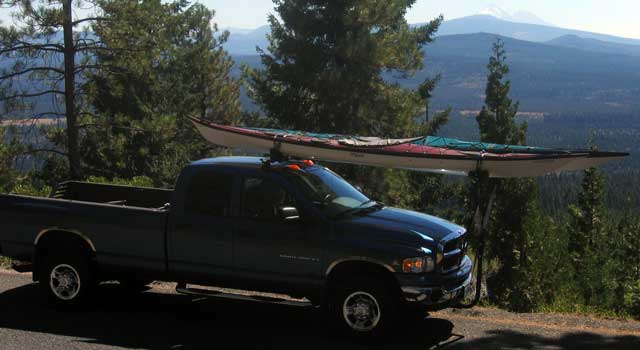
| September 8, 2007: Today I made final adjustments to my kayak rack system. The straps provided by Yakima are pretty funky and are intended to attach to the crossbar. This might work for a rear installation but I don't trust it for a front installation. I drilled the Y upright for a U bolt and each side to attach motorcycle ratchet tie-down straps. This made the rack solid and stable. I also drilled and tapped a hole behind the receiver pin then added a bolt with a knob I purchased at Ace Hardware. This eliminated any forward-aft wobble pivoting on the receiver pin. That's it, the rack is complete. |
|
|
 |
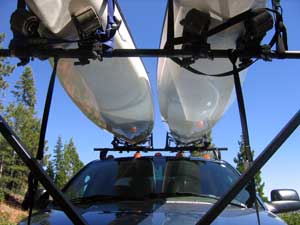
I wanted to easily be able to connect the retaining straps from each side and then disconnect quickly. The loops solve that problem for me.
Note: May, 2009 ... we sold our kayaks but all is not lost. We are considering a scooter and the likely location to carry it will be from this front 2" receiver. It is rated at 9,000 lbs. |
|
| November 27, 2007: I'm continuing to improve the suspension of Big Blue. This time by installing Monotube high pressure gas shocks. These have greatly improved the handling of the Dodge while towing. Now that the new shocks have been installed, I would recommend that you NOT install the Ride-Rite air helper springs. They are not needed because this truck will handle 4,500 lbs of load and my trailer pin weight is only 3,500 lbs. The shocks solved the problem I was trying to solve with the Ride-Rite springs. |
 |
|
 |
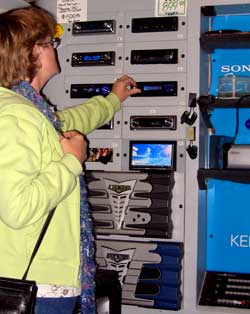
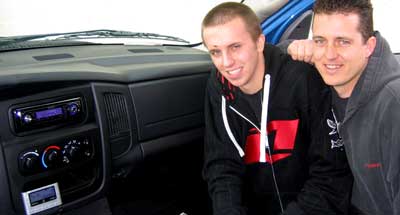
| November 28, 2007: Gwen and I were looking for a method of playing our choice of music in the truck. The stock radio could play CDs, FM and AM. We wanted to play satellite radio and all the tunes we have stored on our MP3 players. We chose to replace the stock radio above with a new Kenwood model which will play satellite and MP3 tunes. Shawn, one of my students from the 1990's works for The Music Shop in Grants Pass so I trust them to suggest and install the radio that will work best for us at the right price. Keaton is pictured below on the left and suggested the Kenwood. Shawn is on the right. He did the professional installation of both the radio and satellite radio wiring including the antenna. |
|
 |
|
 |
 |
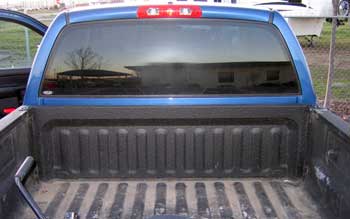
December 5, 2007: It is very difficult to see the jaws of the fifth wheel hitch when the trailer is sitting on the hitch. I painted them neon orange so I can easily see that the jaws are closed and locked around the pin. |
|
 |
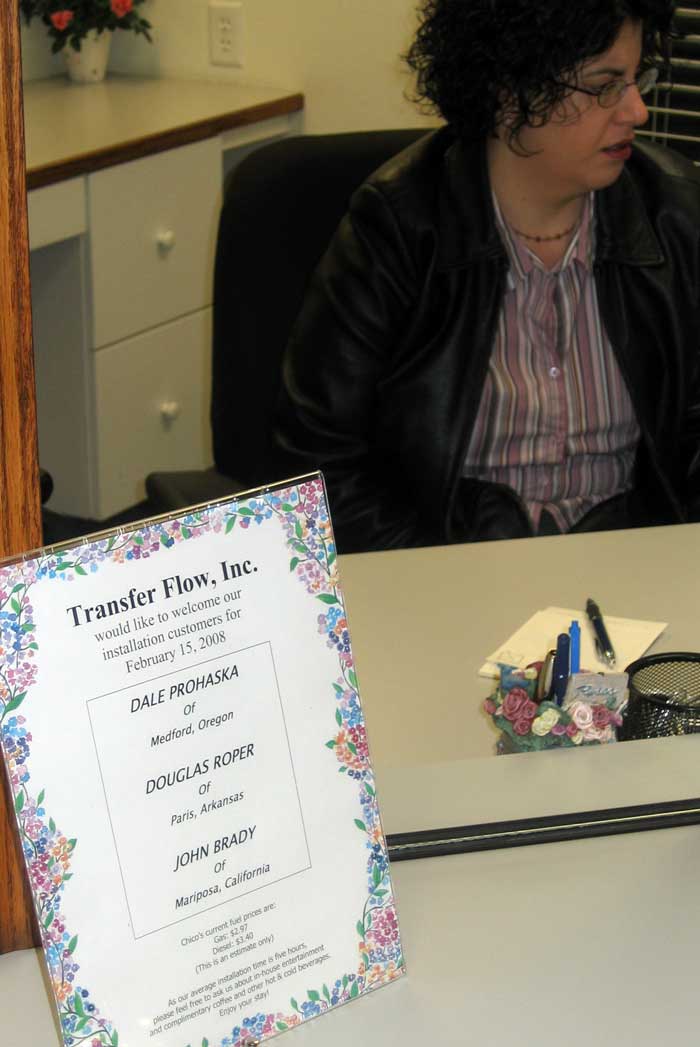
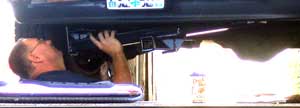
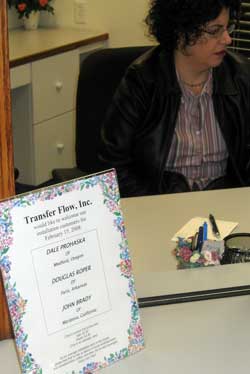
February 15, 2008: We camped last night in a field next to Transfer Flow because our installation time is 7am. Transfer Flow gave us permission to camp here. I am having a toolbox/fuel tank installed. The fuel tank will add another 40 gallons of diesel which will more than double my current range. I |
|
begin looking for fuel when my gauge reads half. When towing, that means only 170 miles. Yesterday, we drove 288 miles from Applegate to Chico, California. My fuel gauge read 1/4 when we arrived. With the new toolbox/tank, I'll have 5.5 cubic feet of locked storage plus 40 gallons of fuel. That means, my fuel gauge will read 1/2 at 375 miles when towing. My range will be 750 miles and twice that when not towing.
This sign was at the reception desk this morning. Rose is the receptionist. Every part of the Transfer Flow reception was very professional. Click this photo to be able to read the sign and click the photo above to enlarge. |
 |
|
 |
It took exactly four hours for the installation so I was signing the American Express bill at 11am. They were having a special on installation today so they gave me $50 in diesel and took $50 off the installation charge. That savings was enough to pay for the fuel it took to get to Chico. Pass your pointer through the photo. |
|
| Tuesday, January 6, 2010: Our Dodge tow vehicle has 66,000 miles on it and the front brake pads need to be replaced. Actually, they should have been replaced about a month ago since the right front rotor had to be replaced. If you hear a squeal like dust is on the rotors, then have your brakes checked. I heard the squeal but since we have been in a dusty area ... well I was expecting something more than a "dusty squeal" to warn me of thin brake pads. I had the pads changed all around because, who knows where I will be when the rear pads need replacing. As for price of the service from Arizona Brake and Wheel in Yuma, the only thing I have to compare it to was the |
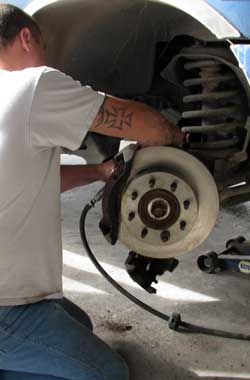 |
| brake job on the Toyota Camry we owned until last summer. This job for one new rotor, one rotor turned and four sets of brake pads was $490. Repair to the brakes on all four wheels of the Camry was considerably MORE expensive. |
|
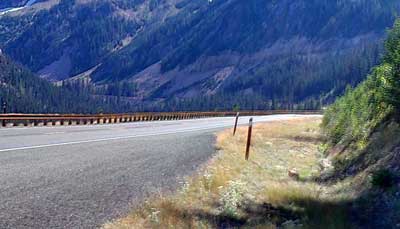
Wednesday, September 5, 2012: While climbing Washington Pass on the North Cascades Highway I noticed my engine temperture acting strangely. As it turned out, my water pump was beginning to leak. Gwen convinced me not to wait for an emergency to happen and get it repaired now before returning to Oregon. I couldn't come up with a good enough reason to wait so we spent extra days in Chimacum, Washington and had it repaired. The repair was completed by Circle and Square in Port Hadlock, Washington. |
|
|
| Sunday, September 14, 2014: In two months we will have owned our Dodge, 3500 for ten years. At this age, the driver's seat fabric has begun to fail so I ordered custom seat covers planning to install this weekend in the cooler conditions (we are camped at 5,000 feet where the temperature is 78 rather than the 95 in Sutherlin). I first repaired the small hole in the driver's seat so it wouldn't expand then I began the seat cover installation. The paper on the seat cover is the instruction sheet. We paid extra to get the "custom" covers made especially for the Dodge Ram, 3500 and I believe the covers look and feel fine. Click the photos for additional views. We learned today that tomorrow is the last day for Broken Arrow campground where we are camped. We'll be "closing" the campground tomorrow when we leave. |
| |
| |
RVeCafe eBooks |
Click for RV Stuff |
Travel Resources |