 |
|
Repair a RV Holding Tank |
 |

|
 |
| September 8, 2006: Do you remember several months ago when I was looking for the source of a musty odor? The odor would seem to disappear with the repairs I made but then reappear. My King of the Road has three holding tanks. Two for gray water and one for black water. One of the gray water tanks is fed only by the kitchen sink. Last week I ran water into the kitchen sink looking to fill the kitchen gray water tank. Instead, water began to run from under the trailer and of course, the musty odor returned worse |
 |
|
| than ever. I decided the tank had to be inspected. |
 |
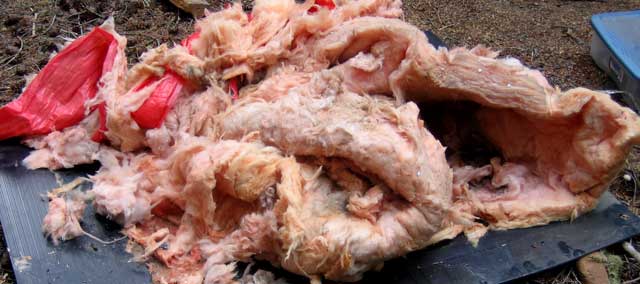
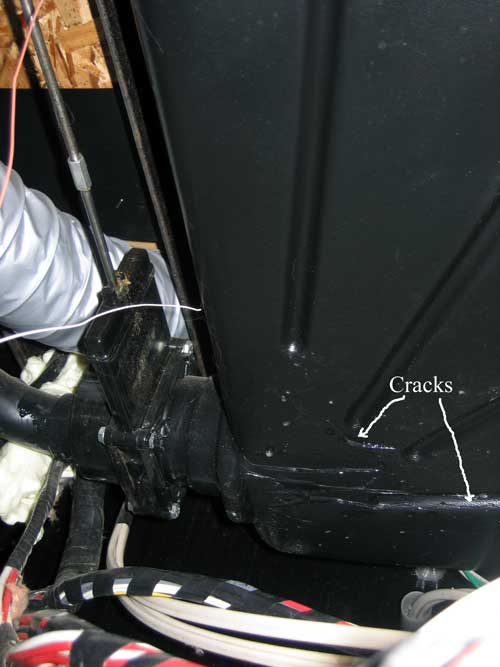
After calling my friend Dave for encouragement and King of the Road for technical assistance, I removed the underbelly to expose the tank and remove wet insulation. (Click here to see the diagrams KOTR sent me.) Cracks were discovered in the bottom of the tank near the valve. At first I saw one crack and thought of the fiberglass patch I was shown at the RV store. Then I discovered a couple of more cracks in the same area. I decided the tank would have to be replaced. I've made a couple of calls and sent emails looking for replacement tanks. It seems it will cost between $200-$300 plus the replacement ABS pipe and probably a new valve. This morning, Gwen has talked with Claudia, another staff person at Howard Prairie. Her tank was fixed with "gas tank epoxy". So I've done an Internet search and found several different "magic potion" fixes for tanks. Some are made for marine use and can be applied under water. I'm going to have to give this a try hoping for a miracle fix since I dread the amount of work it will take to remove and replace this tank. Fortunately, it is not the black water tank but still the biggest challenge yet to do my own repair work on this fifth wheel. |
|
This morning I noticed a definite cold draft due to the missing insulation. I did replace the underbelly hoping this would stop the draft but it didn't help much. This makes me grateful for the insulation and the need to replace it as soon as I can. Stay Tuned.
|
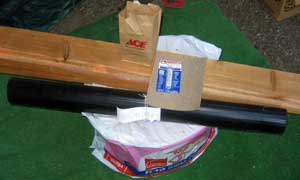
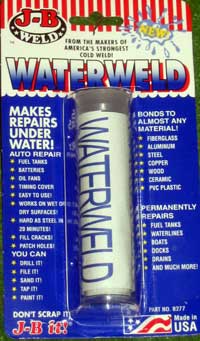
| September 12, 2006: I've purchased most of the items I need for the repair. Insulation, new under belly plastic for patching material, sandpaper to buff the tank and WaterWeld, the "magic potion" to repair the cracks. I've also purchased cedar fence boards to replace the particle boards used to support the underbelly. |
 |
|
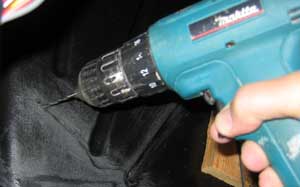 |
September 13, 2006: The first step in making the repair is to drill a small hole at the end of each crack. This is to relieve the pressure the crack makes on the tank and hopefully stop the spread of the crack. I next used 50 grit sandpaper to buff the surface of the tank for better adhesion of the epoxy. This job is taking several days because I have only about an hour of light each day. A flashlight helps but I'm not in any hurry and don't like working in the dark. |
|
September 14, 2006: The tank has been sanded and the holes at the end of each crack have been drilled. It's time to try the magic potion. WaterWeld is a putty epoxy. You cut off a portion of the stick then knead the two layers together until you have only one color of putty. In about two minutes the putty becomes sticky and begins to harden. It stayed pliable long enough for me to press the putty into the tiny holes I drilled and over the cracks. The instructions says the putty requires only a few minutes to harden but about six hours to cure. I was pessimistic but found that the putty stuck to the tank pretty well. I decided to apply the putty to only two of the cracks during the first application because pressing the putty into adjacent
|
 |
|
 |
cracks will cause the tank to flex and may break the bonding action of the putty previously applied. I'll do the rest of the cracks another day. Tomorrow will be a travel day to California for a wedding ... returning Sunday so I'll be able to test the tank late Sunday if I get back in time. |
|
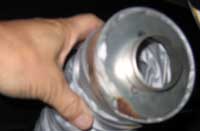
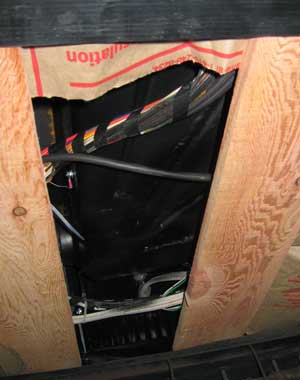
| September 26, 2006: When trailer manufacturers advertise "heated holding tanks", this is what the mean. This is the end of a vent hose located in the holding tank compartment under the floor of the trailer. Note how the air flow is reduced. Also note, if you are not heating with your furnace, the holding tanks are NOT heated. We are often heating with our electric radiator style heater and I know many boondockers use propane catalytic heaters. In both cases, the holding tanks would not be heated. Problem is, using the furnace uses up battery power quickly ... guess you'll have to power up the generator to recharge the batteries when heating with the furnace. |
 |
|
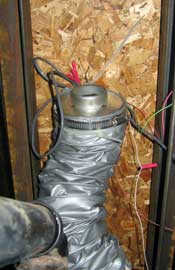 |
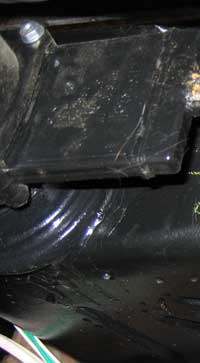
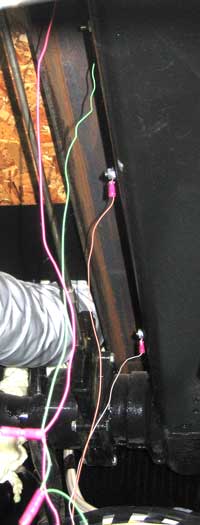
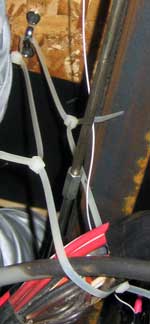
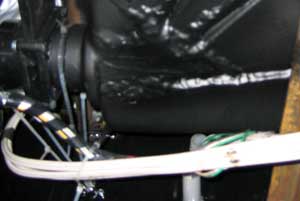
The furnace vent hose was laid in the holding tank compartment during manufacturing. The trailer was built from the bottom up. Since I'm working from the bottom, I've zip tied the vent hose to the bottom of the floor to hold it out of my way. I've done the same with the many wires that are dangling in my way. Note I've had to combine three zip ties to make one long enough. The metal loop I've used to connect the zip tie was call a "rope loop" in the Ace Hardware store where I purchased it. The valve rod passes through the zip tie. |
 |
|
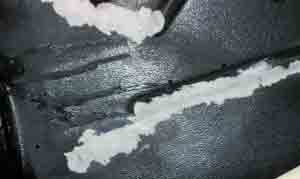
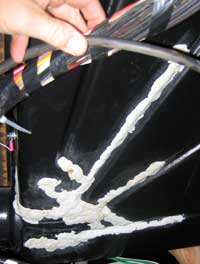
| October 15, 2006: This is what the tank looks like with the waterweld applied to the tank. You can see the number of cracks are extensive. The waterweld is interesting material and could work for many applications but if I had to do it over again I would not have used it. The water still did some seeping under the weld material and droplets would appear. Obviously, with this many cracks the tank should be replaced and I very well may do that next year if the problem appears again. I have another crack solution which I will discuss after the Rescue 911 Instant Leak Sealer below. |
 |
|
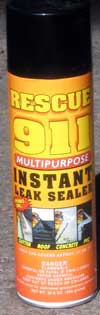 |
I discovered Rescue 911 Instant Leak Sealer. Like the Waterweld, it has it's place. It is essentially liquid spray rubber and is available in several colors. I chose black and sprayed several layers to the bottom of the tank to try to stop the seeping from the Waterweld.
As it turns out, I had the perfect repair material already on-hand, I just didn't think of it until the last repair attempt. |
 |
|
 |
The material I'm speaking of is Eternabond roof top tape. I've used it to completely reseal around all roof vents so had some on-hand. I should have used this to begin with, it would have been the perfect-permanent solution. I did use it on one wet spot after all my Waterweld and 911 Rescue repairs. I've used it to completely reseal around all roof vents so had some on-hand. I should have used this to begin with, it would have been the perfect-permanent solution. I did use it on one wet spot after all my Waterweld and 911 Rescue repairs. |
|
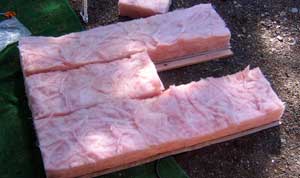
| I have rebuilt the bottom support for the insulation and underlayment. I used the cedar fencing boards I bought earlier which sit on the frame. The insulation is stapled to the cedar then placed onto the frame. I've left an access opening so I can view the holding tank. This opening will be filled with a separate piece of insulation. The plastic underlayment is then slipped between the frame and cedar then screwed to the cedar. This is far better and more secure than the original and added very little extra weight. The final test of filling the holding tank before sealing showed not leaks but I plan to be careful to use this holding tank only when truely needed. |
 |
For a replacement tank, I've learned that my tank is a model HT2556SL8 and can be purchased from:
Lea J Alan Enterprises
101 S Evans St
Newton, KS 67114
316-283-3019 (ask for Dave)
The price is only about $53 plus shipping. This is far cheaper than even ordering directly from the manufacturer of the tank. |
|
|
|
|