Click to Return to RVeCafe Homepage

Fifth Wheel Bedroom Lamps

Replace the RV Bedroom Lamps Project

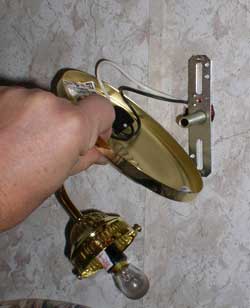
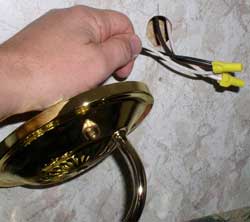
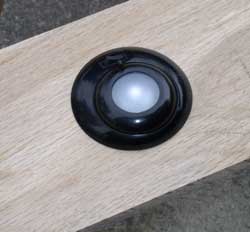
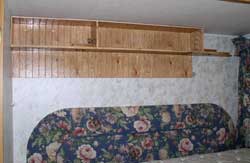
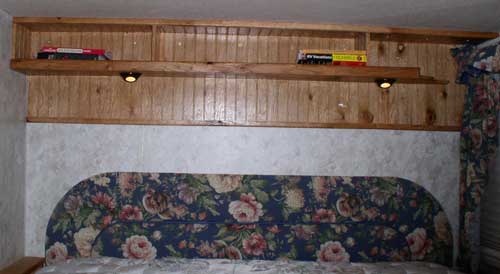
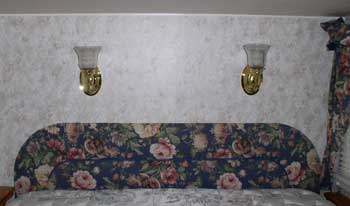
Do these lamps look like the lamps in your RV bedroom? They are actually pretty nice lamps but very bright, hot and in the way when you want to sit in bed and read a book. My wife and I hated them. One weekend while touring a RV show we walked through a Teton Homes fifth wheel and came up with the idea for the project you see here. After all ... anything we can do to make our "King of the Road" fifth wheel look and feel more like a Teton, the better!

Removing the old RV  lamps I began by removing the old lamps. The 12 volt wires simple come through a hole drilled in the pressed board wall.
Click to see What's New at RVeCafe Only one of the black wires is hot. The second black wire is for the second lamp. I ended up not using the second wire and chose to route the power to the second lamp in a molding at the back of the shelf. One black wire is hot
  12 Volt recreational vehilcle replacement reading lamp I purchased these replacement 12 volt RV reading lamps at CampingWorld.com where you can get a 10% discount if your are a member of the Presidential club and shipping is only $1 if your order totals $75.
  I'm testing the lamps to be sure they work before installing. They are 100% good. I'm testing the lamps to be sure they work before installing
  Preparing to mount the lamp in the shelf I'm making the shelf from the only piece of 1/2" Oak found in all of southern Oregon (at least it seemed that way when I went looking). A compass is used to draw the hole for mounting the new reading lamp.
  A hole for the sabre saw blade is drilled into the shelf. Drill a hole for the sabre saw blade
  A sabre saw is used to cut a lamp hole in the shelf I used a sabre saw to cut the RV reading lamp hole in the Oak shelf.
  The lamp fits. The lamp fits
  The RV reading lamp mounted. The RV reading lamp mounted to the shelf.
  The right side of the shelf must be shaped because there is a window on the right side of the bedroom slide. The left side of the shelf will mount to the left wall of the slide. There is no window on the left. The right of the shelf must be shaped
  The right shelf edge is shaped using a router The right edge of the shelf must be shaped using a router.
  The shelf will have two dividers. A low box must also be built to protect the top of the lamp and wires. Dividers are added.
  Molding is used to hide wires I created an "L" shaped molding to hide the wire going to the second lamp. I chose not to use the wire in the wall because I wanted the second lamp in a different location than the original.
  The molding is glued and clamped in place. Molding is glued and clamped
  Front view of shelf unit
  The front view of the shelf unit (above) and with the back board. The backboard is oak plywood. You can just make out the wires from one of the lamps on the right shelf. Shelf unit is taking shape
  Nearly completely mounted The shelf has been urathaned and mounted to the wall using brass wallboard screws. The right side of the backboard is the last to be added.
The finished RV bedroom shelf with reading lamps
  The finished shelf shows the two reading lamps mounted in the shelf. The lamps with swivel to point toward a book. The shelf and edges of the unit have Oak molding to complete the finished look. The front molding on the shelf is about 1 inch above the shelf to help keep items from sliding off the shelf.
Return to RVeCafe Entree Copyright, 2004 by RVeCafe.com