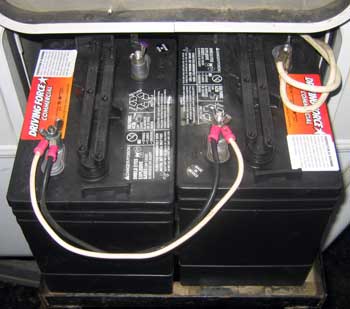
| January 13, 2007: If you note above, I mentioned the lower voltage I was seeing with the 6 volt batteries compared to the 12 volt batteries I replaced. Aaron, one of the RVeCafe readers also noticed this and sent me an email to offer advice with my connection. I'm glad he did because I'm now seeing 13.8 volts and from his email, my new connection is likely |
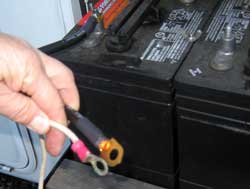 |
| much safer than what I did the first time. I've copied Aaron's email below. I didn't want to fool with the solder connection Aaron mentioned because I don't have the equipment or solder, instead I decided on "over-kill" and installed a #1 gauge wire to connect the two batteries. I suspect the resistance is now zero. |
|
| Here is Aaron's email:
In your text, you mentioned that your voltage reads lower with the 6V batteries. There was not any update after you had charged the batteries so I thought I'd send you an e-mail.
If you series the batteries, all the current for your entire coach has to travel through those two 10 gua. wires and then the crimp at the end. When we installed anything in cars, the smallest wire I would think about hooking to charge a battery was 4 gua. A 4 gua wire can carry 80-100 amps safely over short distances when it has a high strand count (800-1300). After that, there is a voltage loss directly related to the length of the wire due to resistance, quality of wire, etc. Most automotive battery wire is the low strand cheap stuff that doesn't flex very easily. Also, a smaller guage wire becomes the fusable link in your system instead of the fuse box! Any time we installed a second battery in a vehicle, 4 gua was acceptable for runs up to 14 feet or so, but after that we had to jump to 2 gua. wire. When a normal battery is charged in your car/truck it can draw a load of up to 80 amps while charging. I am assuming your converter is not much larger than 50 amps so not as much of a concern.
My thoughts are, you are probably losing voltage due to the resistance of the wire and the crimp connections. I suggest 4 gua wire soldered onto the connecting ends. This can quickly be done with a propane torch and some $5 solder. Hammer the connection to crimp it, then heat the connector and not the wire. The solder will"seep" into the wire after the wire heats to the correct temperature. I am not sure how much experience you have with soldering, so I might be going overboard here. Be sure to use plenty of resin as it aids in the process and will reduce the wire insulation melting. A crimped connection may only have the contact surface area equivalent to a single 10 or 12 gua wire! All the power your trailer needs will be traveling through that single point. Many people are not aware how much these simple factors affect their battery performance for both charging and use. Heat buildup is common and could be dangerous during peak demand times. By the time you smell burning plastic it could be too late.
A normal 12V battery has (6) 2.11V cells for a resting voltage of 12.88 volts. I am not familiar with all 6V batteries, but the way batteries generally work and electricity is stored and distributed, each will have (3) 2.11V cells. The resting voltage should be the same, but it is common for a 12V battery to show a "surface" charge higher than that. Also, (2) 12V batteries will always pull off each other back and forth until the voltage is the same.(Even batteries rolled off the assembly line right after each other have this problem) I never recommend anyone add a second battery unless they buy the pair and install tgether due to this. It quickly diminishes the battery life. That is another advantage of (2) 6V batteries, they are working together instead of always "fighting" each other. |